2013 was another exciting year for us in the kitchen. We continued our exploration of cooking techniques, new and old, with delicious results. Here are our ten favorite posts from the last year:
Ballotine of Pheasant
This was the first of many pheasant cooking techniques and our first (and so far only) foray into modernist cooking. We introduced meat glue into the classic ballotine meat binding process with passable results.
How to Debone a Whole Chicken
We demonstrate the deboning technique depicted in Larousse Gastronomique using the tools from our home kitchen, proving that with a little practice the hobbyist cook can master Olde World cooking skills.
Traditional Bouillabaisse
Every year we post a variation on my favorite seafood dish. In 2013, we went old school and replicated the process advocated by Larousse Gastronomique.
Limas and Ham
We delved more deeply into traditional Americana cooking last year, including this superior take on good old pork and beans.
A Primer on Fiddlehead Ferns
After seeing these tender little shoots appear at our local Wegmans for several springs, 2013 was the year we took the plunge. The result was one of my favorite meals of the year.
Filleting Fish and Prepping Fava Beans
This two-for-one post shows how to fillet a fish in your own kitchen, as well as how simple it is to prepare the tender, buttery fava beans.
Ultimate Pancakes
2013 was the year we perfected pancakes. The secret - cultured dairy. While buttermilk is a favorite, we used labne for a more delicate flavor.
All About the Gravy
Just in time for Thanksgiving, my counterpart shares his best gravy secrets.
Weekday Coq au Vin
We employed the slow cooker to achieve this classic French dish on a Thursday night, made entirely from ingredients found in most home kitchens.
Boeuf Bourguignon
We wrapped up the year with another French classic that was a big hit at the holiday potluck.
And, our year in review wouldn't be complete without a shout out to last year's birthday gift to ourselves - the VacMaster VP112 chamber vacuum sealer for the home. This one tool has reduced food spoilage and waste in our kitchen, allowing us to preserve cheeses, sauces, and leftovers for future use.
Showing posts with label recipe. Show all posts
Wednesday, January 1, 2014
Sunday, December 15, 2013
Holiday Baking: Butterscotch Brownies
The one no-fail, sure-fire, knock-it-out-of-the-ballpark cookie recipe I include in my cookie basket every year is my mother's butterscotch brownie recipe. I grew up eating these - not just during the holidays, but all year round. Friends, neighbors, and co-workers alike snarf these down with child-like abandon, and I know I would hear about it if I stopped including them.
My mother's recipe comes from The Boston School of Cooking cookbook by Fannie Farmer. A single batch makes a small 8x8 square pan of brownies - hardly enough to get through the season. This year, I made two triple-batches. Here's the triple-batch recipe.
1 cup butter - this is two full sticks
3 cups brown sugar, packed
3 eggs
3/4 teaspoon salt
2 1/4 cups flour
3 tsp baking powder
1 1/2 teaspoons vanilla
Melt the butter the butter on the stovetop over low heat, making sure it doesn't get too hot. Mix the remaining ingredients together in a large bowl. When the butter has just about melted, remove it from the heat and let it cool for a few minutes. Then add it to the remaining ingredients, folding everything together with a large spatula or wooden spoon. Even though I have the Kitchen Aid Pro, I still prefer to mix these by hand. I've tried getting modern and fancy with this recipe and it hasn't worked for me, although my mom adds chocolate chips and walnuts to this recipe these days.
One the batter is well,mixed, spread it into a buttered 9x13 pan. Bake for about 25 minutes at 350 and use a toothpick to check the doneness. Cool on a wire rack.
And that's it.
My mother's recipe comes from The Boston School of Cooking cookbook by Fannie Farmer. A single batch makes a small 8x8 square pan of brownies - hardly enough to get through the season. This year, I made two triple-batches. Here's the triple-batch recipe.
1 cup butter - this is two full sticks
3 cups brown sugar, packed
3 eggs
3/4 teaspoon salt
2 1/4 cups flour
3 tsp baking powder
1 1/2 teaspoons vanilla
Melt the butter the butter on the stovetop over low heat, making sure it doesn't get too hot. Mix the remaining ingredients together in a large bowl. When the butter has just about melted, remove it from the heat and let it cool for a few minutes. Then add it to the remaining ingredients, folding everything together with a large spatula or wooden spoon. Even though I have the Kitchen Aid Pro, I still prefer to mix these by hand. I've tried getting modern and fancy with this recipe and it hasn't worked for me, although my mom adds chocolate chips and walnuts to this recipe these days.
One the batter is well,mixed, spread it into a buttered 9x13 pan. Bake for about 25 minutes at 350 and use a toothpick to check the doneness. Cool on a wire rack.
And that's it.
Sunday, November 17, 2013
All About the Gravy
Thanksgiving is about 10 days away, so it's time to get serious about cooking again. The nice thing about Thanksgiving is that it is really all about the meal - that opulent turkey dinner that most of us only muster this one day of the year. And because that turkey is really the cornerstone of the day, you want to bring your A game.
To help prepare for this major cooking event, today's posting is all about the gravy.
But first, an important note about the turkey, because the wrong bird will stop you dead in your tracks. I bring this up because over the last few years I've seen an increase in turkeys that come with a sad little packet of pre-made gravy instead of the traditional packet of neck and giblets. Read the packaging carefully and make sure you pick up a bird with the giblets. Pull them out of the carcass, and trim the ends off the wings, and set them all aside for a moment.
Here's also a nice trick for roasting that will keep the bird moist and flavorful. Turkeys are pretty lean and are prone to drying out in the cooking process. While a free range bird is less likely to dry out than conventional birds, many of us keep it from drying out by adding fat like butter. Put the butter away and try this: Mix dried rubbed sage and salt into a couple of tablespoons of duck fat and rub that on the exterior of your turkey. Duck fat is easy enough to come by. Sometime between now and Thanksgiving, pick up a duck and treat yourself to a duck dinner. Drain off the fat and save it until Thanksgiving.
Once the turkey is in the oven, go back to those giblets. Now, most of us just cover them with water and leave them on the back burner to stock all afternoon. The key to a really flavorful giblet gravy is to brown them first - neck and all - in about a tablespoon of butter with some more sage and maybe a bit of oregano.
A bit if veg will also boost up the flavor. You'll want to add some carrot, leek, onion, and celery hearts as if you were preparing a mirepoix. Let the veg cook until softened. Then add a couple of cups of water to the pot and throw in about half a bullion cube. Now you can set it aside to simmer while the turkey roasts.
When the turkey is cooked through, you'll want to let it rest for a moment. While it is resting, go ahead and cut off some of those nice fatty bits near the butt. And, if you really want all those juices, pull the stuffing and turn the bird on its end to let everything drip down into the roasting pan.
With giblets, stock, pan drippings, and some nice fatty meat, you are now ready to make your gravy. You will also need flour, butter, olive oil, heavy cream, and some variety of flavoring like Worcestershire sauce. We use a bit of sriracha sauce and some Pik-a-Peppa.
Start with a simple roux. In a heavy pan, melt down 3 tablespoons butter and 1/2 tablespoon olive oil. Add to that about 4 tablespoons flour and mix with a spatula until the flour has blended with the fats and has cooked off. This is important because cooked flour makes sauce but raw flour only makes paste. Mind the heat so that you don't end up at the other extreme with scorched flour as this is not appropriate for this application.
Add your flavoring to the roux along with some heavy cream.
Use a spatula to scrape everything off the sides and bottom of the pan and carefully pour it into your gravy. Then, take those giblets off the back burner and strain the stock into the roasting pan to deglace the remaining sucs and add this to the gravy, keeping the heat fairly low.
Now, before you add the giblets, you'll want to get out the immersion blender to smooth out the roux. If you have a uniform texture to your gravy before you add the meat, your gravy will be much more like a sauce. Which is actually what it is.
You'll now want to mince the giblets and that fatty turkey butt meat and add them to the pot. And, finally, you'll take on the neck. This will need to be done by hand to ensure you get the maximum amount of meat without also getting any of the bone. And it's worth it. This is some tender flavorful meat. Carefully pick as much as you can from the neck and mince it up before adding it to the gravy.
Give everything a good stir. If it is not as thick as you'd like, get out the potato starch.You can find this at Asian markets, as well as at some kosher grocers. Mix a little with some water before adding to your gravy; then give it a couple of minutes to thicken up.
And, that is the perfect Thanksgiving gravy.
To help prepare for this major cooking event, today's posting is all about the gravy.
| Perfect giblet gravy |
But first, an important note about the turkey, because the wrong bird will stop you dead in your tracks. I bring this up because over the last few years I've seen an increase in turkeys that come with a sad little packet of pre-made gravy instead of the traditional packet of neck and giblets. Read the packaging carefully and make sure you pick up a bird with the giblets. Pull them out of the carcass, and trim the ends off the wings, and set them all aside for a moment.
Here's also a nice trick for roasting that will keep the bird moist and flavorful. Turkeys are pretty lean and are prone to drying out in the cooking process. While a free range bird is less likely to dry out than conventional birds, many of us keep it from drying out by adding fat like butter. Put the butter away and try this: Mix dried rubbed sage and salt into a couple of tablespoons of duck fat and rub that on the exterior of your turkey. Duck fat is easy enough to come by. Sometime between now and Thanksgiving, pick up a duck and treat yourself to a duck dinner. Drain off the fat and save it until Thanksgiving.
| Neck, giblets, wing tips, and butter |
| Mirepoix |
A bit if veg will also boost up the flavor. You'll want to add some carrot, leek, onion, and celery hearts as if you were preparing a mirepoix. Let the veg cook until softened. Then add a couple of cups of water to the pot and throw in about half a bullion cube. Now you can set it aside to simmer while the turkey roasts.
| Giblet stock |
When the turkey is cooked through, you'll want to let it rest for a moment. While it is resting, go ahead and cut off some of those nice fatty bits near the butt. And, if you really want all those juices, pull the stuffing and turn the bird on its end to let everything drip down into the roasting pan.
| Letting gravity do its thing |
With giblets, stock, pan drippings, and some nice fatty meat, you are now ready to make your gravy. You will also need flour, butter, olive oil, heavy cream, and some variety of flavoring like Worcestershire sauce. We use a bit of sriracha sauce and some Pik-a-Peppa.
| A little extra flavor |
Start with a simple roux. In a heavy pan, melt down 3 tablespoons butter and 1/2 tablespoon olive oil. Add to that about 4 tablespoons flour and mix with a spatula until the flour has blended with the fats and has cooked off. This is important because cooked flour makes sauce but raw flour only makes paste. Mind the heat so that you don't end up at the other extreme with scorched flour as this is not appropriate for this application.
| Cooked flour makes a sauce |
Add your flavoring to the roux along with some heavy cream.
Then, remove your turkey from the roasting pan and place it on a platter because it's time to add the drippings.
| Pan drippings |
Use a spatula to scrape everything off the sides and bottom of the pan and carefully pour it into your gravy. Then, take those giblets off the back burner and strain the stock into the roasting pan to deglace the remaining sucs and add this to the gravy, keeping the heat fairly low.
| Making use of the giblet stock |
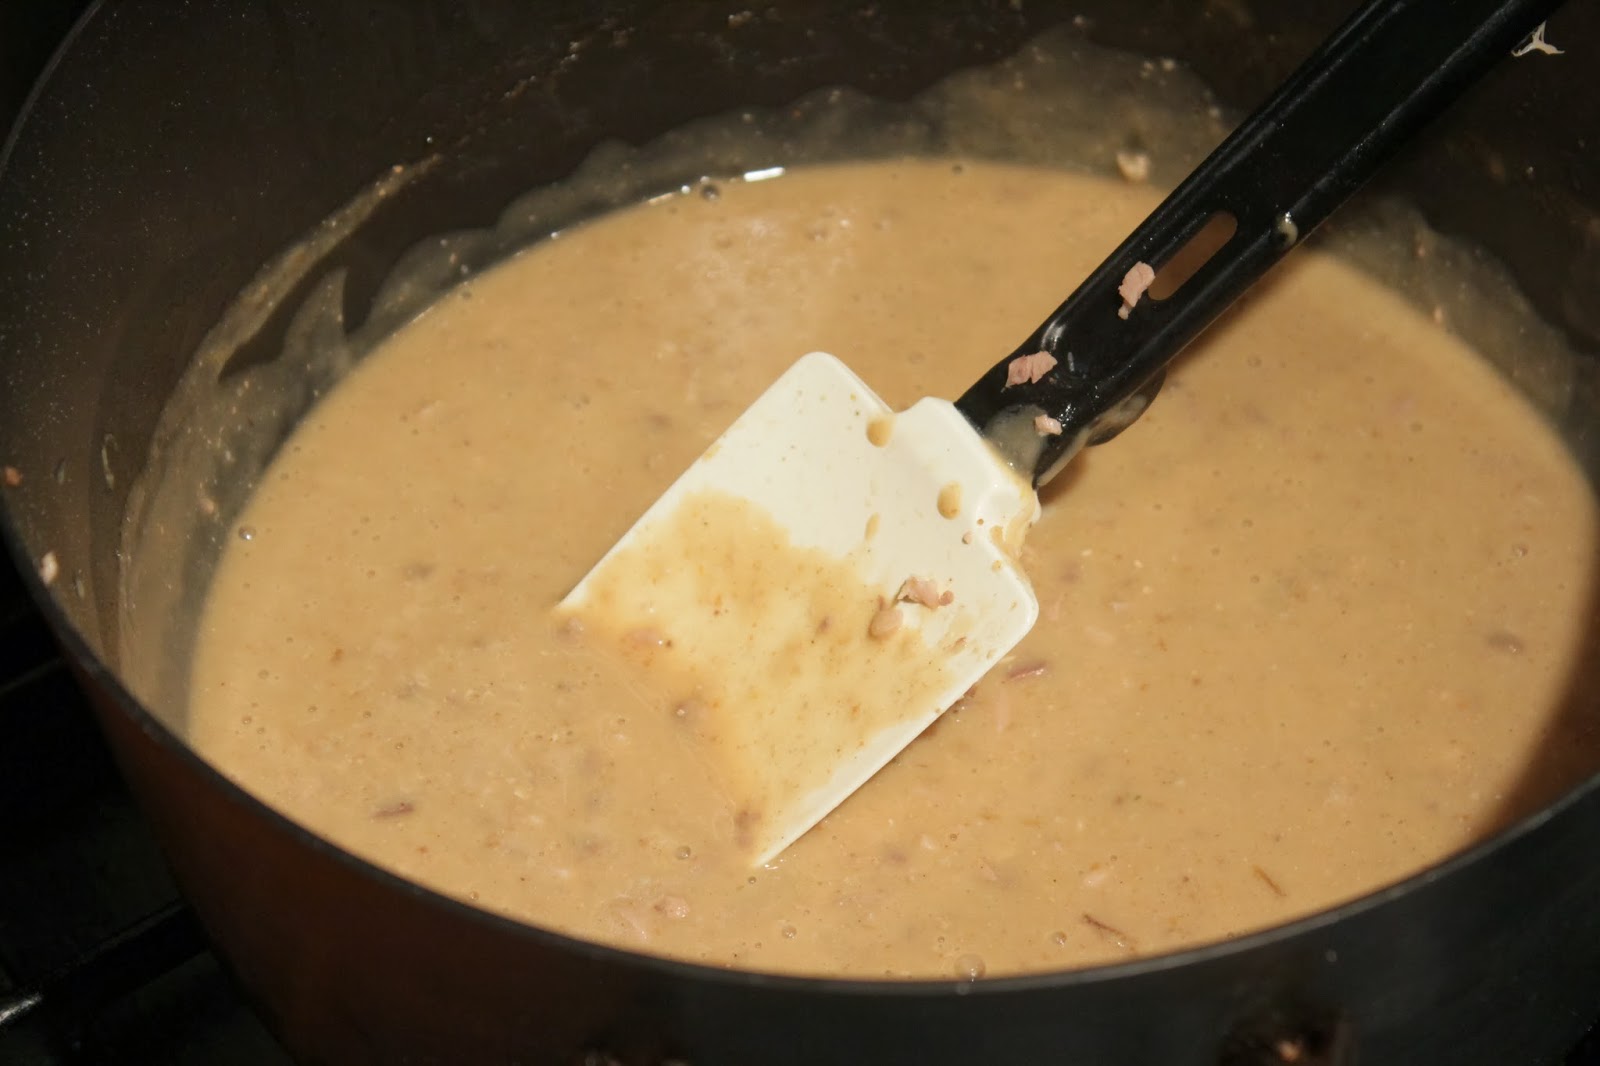
Now, before you add the giblets, you'll want to get out the immersion blender to smooth out the roux. If you have a uniform texture to your gravy before you add the meat, your gravy will be much more like a sauce. Which is actually what it is.
| Emulsification |
You'll now want to mince the giblets and that fatty turkey butt meat and add them to the pot. And, finally, you'll take on the neck. This will need to be done by hand to ensure you get the maximum amount of meat without also getting any of the bone. And it's worth it. This is some tender flavorful meat. Carefully pick as much as you can from the neck and mince it up before adding it to the gravy.
| Giblets |
| Neck meat |
| Just needs a quick stir |
Give everything a good stir. If it is not as thick as you'd like, get out the potato starch.You can find this at Asian markets, as well as at some kosher grocers. Mix a little with some water before adding to your gravy; then give it a couple of minutes to thicken up.
And, that is the perfect Thanksgiving gravy.
Sunday, October 6, 2013
Sunday Morning Banana Bread
Last week we purchased a beautiful bunch of bananas for the week and then promptly forgot about them, which means today they were perfect for banana bread. We had enough for two loaves - one for us and an extra for a grieving friend. Who doesn't feel a little better after a slice of home made banana bread?
While I have Gareth's grandmother's banana bread recipe, I opted for the recipe from The Joy of Cooking as the ancestral Dirlam recipe omits the quantity of bananas needed and how to prep them. I believe this was Edith's secret that she took to the grave with her, thus ensuring that no one else would be able to create her recipe.
The Joy of Cooking recipe is pretty straightforward and was easy to double. I'll provide the recipe for a single standard size loaf.
All ingredients need to be a room temperature. You will need:
1 1/2 cups all-purpose flour
3/4 teaspoon salt
1/2 teaspoon baking soda
1/4 teaspoon baking powder
5 1/3 tablespoons butter
2/3 cup sugar
2 large eggs
2 very ripe bananas, mashed
Move your oven rack to the bottom third of the oven and preheat to 350. Mash your bananas and set aside. Also, lightly beat your eggs with a fork and set those aside as well.
Combine your dry ingredients except the sugar, and set that aside also.
Cream together your butter and sugar like you would do for sugar cookies, using a mixer (or if you're old school, a wooden spoon). Once the butter and sugar are creamed, gently mix in your eggs.
Combine your wet ingredients to your dry ingredients and mix until blended. Then add your bananas and continue mixing until blended into a smooth batter. At this point, you can also fold in about 1/2 cup of nuts.
Pour the batter into a greased 8 1/2 inch loaf pan. Bake at 350 for about an hour. The best way to determine if your bread is done is the toothpick test. If a toothpick inserted into the center of the loaf comes out clean, it's done.
Let your loaf cool on a wire rack for about 15 minutes before removing from the pan.
While I have Gareth's grandmother's banana bread recipe, I opted for the recipe from The Joy of Cooking as the ancestral Dirlam recipe omits the quantity of bananas needed and how to prep them. I believe this was Edith's secret that she took to the grave with her, thus ensuring that no one else would be able to create her recipe.
The Joy of Cooking recipe is pretty straightforward and was easy to double. I'll provide the recipe for a single standard size loaf.
All ingredients need to be a room temperature. You will need:
1 1/2 cups all-purpose flour
3/4 teaspoon salt
1/2 teaspoon baking soda
1/4 teaspoon baking powder
5 1/3 tablespoons butter
2/3 cup sugar
2 large eggs
2 very ripe bananas, mashed
Move your oven rack to the bottom third of the oven and preheat to 350. Mash your bananas and set aside. Also, lightly beat your eggs with a fork and set those aside as well.
| Mashed bananas |
Combine your dry ingredients except the sugar, and set that aside also.
| Dry ingredients |
Cream together your butter and sugar like you would do for sugar cookies, using a mixer (or if you're old school, a wooden spoon). Once the butter and sugar are creamed, gently mix in your eggs.
| Butter and sugar before |
| Butter and sugar after |
Combine your wet ingredients to your dry ingredients and mix until blended. Then add your bananas and continue mixing until blended into a smooth batter. At this point, you can also fold in about 1/2 cup of nuts.
| Batter |
Pour the batter into a greased 8 1/2 inch loaf pan. Bake at 350 for about an hour. The best way to determine if your bread is done is the toothpick test. If a toothpick inserted into the center of the loaf comes out clean, it's done.
Let your loaf cool on a wire rack for about 15 minutes before removing from the pan.
| Banana bread |
Sunday, September 15, 2013
First Pumpkin of the Season in About 30 Minutes
We first started seeing fresh pumpkin for sale at the beginning of the month when we were in Wisconsin. At the time, we thought little of it - they have a different growing season than we do here in Maryland, and this seemed about the right time for the squash in that part of the country. But, when we were out procuring food items this weekend and saw them all over the place out here, we rejoiced, for pumpkin season has arrived in Maryland. We stopped by Hopkins Produce on Route 155 and picked up a couple of small but attractive pumpkins and created our first pumpkin meal of what will hopefully be a plentiful season.
Pumpkin works well with chicken and curry, which is the basis for our pumpkin soup recipe. But by the time we completed our shopping, we were hungry and impatient and getting a little cranky, and we really did not want to take the 45 minutes or so required to roast the pumpkin. So my counterpart devised a shortcut.
Since it was just the two of us and we had a birthday party to attend later in the evening, we wanted just a small lunch to tide us over. Gareth cut off a small section of the pumpkin, skinned it, and cut it down into small pieces (small pieces cook more quickly, and if they look the same, they cook the same.) Then, instead of roasting them in the oven, he pan-friend them on the stovetop.
In a separate pan, he also cooked up some chicken thigh meat, cut off the bone and dusted with a mixture of flour, sriracha sauce, and a Punjab tandoori powder. He cooked the meat in a bit of olive oil, periodically draining the fat off into the pumpkin.
As the pumpkin continued to cook, he mashed it up, eventually employing our favorite tool, the immersion blender, to puree it with some heavy cream.
To finish the dish, he added a little white onion and garlic that had been gently sauteed, and a little chicken stock. (A note about chicken stock is that if you have a vacuum sealer, you can vacuum seal your stock and lay it flat on one of your freezer shelves to save space. You can also crack the sheet of stock to use a portion of it in your cooking.)
And there you have a very nice dish that has all those good flavors of pumpkin soup in about 30 minutes. Serve with a little buttered bread on the side and you have a perfect fall meal.
Pumpkin works well with chicken and curry, which is the basis for our pumpkin soup recipe. But by the time we completed our shopping, we were hungry and impatient and getting a little cranky, and we really did not want to take the 45 minutes or so required to roast the pumpkin. So my counterpart devised a shortcut.
| First pumpkin of the season |
Since it was just the two of us and we had a birthday party to attend later in the evening, we wanted just a small lunch to tide us over. Gareth cut off a small section of the pumpkin, skinned it, and cut it down into small pieces (small pieces cook more quickly, and if they look the same, they cook the same.) Then, instead of roasting them in the oven, he pan-friend them on the stovetop.
| Diced pumpkin cooking on the stovetop |
In a separate pan, he also cooked up some chicken thigh meat, cut off the bone and dusted with a mixture of flour, sriracha sauce, and a Punjab tandoori powder. He cooked the meat in a bit of olive oil, periodically draining the fat off into the pumpkin.
| Boned chicken thighs dusted with flour and Punjab red curry |
| Draining that yummy animal fat into the pumpkin |
As the pumpkin continued to cook, he mashed it up, eventually employing our favorite tool, the immersion blender, to puree it with some heavy cream.
| Puree the cooked pumpkin with a little cream |
To finish the dish, he added a little white onion and garlic that had been gently sauteed, and a little chicken stock. (A note about chicken stock is that if you have a vacuum sealer, you can vacuum seal your stock and lay it flat on one of your freezer shelves to save space. You can also crack the sheet of stock to use a portion of it in your cooking.)
| Vacuum-sealed stock keeps longer and saves space |
And there you have a very nice dish that has all those good flavors of pumpkin soup in about 30 minutes. Serve with a little buttered bread on the side and you have a perfect fall meal.
| 30-minute curried chicken with pumpkin |
Sunday, August 25, 2013
Ultimate Weekend Pancake Breakfast
Pancakes are tricky, although most people do not realize this. To get a light, fluffy pancake, you need to sacrifice flavor. But for a truly flavorful pancake, you almost always end up with something closer to a crepe. Personally, I'll take the flavor over the fluffiness. But, recently my counterpart came up with a recipe that provides both. The key - acidulation. By adding things like vinegar and cultured dairy, you give the baking powder a boost and can scale back on it a bit. You also inject the batter with a little savory zing, adding more depth to the flavor. If you serve these up right away, they are light, fluffy, and flavorful - pancake perfection.
For the batter you will need:
1 1/2 cups self rising flour
(or add two teaspoons baking powder)
2 eggs
2 tablespoons grapeseed oil
1 tablespoon olive oil
1/3 cup milk
1/3 cup cream
1/3 cup labne (or Greek yogurt)
1 tablespoon corn syrup
1 tablespoon brown sugar
1 teaspoon white vinegar
1 teaspoon vanilla
Mix everything together, and mix it well. Use your submersion blender to truly homogenize your batter. You won't regret it.
Let the batter rest for at least 15 minutes or up to 24 hours. The longer the batter rests, the fuller the flavor will be. And here's another key to flavorful pancakes - something wonderful happens when you mix eggs and flour. The longer they are exposed to each other, the richer their combined flavor. But. most of us do not want to wait a full day for our pancakes. This recipe is enough to serve two today and two again tomorrow, making it the ultimate weekend pancake breakfast recipe.
Once the batter has rested, lightly oil your omelet pan with a little light-tasting oil like grapeseed. Cook one pancake in the pan over medium-low heat. Gently check the underside and flip when it is a golden color. Continue to cook until the other side is also golden.
Serve these bad boys up topped with fresh strawberries and maple syrup with a little bacon on the side, and enjoy your weekend.
For the batter you will need:
1 1/2 cups self rising flour
(or add two teaspoons baking powder)
2 eggs
2 tablespoons grapeseed oil
1 tablespoon olive oil
1/3 cup milk
1/3 cup cream
1/3 cup labne (or Greek yogurt)
1 tablespoon corn syrup
1 tablespoon brown sugar
1 teaspoon white vinegar
1 teaspoon vanilla
Mix everything together, and mix it well. Use your submersion blender to truly homogenize your batter. You won't regret it.
Let the batter rest for at least 15 minutes or up to 24 hours. The longer the batter rests, the fuller the flavor will be. And here's another key to flavorful pancakes - something wonderful happens when you mix eggs and flour. The longer they are exposed to each other, the richer their combined flavor. But. most of us do not want to wait a full day for our pancakes. This recipe is enough to serve two today and two again tomorrow, making it the ultimate weekend pancake breakfast recipe.
Once the batter has rested, lightly oil your omelet pan with a little light-tasting oil like grapeseed. Cook one pancake in the pan over medium-low heat. Gently check the underside and flip when it is a golden color. Continue to cook until the other side is also golden.
| In the pan |
Serve these bad boys up topped with fresh strawberries and maple syrup with a little bacon on the side, and enjoy your weekend.
| On the plate |
Thursday, August 8, 2013
Perfect Pesto
We were both driving home from our separate jobs in our separate cars when we both heard the same story on NPR and both had the same thoughts about dinner tonight. With the abundance of fresh basil this time of year and the rising cost of pine nuts, on this evening's program they featured a recipe for Pistachio Pesto. It was presented by the author of an Italian cookbook, and even though we disagreed with her about basil (she says it's sweet when it's really a bitter) and olive oil (she says it's fruity when it's actually nutty), we trusted her on the whole pistachio as a substitute for pine nuts thing.
It's been a while since we have had pesto. I have had a long-standing prejudice against nuts that has been respected for about eight years now. But, after my own personal cooking experience with them a few months back, I was able to identify the root cause of my nut issue (the skin that clings to the nut after it has been shelled - disconcerting in its texture and bitter flavor), and the nut prohibition has been lifted. This is our first dinner featuring nuts since.
Your basic pesto is basil, garlic, pine nuts, and olive oil. You could stop there if you wanted and still have something quite nice to toss with your pasta. Or you could go a little further and end up with something truly amazing.
Your first step is to cook that garlic. Mince it and brown it on the stovetop with minced onions. This will cut the bitterness and will release what natural sugars exist in these bulbs. Once they are translucent with golden edges, add some coarsely chopped nuts - for our dinner, we used pistachio, but you can also substitute macadamia nuts for a more mild nut flavor.
Let the nuts cook until heated through. Then, toss in the chopped basil, but also add some fresh oregano and parsley. These additional herbs will cut the bitter of the basil and bring out its sweeter notes. it will also boost the aroma and fresh flavor of your pesto.
Don't let the herbs cook too long before you pull it from the heat. Let it cool slightly, and the toss it with finely grated hard cheese - say, asiago or romano - and a dollop of a soft cheese like a mild goat cheese. Add some olive oil to help bind it together and it's ready for pasta.

Served over hand cut pasta, this was pesto perfection. The pistachio was a little stronger than the traditional pine nuts, but was less bitter and really did work out very well in this application.
It's been a while since we have had pesto. I have had a long-standing prejudice against nuts that has been respected for about eight years now. But, after my own personal cooking experience with them a few months back, I was able to identify the root cause of my nut issue (the skin that clings to the nut after it has been shelled - disconcerting in its texture and bitter flavor), and the nut prohibition has been lifted. This is our first dinner featuring nuts since.
Your basic pesto is basil, garlic, pine nuts, and olive oil. You could stop there if you wanted and still have something quite nice to toss with your pasta. Or you could go a little further and end up with something truly amazing.
Your first step is to cook that garlic. Mince it and brown it on the stovetop with minced onions. This will cut the bitterness and will release what natural sugars exist in these bulbs. Once they are translucent with golden edges, add some coarsely chopped nuts - for our dinner, we used pistachio, but you can also substitute macadamia nuts for a more mild nut flavor.
Let the nuts cook until heated through. Then, toss in the chopped basil, but also add some fresh oregano and parsley. These additional herbs will cut the bitter of the basil and bring out its sweeter notes. it will also boost the aroma and fresh flavor of your pesto.
Don't let the herbs cook too long before you pull it from the heat. Let it cool slightly, and the toss it with finely grated hard cheese - say, asiago or romano - and a dollop of a soft cheese like a mild goat cheese. Add some olive oil to help bind it together and it's ready for pasta.
Pesto pairs well with mild protein like chicken. Tonight, we roasted some chicken thighs and then topped them with uncured bacon and a little goat cheese.
Served over hand cut pasta, this was pesto perfection. The pistachio was a little stronger than the traditional pine nuts, but was less bitter and really did work out very well in this application.
Tuesday, July 23, 2013
Shrimp with Beurre Blanc
While I was at work today, my counterpart whipped up a beurre blanc sauce. This is another one of those things that you can do yourself at home if you know a couple of things.
Beurre Blanc is not a classic French sauce - it's actually fairly modern, having allegedly been discovered by accident about 100 years ago by Chef Clémence Lefeuvre. She was supposedly working on a Bearnaise and she forgot to add the egg yolks. She still ended up with a decent emulsification, so she plated up.
For us non-French chefs, life does not always go so well. Anyone who has ever played around with a recipe and thought that mixing vinegar, wine, and shallots together was a good idea might claim that no one would do this on purpose, and that all the butter in the world might not save the sauce. Turns out there is a bit of an art to it.
Your basic beurre blanc starts with vinegar and wine, and the wine makes a difference here. You'll want a very sweet white like Champagne to cut the bitter edge off the rest of the ingrdients. You'll want two parts wine to one part vinegar, and you'll want to reduce it.
Once you have your reduction, you'll also want to add any combination of shallots, leek, and garlic. Traditionalists will stick to shallot, but leek and garlic add a little depth.
You'll also want about half a stick of butter, cut into about five or six pieces. Once the shallots, etc., have cooked, add the butter, reserving two pieces for later. When the butter has melted and is integrated into the sauce, remove it from the burner and add the two remaining pieces of butter to melt at their own pace.
This will result in a sauce that is sweet, tangy, buttery, and surprisingly light. The Champagne will cut through the bitterness and will bring out the subtle sweetness of the shallot that is otherwise overpowered by its bitterness.
This sauce is an excellent partner for seafood, and my counterpart served it over fresh shrimp that he sauteed with a little jalapeno, leek, and peas. Pasta tossed with a Spanish goat cheese and a smattering of lima beans rounded out things out nicely. It was completely unexpected for a Tuesday, and it was completely delicious.
Beurre Blanc is not a classic French sauce - it's actually fairly modern, having allegedly been discovered by accident about 100 years ago by Chef Clémence Lefeuvre. She was supposedly working on a Bearnaise and she forgot to add the egg yolks. She still ended up with a decent emulsification, so she plated up.
For us non-French chefs, life does not always go so well. Anyone who has ever played around with a recipe and thought that mixing vinegar, wine, and shallots together was a good idea might claim that no one would do this on purpose, and that all the butter in the world might not save the sauce. Turns out there is a bit of an art to it.
Your basic beurre blanc starts with vinegar and wine, and the wine makes a difference here. You'll want a very sweet white like Champagne to cut the bitter edge off the rest of the ingrdients. You'll want two parts wine to one part vinegar, and you'll want to reduce it.
Once you have your reduction, you'll also want to add any combination of shallots, leek, and garlic. Traditionalists will stick to shallot, but leek and garlic add a little depth.
You'll also want about half a stick of butter, cut into about five or six pieces. Once the shallots, etc., have cooked, add the butter, reserving two pieces for later. When the butter has melted and is integrated into the sauce, remove it from the burner and add the two remaining pieces of butter to melt at their own pace.
| Beurre Blanc - white butter |
This will result in a sauce that is sweet, tangy, buttery, and surprisingly light. The Champagne will cut through the bitterness and will bring out the subtle sweetness of the shallot that is otherwise overpowered by its bitterness.
| Fresh shrimp |
This sauce is an excellent partner for seafood, and my counterpart served it over fresh shrimp that he sauteed with a little jalapeno, leek, and peas. Pasta tossed with a Spanish goat cheese and a smattering of lima beans rounded out things out nicely. It was completely unexpected for a Tuesday, and it was completely delicious.
| Beurre Blanc over shrimp |
Wednesday, April 24, 2013
Mary Cooks: Shrimp Cakes with Wasabi Tartar Sauce
Last night's dinner included a potato rosti that yielded five servings. For tonight's dinner, I was looking for something that would pair well with that leftover potato. And where I come from, there are few things that go better with fried potato than fried fish. Earlier today over my morning coffee, I found a recipe for shrimp cakes on the Foodista blog and knew it was dinner.
A quick review of the required ingredients without also a quick review of what we had on hand led me to believe that this meal could be made quickly and easily with only the acquisition of a little panko and a little mayo. As my counterpart can attest, any time I claim that we already have something in the pantry, there is about a 65% chance that I will be dead wrong. So tonight's cooking adventure was an exercise in quick thinking and substitution. And it was much more typical of my time in the kitchen as I stumbled around the recipe, arms flailing, wondering how on earth it would all come together.
| At least some of what I will need for tonight's dinner |
But, come together it did, and it was pretty tasty.
For the shrimp cakes, you will need 1 1/2 pounds of Oregon pink shrimp. And here is where the substitutions begin. We always have shrimp in the freezer. Always. And today was no exception. We did not have Oregon pink shrimp, but I thought we would have a close proximity. We did not. Oregon pink shrimp are those tiny little guys people like to use in shrimp salad. The shrimp I had on hand were jumbo tiger shrimp just short of actual prawn. Undaunted, I pulled five of them out to thaw in a bowl of lukewarm water while I assembled the rest of my ingredients for what I reckoned would be about a half batch:
1/2 cup plain breadcrumbs - I used panko
2 celery stalks - even though I was making a half batch, I used the full amount of celery
1/4 white onion
1 small green pepper - I used a serrano pepper, it being both small and green
1/2 tsp dry mustard
1/4 tsp Tabasco - which we did not have on hand, which is shocking. I used Cholula Mexican-style hot sauce
1 egg
1 Tbsp mayonnaise
1/2 Tbsp lemon juice
1/4 tsp Worcestershire sauce - which we also did not have on hand, so I used Picka Peppa sauce
2 celery stalks - even though I was making a half batch, I used the full amount of celery
1/4 white onion
1 small green pepper - I used a serrano pepper, it being both small and green
1/2 tsp dry mustard
1/4 tsp Tabasco - which we did not have on hand, which is shocking. I used Cholula Mexican-style hot sauce
1 egg
1 Tbsp mayonnaise
1/2 Tbsp lemon juice
1/4 tsp Worcestershire sauce - which we also did not have on hand, so I used Picka Peppa sauce
I used a food processor to mince the veg and blend it with the spices. Then in a large bowl, I combined this with the egg and the panko. At a loss for what to do with those enormous shrimp, I coarsely ground them in the food processor as well by pulsing them quickly about 10 times. I added this to the rest of the ingredients and let it rest while I made the tartar sauce.
| Shrimp cake mix - it doesn't look like anything is missing.... |
For the sauce you will need:
1/2 cup sour cream - I used the good crema Mexicana
1/2 cup mayonnaise
1 1/5 Tbsp ground ginger
1 glove garlic, pressed
1/2 Tbsp white vermouth - this I knew we did not have. I added a splash of flat champagne instead
1/2 Tbsp seasame oil
1/2 tsp lime zest - I used lemon
1/2 Tbsp lime juice - I used lemon here too
1 tsp wasabi paste - I used wasabi powder
I mixed everything together and set aside in the fridge to chill while I cooked my shrimp cakes.
| Wasabi tartar sauce |
My mix was something close to a crab cake mix. I got about five patties out of it but noticed that they did not seem to stick together as well as they should and was feeling as if the recipe had left out some key ingredient. I patted some more panko on them before frying them up.
| Shrimp cakes ready for the skillet |
I cooked them in a skillet in a generous amount of grape seed oil, allowing about four minutes per side as the recipe instructed, and let them cool on a paper towel-lined plate. I reheated a wedge of rosti in the same skillet.
As I was plating up, I realized that they key ingredient was probably something like mayo, and that I had forgotten it. Sure enough, a good tablespoon of mayo was included in the recipe but not in my little cakes.
| Cooking on the stovetop |
Even so, my little shrimp cakes were tender and delicious. While the panko really does need the mayo to keep the cakes together, it forms a nice crust on the outside when fried. The cakes were spicy and slightly sweet with a good shrimpy flavor. The tartar sauce was actually a bit busy with a lot of different flavors but nothing really pulling it all together. It was better with these cakes than a more traditional tartar sauce, though, and the creamy texture was nice against the fried cakes.
Even with the mishaps I encountered, I still feel this was a success. I also feel as if I'm learning more about cooking. A lot of it feels like timing. Preparing this meal had me running around the kitchen a lot while last night's roasted poussin did not. While that was the more elegant dish, I think it might actually have been easier at least in part because of the timing. A good plan also helps. I'm not sure I really had one tonight.
| Plated up with last night's potato rosti |
Subscribe to:
Posts (Atom)