2013 was another exciting year for us in the kitchen. We continued our exploration of cooking techniques, new and old, with delicious results. Here are our ten favorite posts from the last year:
Ballotine of Pheasant
This was the first of many pheasant cooking techniques and our first (and so far only) foray into modernist cooking. We introduced meat glue into the classic ballotine meat binding process with passable results.
How to Debone a Whole Chicken
We demonstrate the deboning technique depicted in Larousse Gastronomique using the tools from our home kitchen, proving that with a little practice the hobbyist cook can master Olde World cooking skills.
Traditional Bouillabaisse
Every year we post a variation on my favorite seafood dish. In 2013, we went old school and replicated the process advocated by Larousse Gastronomique.
Limas and Ham
We delved more deeply into traditional Americana cooking last year, including this superior take on good old pork and beans.
A Primer on Fiddlehead Ferns
After seeing these tender little shoots appear at our local Wegmans for several springs, 2013 was the year we took the plunge. The result was one of my favorite meals of the year.
Filleting Fish and Prepping Fava Beans
This two-for-one post shows how to fillet a fish in your own kitchen, as well as how simple it is to prepare the tender, buttery fava beans.
Ultimate Pancakes
2013 was the year we perfected pancakes. The secret - cultured dairy. While buttermilk is a favorite, we used labne for a more delicate flavor.
All About the Gravy
Just in time for Thanksgiving, my counterpart shares his best gravy secrets.
Weekday Coq au Vin
We employed the slow cooker to achieve this classic French dish on a Thursday night, made entirely from ingredients found in most home kitchens.
Boeuf Bourguignon
We wrapped up the year with another French classic that was a big hit at the holiday potluck.
And, our year in review wouldn't be complete without a shout out to last year's birthday gift to ourselves - the VacMaster VP112 chamber vacuum sealer for the home. This one tool has reduced food spoilage and waste in our kitchen, allowing us to preserve cheeses, sauces, and leftovers for future use.
Showing posts with label food. Show all posts
Wednesday, January 1, 2014
Friday, December 6, 2013
Weekday Coq au Vin
What I love most about winter is my counterpart invariably pulls out Le Gastronomique for a little old school comfort food. This week, he tried his had at that old classic Coq au Vin. As the name implies, this is basically chicken in a wine sauce. And it is a very old recipe with some accounts tracing it back to Julius Caesar in Gaul. A variant of the dish first appeared in print in 1864. Then, about 100 years later, Julia Child brought it to the U.S. in her seminal cookbook and featured it often on her cooking show.
The recipe was most likely developed as a means of preparing old rooster, so there is a certain amount of time devoted to simmering the chicken in the wine to help season it. Even if you used a conventional bird from the grocery store, you still want to allow sufficient simmering time for that authentic flavor to develop. You need to create a sauce that is flavorful enough to both compensate for the mildness of the slow-cooked meat, but also complements it without overpowring it. And, while many have tried, there is no real getting around the long, slow cook required to get this right. But there is a way to mitigate it so that you can even have authentic coq au vin on a school night. The trick is the slow cooker.
Empty the contents of the slow cooker into a colander to strain the sauce from the meat and veg. Then strain the liquid again through a mesh colander or something similar. This is also a necessary step to remove the sediment from the sauce. Here's a photo depicting why you should do this.
| The basis of Coq au Vin - chicken and wine |
So, the night before, you will have left overs because you will be prepping your authentic coq au vin. One of the truly nice things about this dish is that it does not require any esoteric ingredients. We had everything we needed on hand for this without needing to stop by the grocery store. And in the 30-45 minutes it takes for your leftovers to reheat in the oven, you will be able to brown your meat and prep your veg.
You will need:
- About 4 pounds of chicken, cut up (We used a pack of chicken thighs with the skin on that we deboned)
- About 3 oz of bacon, also cut up
- Onions
- Mushrooms
- Leek
- Carrot
- Potato
- A heavy hand of Mediterranean seasoning on our chicken
- Brandy
- About half a bottle of a nice wine
- A bit of habanero sauce or some other hot sauce to help cut the richness of the dish
- A bit of sugar to help cut the bitter
- A bit of flour
Continue to cook the chicken in the bacon fat while you prep your veg, remembering to turn the chicken a couple of times with your tongs.
You'll also want to sprinkle a handful of flour over the chicken. This will mix with the fats and will help things thicken in this first cooking.
| Heavily seasoned chicken cooking in the bacon |
You'll also want to sprinkle a handful of flour over the chicken. This will mix with the fats and will help things thicken in this first cooking.
And, prepping the veg is not so bad for this dish as you will want large chunks of veg. Make sure to peel the potatoes and carrots, and to thoroughly clean your leek.
| Large chunks of veg |
Once the chicken has cooked through and the outside has browned, add a generous pour of brandy to the pot. If you have the time and you want to be truly authentic, light it up and flame it off. We passed on this step and just let the heat of the pot cook off the booze.
| When it looks like this, it's ready for the booze |
You'll also want to add that nice wine, and also a bit of sugar. While the French may say you'll get the sugar from the wine, we used a domestic and were not hedging our bets.
| A splash of brandy |
Give the wine some time to cook as well. Then, gently transfer the contents of your pot to your 2-quart measuring cup. Once it has cooled a bit, place a lid on it and let it rest in the refrigerator overnight for the flavors to mingle.
| When it looks like this, it's done for the night |
| A large measuring cup is ideal for overnight storage |
Bag up your veg for the night also.
The next morning, get out that slow cooker. Place the potatoes in first at the bottom of the pot. Then add the rest of the veg. Then place the meat on top, pouring the liquid from the meat over the whole thing and add a couple of cups of water as well.
Set your slow cooker for 4-6 hours and go on your merry way to work. When you get home, your coq au vin will be cooked, and you'll just have to make the sauce. This is a necessary and quick step, so don't get over-excited and skip it, no matter how good the kitchen smells.
| This is what I came home to on Thursday |
| Why you need to strain that sauce |
Place the strained sauce in a pan on the stove over medium heat. Dissolve some potato starch in a bit of water and add it to the sauce and simmer until slightly thickened.
| Thickening the sauce on the stovetop |
Arrange your chicken pieces and veg in a wide, shallow bowl and top with the sauce. And go easy on that sauce. That golden color and delicious flavor comes from animal fat. Plus, the surprise best-tasting element of this dish - the onions. They come out sweet and fatty and melt in your mouth. And that's how you get coq au vin on a Thursday night.
Sunday, November 17, 2013
All About the Gravy
Thanksgiving is about 10 days away, so it's time to get serious about cooking again. The nice thing about Thanksgiving is that it is really all about the meal - that opulent turkey dinner that most of us only muster this one day of the year. And because that turkey is really the cornerstone of the day, you want to bring your A game.
To help prepare for this major cooking event, today's posting is all about the gravy.
But first, an important note about the turkey, because the wrong bird will stop you dead in your tracks. I bring this up because over the last few years I've seen an increase in turkeys that come with a sad little packet of pre-made gravy instead of the traditional packet of neck and giblets. Read the packaging carefully and make sure you pick up a bird with the giblets. Pull them out of the carcass, and trim the ends off the wings, and set them all aside for a moment.
Here's also a nice trick for roasting that will keep the bird moist and flavorful. Turkeys are pretty lean and are prone to drying out in the cooking process. While a free range bird is less likely to dry out than conventional birds, many of us keep it from drying out by adding fat like butter. Put the butter away and try this: Mix dried rubbed sage and salt into a couple of tablespoons of duck fat and rub that on the exterior of your turkey. Duck fat is easy enough to come by. Sometime between now and Thanksgiving, pick up a duck and treat yourself to a duck dinner. Drain off the fat and save it until Thanksgiving.
Once the turkey is in the oven, go back to those giblets. Now, most of us just cover them with water and leave them on the back burner to stock all afternoon. The key to a really flavorful giblet gravy is to brown them first - neck and all - in about a tablespoon of butter with some more sage and maybe a bit of oregano.
A bit if veg will also boost up the flavor. You'll want to add some carrot, leek, onion, and celery hearts as if you were preparing a mirepoix. Let the veg cook until softened. Then add a couple of cups of water to the pot and throw in about half a bullion cube. Now you can set it aside to simmer while the turkey roasts.
When the turkey is cooked through, you'll want to let it rest for a moment. While it is resting, go ahead and cut off some of those nice fatty bits near the butt. And, if you really want all those juices, pull the stuffing and turn the bird on its end to let everything drip down into the roasting pan.
With giblets, stock, pan drippings, and some nice fatty meat, you are now ready to make your gravy. You will also need flour, butter, olive oil, heavy cream, and some variety of flavoring like Worcestershire sauce. We use a bit of sriracha sauce and some Pik-a-Peppa.
Start with a simple roux. In a heavy pan, melt down 3 tablespoons butter and 1/2 tablespoon olive oil. Add to that about 4 tablespoons flour and mix with a spatula until the flour has blended with the fats and has cooked off. This is important because cooked flour makes sauce but raw flour only makes paste. Mind the heat so that you don't end up at the other extreme with scorched flour as this is not appropriate for this application.
Add your flavoring to the roux along with some heavy cream.
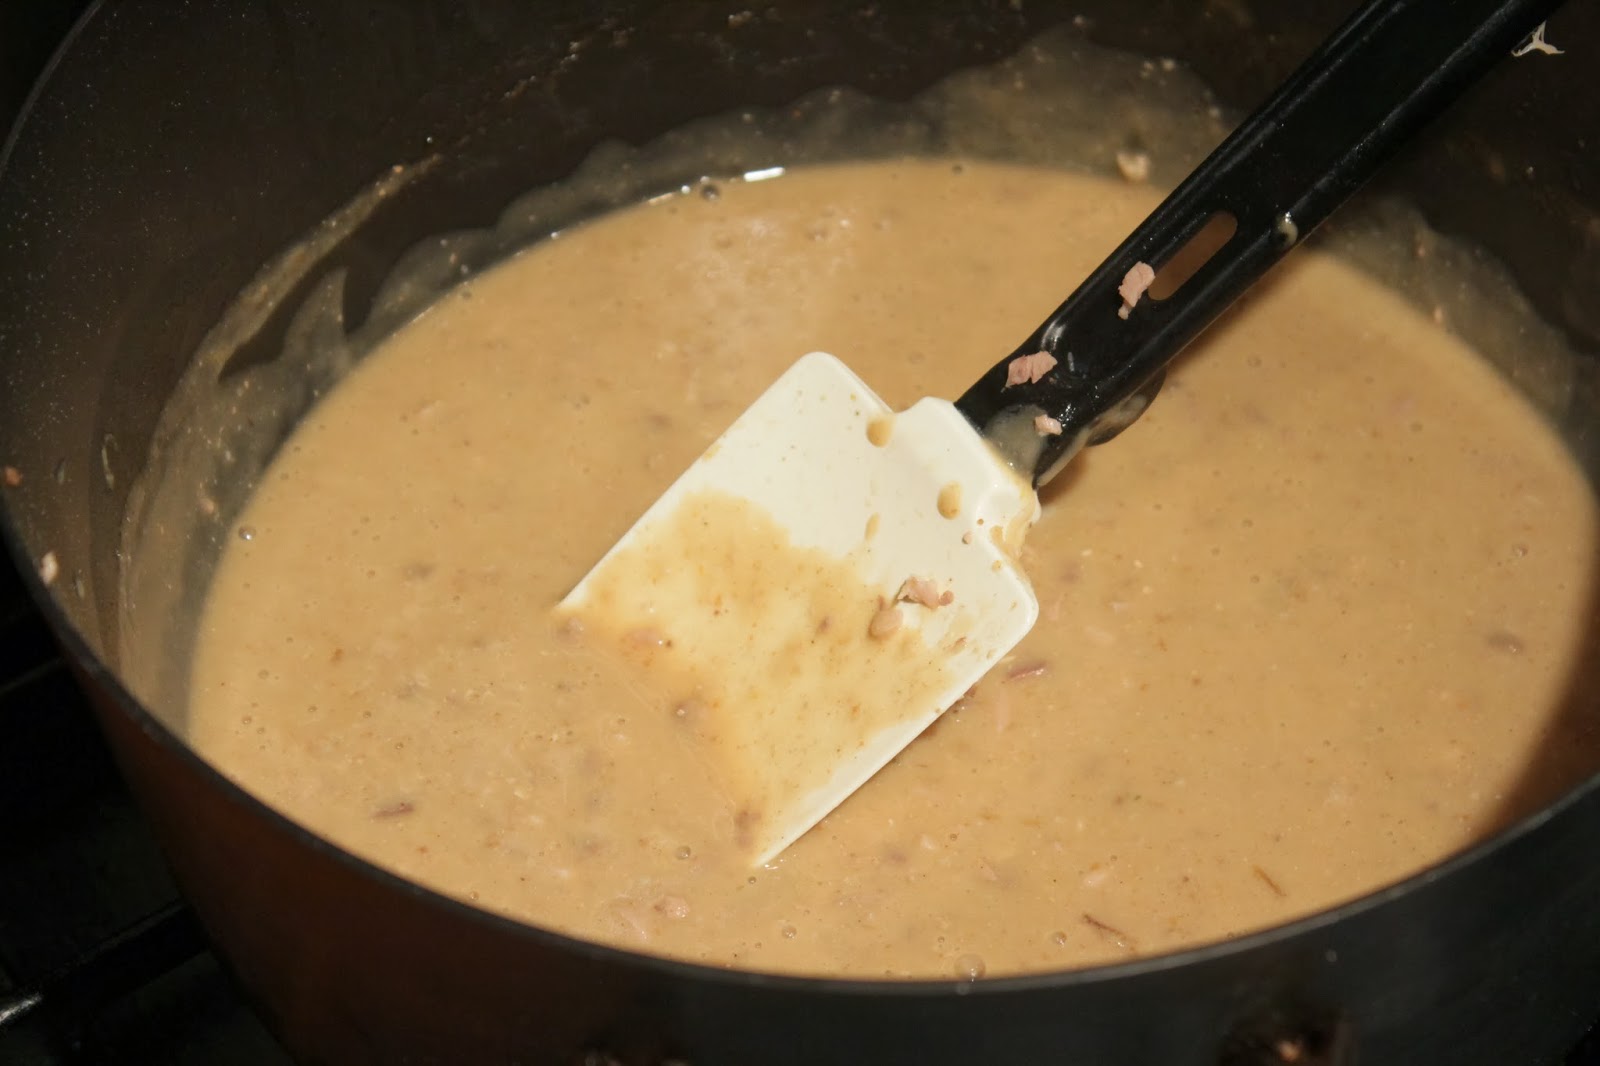
Use a spatula to scrape everything off the sides and bottom of the pan and carefully pour it into your gravy. Then, take those giblets off the back burner and strain the stock into the roasting pan to deglace the remaining sucs and add this to the gravy, keeping the heat fairly low.
Now, before you add the giblets, you'll want to get out the immersion blender to smooth out the roux. If you have a uniform texture to your gravy before you add the meat, your gravy will be much more like a sauce. Which is actually what it is.
You'll now want to mince the giblets and that fatty turkey butt meat and add them to the pot. And, finally, you'll take on the neck. This will need to be done by hand to ensure you get the maximum amount of meat without also getting any of the bone. And it's worth it. This is some tender flavorful meat. Carefully pick as much as you can from the neck and mince it up before adding it to the gravy.
Give everything a good stir. If it is not as thick as you'd like, get out the potato starch.You can find this at Asian markets, as well as at some kosher grocers. Mix a little with some water before adding to your gravy; then give it a couple of minutes to thicken up.
And, that is the perfect Thanksgiving gravy.
To help prepare for this major cooking event, today's posting is all about the gravy.
| Perfect giblet gravy |
But first, an important note about the turkey, because the wrong bird will stop you dead in your tracks. I bring this up because over the last few years I've seen an increase in turkeys that come with a sad little packet of pre-made gravy instead of the traditional packet of neck and giblets. Read the packaging carefully and make sure you pick up a bird with the giblets. Pull them out of the carcass, and trim the ends off the wings, and set them all aside for a moment.
Here's also a nice trick for roasting that will keep the bird moist and flavorful. Turkeys are pretty lean and are prone to drying out in the cooking process. While a free range bird is less likely to dry out than conventional birds, many of us keep it from drying out by adding fat like butter. Put the butter away and try this: Mix dried rubbed sage and salt into a couple of tablespoons of duck fat and rub that on the exterior of your turkey. Duck fat is easy enough to come by. Sometime between now and Thanksgiving, pick up a duck and treat yourself to a duck dinner. Drain off the fat and save it until Thanksgiving.
| Neck, giblets, wing tips, and butter |
| Mirepoix |
A bit if veg will also boost up the flavor. You'll want to add some carrot, leek, onion, and celery hearts as if you were preparing a mirepoix. Let the veg cook until softened. Then add a couple of cups of water to the pot and throw in about half a bullion cube. Now you can set it aside to simmer while the turkey roasts.
| Giblet stock |
When the turkey is cooked through, you'll want to let it rest for a moment. While it is resting, go ahead and cut off some of those nice fatty bits near the butt. And, if you really want all those juices, pull the stuffing and turn the bird on its end to let everything drip down into the roasting pan.
| Letting gravity do its thing |
With giblets, stock, pan drippings, and some nice fatty meat, you are now ready to make your gravy. You will also need flour, butter, olive oil, heavy cream, and some variety of flavoring like Worcestershire sauce. We use a bit of sriracha sauce and some Pik-a-Peppa.
| A little extra flavor |
Start with a simple roux. In a heavy pan, melt down 3 tablespoons butter and 1/2 tablespoon olive oil. Add to that about 4 tablespoons flour and mix with a spatula until the flour has blended with the fats and has cooked off. This is important because cooked flour makes sauce but raw flour only makes paste. Mind the heat so that you don't end up at the other extreme with scorched flour as this is not appropriate for this application.
| Cooked flour makes a sauce |
Add your flavoring to the roux along with some heavy cream.
Then, remove your turkey from the roasting pan and place it on a platter because it's time to add the drippings.
| Pan drippings |
Use a spatula to scrape everything off the sides and bottom of the pan and carefully pour it into your gravy. Then, take those giblets off the back burner and strain the stock into the roasting pan to deglace the remaining sucs and add this to the gravy, keeping the heat fairly low.
| Making use of the giblet stock |
Now, before you add the giblets, you'll want to get out the immersion blender to smooth out the roux. If you have a uniform texture to your gravy before you add the meat, your gravy will be much more like a sauce. Which is actually what it is.
| Emulsification |
You'll now want to mince the giblets and that fatty turkey butt meat and add them to the pot. And, finally, you'll take on the neck. This will need to be done by hand to ensure you get the maximum amount of meat without also getting any of the bone. And it's worth it. This is some tender flavorful meat. Carefully pick as much as you can from the neck and mince it up before adding it to the gravy.
| Giblets |
| Neck meat |
| Just needs a quick stir |
Give everything a good stir. If it is not as thick as you'd like, get out the potato starch.You can find this at Asian markets, as well as at some kosher grocers. Mix a little with some water before adding to your gravy; then give it a couple of minutes to thicken up.
And, that is the perfect Thanksgiving gravy.
Sunday, September 15, 2013
First Pumpkin of the Season in About 30 Minutes
We first started seeing fresh pumpkin for sale at the beginning of the month when we were in Wisconsin. At the time, we thought little of it - they have a different growing season than we do here in Maryland, and this seemed about the right time for the squash in that part of the country. But, when we were out procuring food items this weekend and saw them all over the place out here, we rejoiced, for pumpkin season has arrived in Maryland. We stopped by Hopkins Produce on Route 155 and picked up a couple of small but attractive pumpkins and created our first pumpkin meal of what will hopefully be a plentiful season.
Pumpkin works well with chicken and curry, which is the basis for our pumpkin soup recipe. But by the time we completed our shopping, we were hungry and impatient and getting a little cranky, and we really did not want to take the 45 minutes or so required to roast the pumpkin. So my counterpart devised a shortcut.
Since it was just the two of us and we had a birthday party to attend later in the evening, we wanted just a small lunch to tide us over. Gareth cut off a small section of the pumpkin, skinned it, and cut it down into small pieces (small pieces cook more quickly, and if they look the same, they cook the same.) Then, instead of roasting them in the oven, he pan-friend them on the stovetop.
In a separate pan, he also cooked up some chicken thigh meat, cut off the bone and dusted with a mixture of flour, sriracha sauce, and a Punjab tandoori powder. He cooked the meat in a bit of olive oil, periodically draining the fat off into the pumpkin.
As the pumpkin continued to cook, he mashed it up, eventually employing our favorite tool, the immersion blender, to puree it with some heavy cream.
To finish the dish, he added a little white onion and garlic that had been gently sauteed, and a little chicken stock. (A note about chicken stock is that if you have a vacuum sealer, you can vacuum seal your stock and lay it flat on one of your freezer shelves to save space. You can also crack the sheet of stock to use a portion of it in your cooking.)
And there you have a very nice dish that has all those good flavors of pumpkin soup in about 30 minutes. Serve with a little buttered bread on the side and you have a perfect fall meal.
Pumpkin works well with chicken and curry, which is the basis for our pumpkin soup recipe. But by the time we completed our shopping, we were hungry and impatient and getting a little cranky, and we really did not want to take the 45 minutes or so required to roast the pumpkin. So my counterpart devised a shortcut.
| First pumpkin of the season |
Since it was just the two of us and we had a birthday party to attend later in the evening, we wanted just a small lunch to tide us over. Gareth cut off a small section of the pumpkin, skinned it, and cut it down into small pieces (small pieces cook more quickly, and if they look the same, they cook the same.) Then, instead of roasting them in the oven, he pan-friend them on the stovetop.
| Diced pumpkin cooking on the stovetop |
In a separate pan, he also cooked up some chicken thigh meat, cut off the bone and dusted with a mixture of flour, sriracha sauce, and a Punjab tandoori powder. He cooked the meat in a bit of olive oil, periodically draining the fat off into the pumpkin.
| Boned chicken thighs dusted with flour and Punjab red curry |
| Draining that yummy animal fat into the pumpkin |
As the pumpkin continued to cook, he mashed it up, eventually employing our favorite tool, the immersion blender, to puree it with some heavy cream.
| Puree the cooked pumpkin with a little cream |
To finish the dish, he added a little white onion and garlic that had been gently sauteed, and a little chicken stock. (A note about chicken stock is that if you have a vacuum sealer, you can vacuum seal your stock and lay it flat on one of your freezer shelves to save space. You can also crack the sheet of stock to use a portion of it in your cooking.)
| Vacuum-sealed stock keeps longer and saves space |
And there you have a very nice dish that has all those good flavors of pumpkin soup in about 30 minutes. Serve with a little buttered bread on the side and you have a perfect fall meal.
| 30-minute curried chicken with pumpkin |
Saturday, September 14, 2013
Food From the Dieter's Perspective, Part 2
Mostly I write about what I am eating, how to make it at home, or where to find it in my area. I also spend a lot of time considering the impact of food on our health and our overall sense of well-being. So every once in a while, some of these thoughts end up in the blog.
And today I am thinking about the ramifications of enjoying food. It started last night at a happy hour to send off one of my favorite coworkers to her next job, which should have been a really good time. Then someone took a group shot. And I saw myself. And I was shocked. I have become a pillow, and a very lumpy one at that. One of my friends was generous enough to claim that it was the sweater I was wearing, but this was clearly not the case. (But I love her for saying so anyway.) And it hung over me like a dark cloud of failure. How had this happened?
Many of us women have spent most of our lives dieting in some manner, or at least convincing ourselves that food is just fuel to keep us healthy and active but not to be enjoyed. I know I've spent a good portion of my life since puberty afraid of what would happen if I actually started enjoying food.
And this is not the same as eating for enjoyment. I'm talking about enjoying what you are eating, and what this can lead to. And I eat some highly enjoyable meals. And my worst fears have come true. When I regularly eat food that I enjoy and I consistently take pleasure in my meals, I am 15 pounds heavier and 2 sizes larger than when I chose the more Spartan "food is fuel" outlook.
But I also see things like anxiety, depression, and insomnia subside. My concentration improves, and so does my productivity. I am good with a normal 8 hours of sleep and do not feel the need to nap. The truth is, my slimmer, lighter self comes at a price - my overall sense of well-being. When I diet, I am cranky, and not just because of food deprivation. Mealtime is transformed from an enjoyable sensory and social experience to something to be dreaded, a minefield of bad choices and regrets. And this detracts from my quality of life.
When I was younger, I really did fear that my greatest assets were physical, and that once my beauty faded, so would my perceived value. So, the trade off of security for beauty seemed like a fair one. As I have gotten older, though, my perception of myself has changed, as has what I want my life to look like, to feel like. While in my own residual self-image, I am still 125 pounds (and I am always deeply troubled by reminders that this is not actually true), I also see the value in a consistent level of comfort, happiness, satisfaction, peace.
And maintaining this peace requires food, and food that I enjoy. I don't think I am alone in this realization. Which is why so many women my age appear to "let ourselves go". It's not just shifting hormones, changing metabolism, or genetics. I am not lazy or no longer concerned with my appearance. I am just concerned with so many other things as well, and the struggle to maintain a certain weight often seems like so much vanity when compared to my effectiveness at work or how well I am sleeping and getting along with others or the state of my home life.
It's difficult for me to accept my current girth. I was always anxious that enjoyable meals would result in this. But, I do not have those telltale symptoms of pending obesity that I exhibited when I joined Weight Watchers - there's no blood sugar issues or shortness of breath or brain fog and mental fatigue. My joints don't ache or cry out in protest when I engage in physical activity. And most of the time I feel pretty good - as long as I am eating home-cooked meals.
And I think that is an important distinction. What we eat most definitely impacts not only our health, but how we feel, both physically and emotionally. While last night's photo was a shock, I will not take the drastic actions of my younger self. I will continue to enjoy my meals and my dining experiences, just maybe in smaller portions. And I will accept that my long-term sense of well-being does not depend on me being a size 6.
And, in closing, here is the shocking photo from last night. I am on the left, raising my glass in celebration, healthy and happy and completely at ease.
And today I am thinking about the ramifications of enjoying food. It started last night at a happy hour to send off one of my favorite coworkers to her next job, which should have been a really good time. Then someone took a group shot. And I saw myself. And I was shocked. I have become a pillow, and a very lumpy one at that. One of my friends was generous enough to claim that it was the sweater I was wearing, but this was clearly not the case. (But I love her for saying so anyway.) And it hung over me like a dark cloud of failure. How had this happened?
Many of us women have spent most of our lives dieting in some manner, or at least convincing ourselves that food is just fuel to keep us healthy and active but not to be enjoyed. I know I've spent a good portion of my life since puberty afraid of what would happen if I actually started enjoying food.
And this is not the same as eating for enjoyment. I'm talking about enjoying what you are eating, and what this can lead to. And I eat some highly enjoyable meals. And my worst fears have come true. When I regularly eat food that I enjoy and I consistently take pleasure in my meals, I am 15 pounds heavier and 2 sizes larger than when I chose the more Spartan "food is fuel" outlook.
But I also see things like anxiety, depression, and insomnia subside. My concentration improves, and so does my productivity. I am good with a normal 8 hours of sleep and do not feel the need to nap. The truth is, my slimmer, lighter self comes at a price - my overall sense of well-being. When I diet, I am cranky, and not just because of food deprivation. Mealtime is transformed from an enjoyable sensory and social experience to something to be dreaded, a minefield of bad choices and regrets. And this detracts from my quality of life.
When I was younger, I really did fear that my greatest assets were physical, and that once my beauty faded, so would my perceived value. So, the trade off of security for beauty seemed like a fair one. As I have gotten older, though, my perception of myself has changed, as has what I want my life to look like, to feel like. While in my own residual self-image, I am still 125 pounds (and I am always deeply troubled by reminders that this is not actually true), I also see the value in a consistent level of comfort, happiness, satisfaction, peace.
And maintaining this peace requires food, and food that I enjoy. I don't think I am alone in this realization. Which is why so many women my age appear to "let ourselves go". It's not just shifting hormones, changing metabolism, or genetics. I am not lazy or no longer concerned with my appearance. I am just concerned with so many other things as well, and the struggle to maintain a certain weight often seems like so much vanity when compared to my effectiveness at work or how well I am sleeping and getting along with others or the state of my home life.
It's difficult for me to accept my current girth. I was always anxious that enjoyable meals would result in this. But, I do not have those telltale symptoms of pending obesity that I exhibited when I joined Weight Watchers - there's no blood sugar issues or shortness of breath or brain fog and mental fatigue. My joints don't ache or cry out in protest when I engage in physical activity. And most of the time I feel pretty good - as long as I am eating home-cooked meals.
And I think that is an important distinction. What we eat most definitely impacts not only our health, but how we feel, both physically and emotionally. While last night's photo was a shock, I will not take the drastic actions of my younger self. I will continue to enjoy my meals and my dining experiences, just maybe in smaller portions. And I will accept that my long-term sense of well-being does not depend on me being a size 6.
And, in closing, here is the shocking photo from last night. I am on the left, raising my glass in celebration, healthy and happy and completely at ease.
Sunday, August 25, 2013
Ultimate Weekend Pancake Breakfast
Pancakes are tricky, although most people do not realize this. To get a light, fluffy pancake, you need to sacrifice flavor. But for a truly flavorful pancake, you almost always end up with something closer to a crepe. Personally, I'll take the flavor over the fluffiness. But, recently my counterpart came up with a recipe that provides both. The key - acidulation. By adding things like vinegar and cultured dairy, you give the baking powder a boost and can scale back on it a bit. You also inject the batter with a little savory zing, adding more depth to the flavor. If you serve these up right away, they are light, fluffy, and flavorful - pancake perfection.
For the batter you will need:
1 1/2 cups self rising flour
(or add two teaspoons baking powder)
2 eggs
2 tablespoons grapeseed oil
1 tablespoon olive oil
1/3 cup milk
1/3 cup cream
1/3 cup labne (or Greek yogurt)
1 tablespoon corn syrup
1 tablespoon brown sugar
1 teaspoon white vinegar
1 teaspoon vanilla
Mix everything together, and mix it well. Use your submersion blender to truly homogenize your batter. You won't regret it.
Let the batter rest for at least 15 minutes or up to 24 hours. The longer the batter rests, the fuller the flavor will be. And here's another key to flavorful pancakes - something wonderful happens when you mix eggs and flour. The longer they are exposed to each other, the richer their combined flavor. But. most of us do not want to wait a full day for our pancakes. This recipe is enough to serve two today and two again tomorrow, making it the ultimate weekend pancake breakfast recipe.
Once the batter has rested, lightly oil your omelet pan with a little light-tasting oil like grapeseed. Cook one pancake in the pan over medium-low heat. Gently check the underside and flip when it is a golden color. Continue to cook until the other side is also golden.
Serve these bad boys up topped with fresh strawberries and maple syrup with a little bacon on the side, and enjoy your weekend.
For the batter you will need:
1 1/2 cups self rising flour
(or add two teaspoons baking powder)
2 eggs
2 tablespoons grapeseed oil
1 tablespoon olive oil
1/3 cup milk
1/3 cup cream
1/3 cup labne (or Greek yogurt)
1 tablespoon corn syrup
1 tablespoon brown sugar
1 teaspoon white vinegar
1 teaspoon vanilla
Mix everything together, and mix it well. Use your submersion blender to truly homogenize your batter. You won't regret it.
Let the batter rest for at least 15 minutes or up to 24 hours. The longer the batter rests, the fuller the flavor will be. And here's another key to flavorful pancakes - something wonderful happens when you mix eggs and flour. The longer they are exposed to each other, the richer their combined flavor. But. most of us do not want to wait a full day for our pancakes. This recipe is enough to serve two today and two again tomorrow, making it the ultimate weekend pancake breakfast recipe.
Once the batter has rested, lightly oil your omelet pan with a little light-tasting oil like grapeseed. Cook one pancake in the pan over medium-low heat. Gently check the underside and flip when it is a golden color. Continue to cook until the other side is also golden.
| In the pan |
Serve these bad boys up topped with fresh strawberries and maple syrup with a little bacon on the side, and enjoy your weekend.
| On the plate |
Sunday, August 18, 2013
Summer Steak is a Beautiful Thing
Any day that starts with pancakes and ends with steak is a good day, regardless of what happens in between. And, while I was not conscious enough this morning to capture the pancakes, I did manage to get something of tonight's steak.
This Sunday's dinner was a tribute to summer foods, and summer foods are truly wonderful. We picked up some fresh corn on the cob from the Hopkins produce stand just down the street from us that we worked into a beautiful medley with some red peppers and fresh fava beans on the side.
And the steak - a couple of 12-ounce striploins from D'Artagnan. These are strip steaks cut from the loin near the butt-end just below the ribs. It's cut from a tender part of the cow, albeit not as tender as the ribeye. My counterpart topped this all natural pasture-grazed beef with a garlic-jalapeno caramel glaze.
Now those who doubt that a garlic jalapeno caramel will work out here, just consider the typical steak sauce and then remove what doesn't work. What you end up with is garlic, peppers, salt, sugar, and vinegar. This was the basis for our sauce.
First, my counterpart sauteed slices of garlic and jalapeno in olive oil. He then added salt and a generous pour of sugar and continued cooking it until the sugar dissolved. He added a healthy pour of mild white vinegar, plus a good pour of white wine and continued to cook it, using a deglazing motion with a spatula to remove any residue from the pan. He finished it with a bit of King syrup and let it boil for a few minutes before removing it from the heat to rest.
The corn medley began with our fresh corn. If you are planning on removing it form the cob, here's another use for the MAP torch in the kitchen, once again proving that it's not just for creme brulee.
After you have husked your corn, use the torch to sear off the remaining corn silk, being careful not to actually sear the corn. Once that's done, cut the cobs in half and use a knife to gently cut off the kernels.
With corn that fresh and pristine, we wanted our red peppers to achieve a similar perfection, so Gareth took the extra step of skinning them. This can be done with a vegetable peeler and a gentle touch. Once peeled, he sliced them, as well as some onion and leek. This was our medley for this evening, and one that would prove to work out well with our caramel.
The best way to cook a steak is medium rare, While I have long maintained that this is a bit over-cooked, Gareth took care to cook tonight's steaks to this generally-accepted state of perfection. To do this at home, you'll want a generous amount of olive oil heated in a heavy skillet until just about smoking. First, pat down the steaks to remove any moisture. This will prevent things from becoming a bloody mess in your skillet.
Using two sets of tongs, carefully sear each side of the steak, starting with the fatty edge. If you do this right, you'll end up with a thin exterior that is seared and an interior that is red and slightly warm and just cooked enough to be on the civilized side of raw. When cooked in this manner, the juices are sealed inside, and you can cut through the tender meat easily with a sharp knife.
When all sides have been seared, remove the steaks from your pan and let them rest. The best way to do this is to set a small rack over a plate and rest the meat on the rack. This will allow some of the oil to drain.
The garlic and jalapeno caramel provided a bold counterpoint to the tender, mild steak, and was a great compliment to the sweet corn medley. With starchy fava beans on the side, this was a most excellent summer meal.
This Sunday's dinner was a tribute to summer foods, and summer foods are truly wonderful. We picked up some fresh corn on the cob from the Hopkins produce stand just down the street from us that we worked into a beautiful medley with some red peppers and fresh fava beans on the side.
And the steak - a couple of 12-ounce striploins from D'Artagnan. These are strip steaks cut from the loin near the butt-end just below the ribs. It's cut from a tender part of the cow, albeit not as tender as the ribeye. My counterpart topped this all natural pasture-grazed beef with a garlic-jalapeno caramel glaze.
Now those who doubt that a garlic jalapeno caramel will work out here, just consider the typical steak sauce and then remove what doesn't work. What you end up with is garlic, peppers, salt, sugar, and vinegar. This was the basis for our sauce.
First, my counterpart sauteed slices of garlic and jalapeno in olive oil. He then added salt and a generous pour of sugar and continued cooking it until the sugar dissolved. He added a healthy pour of mild white vinegar, plus a good pour of white wine and continued to cook it, using a deglazing motion with a spatula to remove any residue from the pan. He finished it with a bit of King syrup and let it boil for a few minutes before removing it from the heat to rest.
The corn medley began with our fresh corn. If you are planning on removing it form the cob, here's another use for the MAP torch in the kitchen, once again proving that it's not just for creme brulee.
After you have husked your corn, use the torch to sear off the remaining corn silk, being careful not to actually sear the corn. Once that's done, cut the cobs in half and use a knife to gently cut off the kernels.
With corn that fresh and pristine, we wanted our red peppers to achieve a similar perfection, so Gareth took the extra step of skinning them. This can be done with a vegetable peeler and a gentle touch. Once peeled, he sliced them, as well as some onion and leek. This was our medley for this evening, and one that would prove to work out well with our caramel.
The best way to cook a steak is medium rare, While I have long maintained that this is a bit over-cooked, Gareth took care to cook tonight's steaks to this generally-accepted state of perfection. To do this at home, you'll want a generous amount of olive oil heated in a heavy skillet until just about smoking. First, pat down the steaks to remove any moisture. This will prevent things from becoming a bloody mess in your skillet.
Using two sets of tongs, carefully sear each side of the steak, starting with the fatty edge. If you do this right, you'll end up with a thin exterior that is seared and an interior that is red and slightly warm and just cooked enough to be on the civilized side of raw. When cooked in this manner, the juices are sealed inside, and you can cut through the tender meat easily with a sharp knife.
When all sides have been seared, remove the steaks from your pan and let them rest. The best way to do this is to set a small rack over a plate and rest the meat on the rack. This will allow some of the oil to drain.
The garlic and jalapeno caramel provided a bold counterpoint to the tender, mild steak, and was a great compliment to the sweet corn medley. With starchy fava beans on the side, this was a most excellent summer meal.
Subscribe to:
Posts (Atom)