Showing posts with label chicken. Show all posts

Friday, December 6, 2013

Weekday Coq au Vin

What I love most about winter is my counterpart invariably pulls out Le Gastronomique for a little old school comfort food. This week, he tried his had at that old classic Coq au Vin. As the name implies, this is basically chicken in a wine sauce. And it is a very old recipe with some accounts tracing it back to Julius Caesar in Gaul. A variant of the dish first appeared in print in 1864. Then, about 100 years later, Julia Child brought it to the U.S. in her seminal cookbook and featured it often on her cooking show.

The basis of Coq au Vin - chicken and wine
The recipe was most likely developed as a means of preparing old rooster, so there is a certain amount of time devoted to simmering the chicken in the wine to help season it. Even if you used a conventional bird from the grocery store, you still want to allow sufficient simmering time for that authentic flavor to develop. You need to create a sauce that is flavorful enough to both compensate for the mildness of the slow-cooked meat, but also complements it without overpowring it. And, while many have tried, there is no real getting around the long, slow cook required to get this right. But there is a way to mitigate it so that you can even have authentic coq au vin on a school night. The trick is the slow cooker.

So, the night before, you will have left overs because you will be prepping your authentic coq au vin. One of the truly nice things about this dish is that it does not require any esoteric ingredients. We had everything we needed on hand for this without needing to stop by the grocery store. And in the 30-45 minutes it takes for your leftovers to reheat in the oven, you will be able to brown your meat and prep your veg.

You will need:
  • About 4 pounds of chicken, cut up (We used a pack of chicken thighs with the skin on that we deboned)
  • About 3 oz of bacon, also cut up
  • Onions
  • Mushrooms
  • Leek
  • Carrot
  • Potato
  • A heavy hand of Mediterranean seasoning on our chicken
  • Brandy
  • About half a bottle of a nice wine
  • A bit of habanero sauce or some other hot sauce to help cut the richness of the dish
  • A bit of sugar to help cut the bitter
  • A bit of flour
First, brown the bacon in a heavy pot. While it is browning, season the meat. We recommend sage, thyme, oregano, savory, white pepper, salt, and a bit of that habanero sauce. Place the chicken skin-side down directly on top of the bacon.

Start with a nice base of bacon

Continue to cook the chicken in the bacon fat while you prep your veg, remembering to turn the chicken a couple of times with your tongs.

Heavily seasoned chicken cooking in the bacon


You'll also want to sprinkle a handful of flour over the chicken. This will mix with the fats and will help things thicken in this first cooking.

A little flour never hurts


And, prepping the veg is not so bad for this dish as you will want large chunks of veg. Make sure to peel the potatoes and carrots, and to thoroughly clean your leek.

Large chunks of veg

Once the chicken has cooked through and the outside has browned, add a generous pour of brandy to the pot. If you have the time and you want to be truly authentic, light it up and flame it off. We passed on this step and just let the heat of the pot cook off the booze.

When it looks like this, it's ready for the booze

You'll also want to add that nice wine, and also a bit of sugar. While the French may say you'll get the sugar from the wine, we used a domestic and were not hedging our bets.

A splash of brandy

A lot of wine


Give the wine some time to cook as well. Then, gently transfer the contents of your pot to your 2-quart measuring cup. Once it has cooled a bit, place a lid on it and let it rest in the refrigerator overnight for the flavors to mingle.

When it looks like this, it's done for the night

A large measuring cup is ideal for overnight storage

Bag up your veg for the night also.

The next morning, get out that slow cooker. Place the potatoes in first at the bottom of the pot. Then add the rest of the veg. Then place the meat on top, pouring the liquid from the meat over the whole thing and add a couple of cups of water as well.

Set your slow cooker for 4-6 hours and go on your merry way to work. When you get home, your coq au vin will be cooked, and you'll just have to make the sauce. This is a necessary and quick step, so don't get over-excited and skip it, no matter how good the kitchen smells.


This is what I came home to on Thursday
Empty the contents of the slow cooker into a colander to strain the sauce from the meat and veg. Then strain the liquid again through a mesh colander or something similar. This is also a necessary step to remove the sediment from the sauce. Here's a photo depicting why you should do this.

Why you need to strain that sauce

Place the strained sauce in a pan on the stove over medium heat. Dissolve some potato starch in a bit of water and add it to the sauce and simmer until slightly thickened.

Thickening the sauce on the stovetop

Arrange your chicken pieces and veg in a wide, shallow bowl and top with the sauce. And go easy on that sauce. That golden color and delicious flavor comes from animal fat. Plus, the surprise best-tasting element of this dish - the onions. They come out sweet and fatty and melt in your mouth. And that's how you get coq au vin on a Thursday night.


Weekday Coq au Vin

Thursday, August 8, 2013

Perfect Pesto

We were both driving home from our separate jobs in our separate cars when we both heard the same story on NPR and both had the same thoughts about dinner tonight. With the abundance of fresh basil this time of year and the rising cost of pine nuts, on this evening's program they featured a recipe for Pistachio Pesto. It was presented by the author of an Italian cookbook, and even though we disagreed with her about basil (she says it's sweet when it's really a bitter) and olive oil (she says it's fruity when it's actually nutty), we trusted her on the whole pistachio as a substitute for pine nuts thing.


It's been a while since we have had pesto. I have had a long-standing prejudice against nuts that has been respected for about eight years now. But, after my own personal cooking experience with them a few months back, I was able to identify the root cause of my nut issue (the skin that clings to the nut after it has been shelled - disconcerting in its texture and bitter flavor), and the nut prohibition has been lifted. This is our first dinner featuring nuts since.

Your basic pesto is basil, garlic, pine nuts, and olive oil. You could stop there if you wanted and still have something quite nice to toss with your pasta. Or you could go a little further and end up with something truly amazing.

Your first step is to cook that garlic. Mince it and brown it on the stovetop with minced onions. This will cut the bitterness and will release what natural sugars exist in these bulbs. Once they are translucent with golden edges, add some coarsely chopped nuts - for our dinner, we used pistachio, but you can also substitute macadamia nuts for a more mild nut flavor.


Let the nuts cook until heated through. Then, toss in the chopped basil, but also add some fresh oregano and parsley. These additional herbs will cut the bitter of the basil and bring out its sweeter notes. it will also boost the aroma and fresh flavor of your pesto.

Don't let the herbs cook too long before you pull it from the heat. Let it cool slightly, and the toss it with finely grated hard cheese - say, asiago or romano - and a dollop of a soft cheese like a mild goat cheese. Add some olive oil to help bind it together and it's ready for pasta.


Pesto pairs well with mild protein like chicken. Tonight, we roasted some chicken thighs and then topped them with uncured bacon and a little goat cheese. 


Served over hand cut pasta, this was pesto perfection. The pistachio was a little stronger than the traditional pine nuts, but was less bitter and really did work out very well in this application.


Wednesday, May 8, 2013

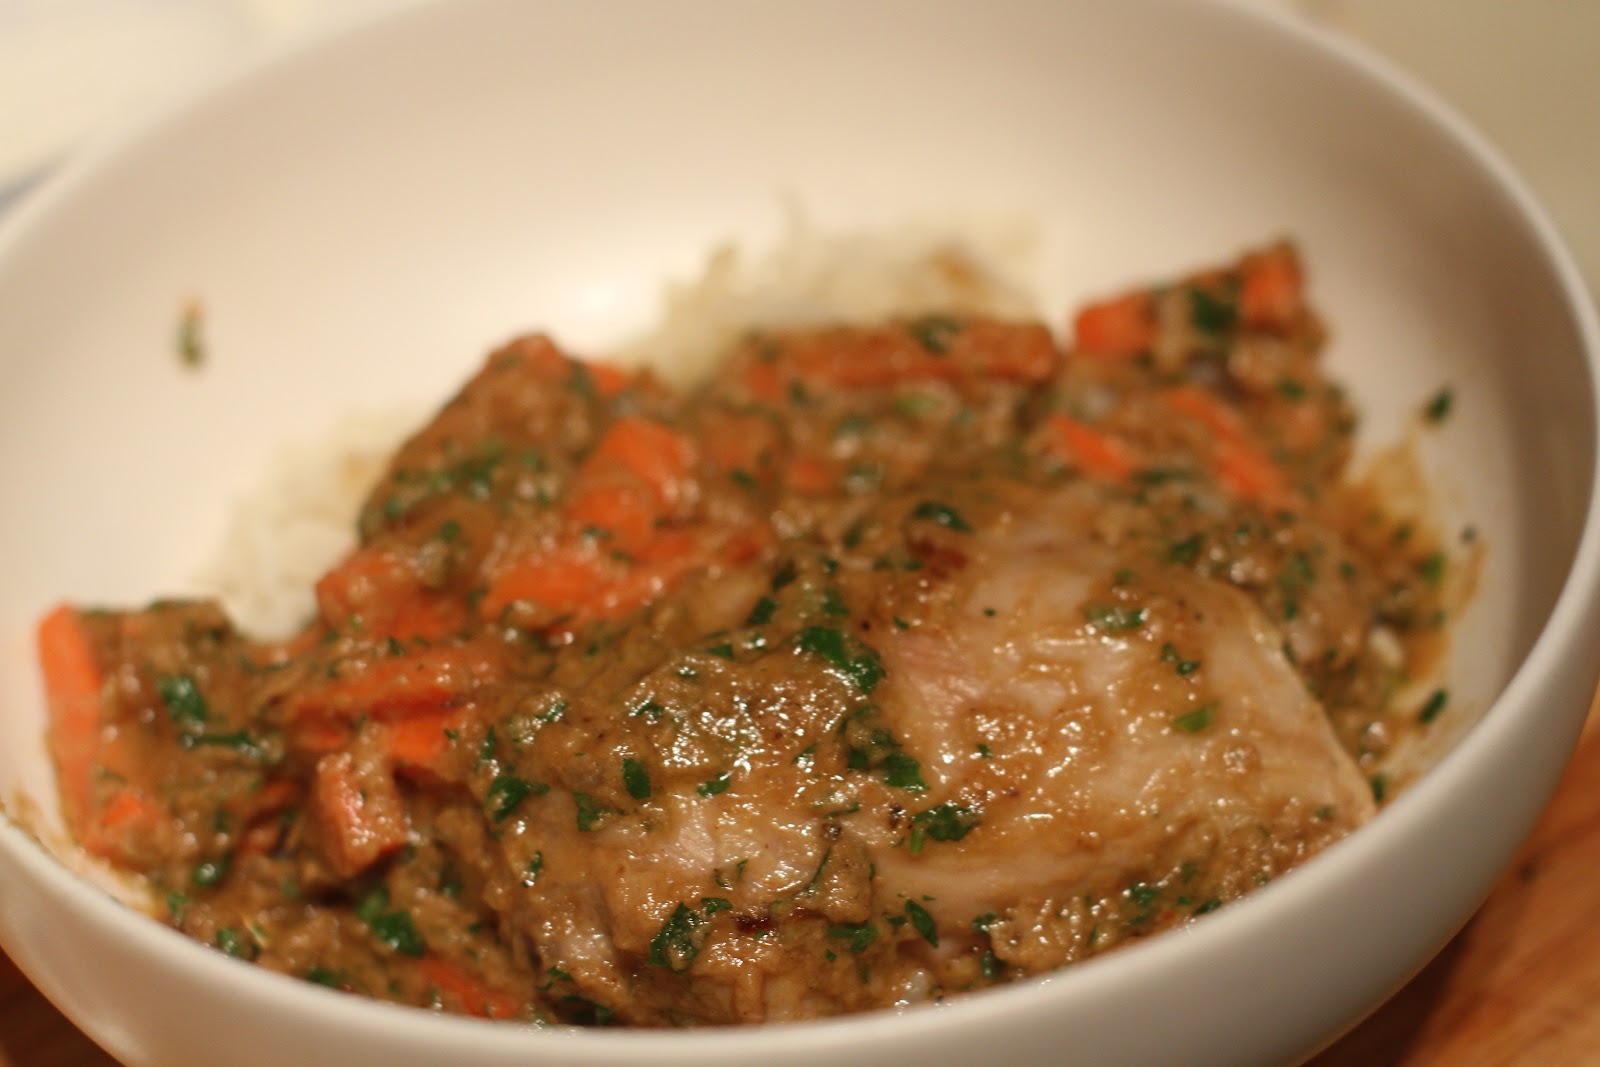
Moroccan Chicken with Pomegranate Glazed Carrots

My counterpart returned from Pittsburgh, and things have more or less returned to normal. Except that he is now telecommuting to Pittsburgh from the den. Which means until the weather is consistently nice for grilling, dinner will usually be something quick, like hot dogs or mac and cheese. This provides me with an opportunity to continue cooking. So long as he is open to experimentation.

Tonight I threw my hat in the ring with a Moroccan-themed dinner of chicken with pomegranate-glazed carrots. I thought these two dishes would go together as they have a similar flavor theme - cinnamon and coriander. The chicken recipe is for chicken that is first marinaded for six hours and then grilled. I adapted it for cooking on the stovetop by applying the seasonings as a rub rather than a marinade.

Tonight's flavor theme for dinner


First, I started some rice. Remember that the key to perfect rice is a splash of heavy cream.

For my chicken, I used a pack of chicken thighs that I cut into strips, because if it looks the same, it cooks the same.

I made my rub out of the seasonings for the marinade:

3 Tbsp ground cumin
1 1/2 tsp ground coriander
2 tsp ground cinnamon
2 tsp salt
2 tsp sugar 1/4 tsp cayenne pepper

Chicken rubbed with spices


I rubbed it into the cut thigh meat while I preheated some olive oil in a sturdy skillet. I sauteed the chicken in the oil over moderate heat until it was cooked through.

Cooked on the stovetop


I also cooked om carrots at the same time. For the pomegranate-glazed carrots, I cut my carrots into diagonal slices and sauteed them in olive oil for about five minutes before adding the following:

1/2 cup pomegranate juice
1 tsp cinnamon - the recipe calls for a cinnamon stick, which I did not have, so I used the same cinnamon as in the chicken
1/2 tsp salt
1/8 tsp pepper
1/2 tsp coriander - the recipe calls for roasted coriander seeds - I used the same ground coriander as in the chicken

The recipe indicates that as this cooks, the pomegranate juice will cook down and may a glaze. This did happen. Kind of. I think it is relying on some natural sugar form the carrots to create the glaze, so timing is important. I think my timing was a little off, along with my seasonings. My carrots were not overcooked; however, the flavor of the dish was overpowered by the pomegranate.

Carrots with a pomegranate glaze


The chicken fared much better. It had a vaguely Moroccan flavor to it with just a little sweetness from the sugar. I think this recipe worked well as a rub and wish I had taken the time to let the flavors set before cooking.

Here are the links to the recipes as they appeared on epicurious:

Grilled Chicken Moroccan Style
Pomegranate-Glazed Carrots


Tonight's dinner - a fair success

Sunday, February 17, 2013

The VacMaster VP112 and Preparing for Spring

This weekend was a weekend to take care of things. As the seasons change, so does the kitchen. Casseroles and roasts and pastas make way for lighter fare. In our case, we invariably migrate to the quick and easy protein of Mexican food similar to what my counterpart was exposed to as he came of age in Escondido and San Marcos. This always serves us well as the longer, warmer days pull us out into the yard to make further inroads into the holly and creeper and roses gone to seed that surround our home.

This focus on resolving longstanding problems was heralded by the arrival of the long-awaited VacMaster P112 we ordered back in January. For those not familiar, this is the prosumer vacuum sealer with the engineering of the professional food service vacuum sealer scaled down for home kitchen use. It does carry a price tag, but the bags that go with it are about a dime apiece. For anyone who stocks a lit of cheeses and specialty meats like we do, this device will pay for itself in the increased shelf life of your food.

 The real value of a good vacuum sealer is that it protects your food from its two greatest enemies - air and water. While a bad vacuum sealer can give you a false sense of security about your food only to have it go to rot and ruin despite your efforts, a good vacuum sealer more than doubles the shelf life of perishable items.

The devise is fairly straightforward to use. Start with a clean, dry bag and place your perishables inside.

Wisconsin sharp cheddar - highly valuable and highly perishable


Cutting the bag to size


Now here is where it differs from those inferior vacuum sealers we have tried in the past. Most consumer vacuum sealers attempt to suck the air out of the bag and then apply a heat seal. The VacMaster has a chamber that you place your perishables in. Then, the air is removed from the chamber.

In the chamber it goes


TheVacMaster VP112 in action


Vacuum sealed cheese


The vacuum strength and the duration of the sealing time are independently adjustable as well. so you can seal anything from hard cheese to chicken stock. Which we did. In fact, we vacuum sealed half the kitchen. Even bread. We even resealed a bag of MSG in its original bag.

In every instance, my counterpart gleefully declared "Suck It!". And, in every instance, a good, strong, airtight seal was formed, making our food safe for long-term storage in either freezer or fridge.

Labeled and ready for storage


For dinner, we turned to a couple of classics - roast chicken, Spanish rice, and beans.

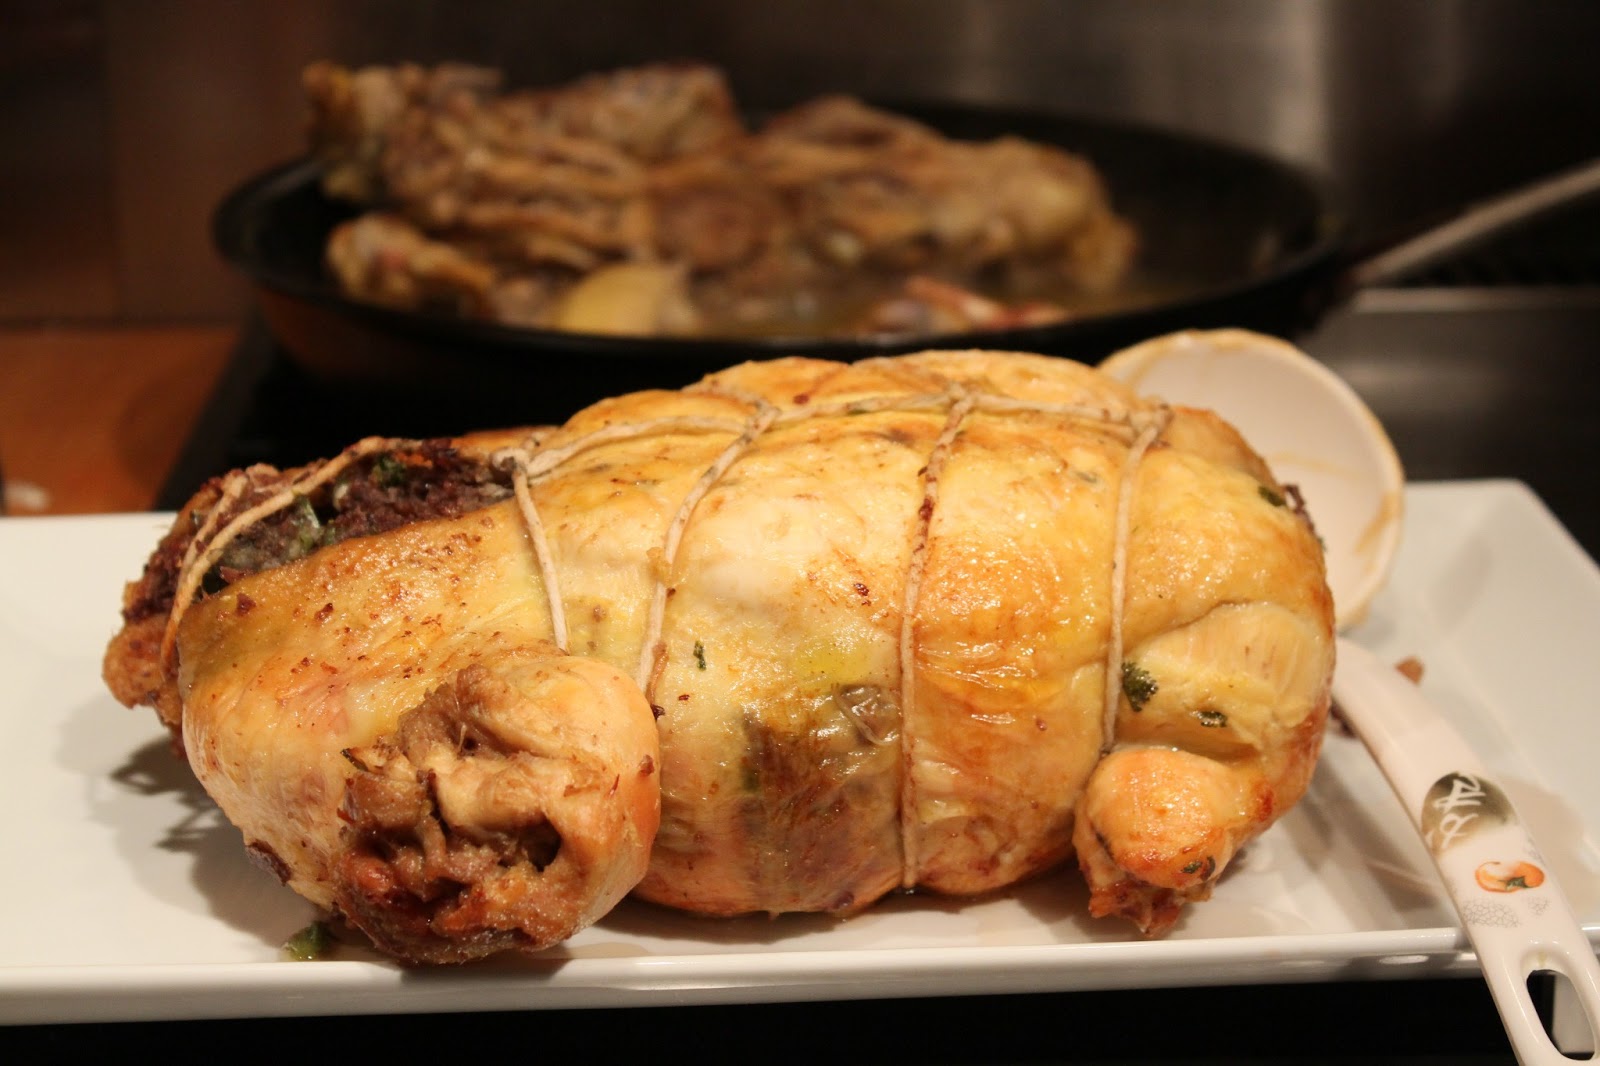
Deboned chicken stuffed with jalapenos, cilantro, and blue corn chips


Gareth tried his hand at deboning again. This time, he stuffed the empty carcass with a mixture of diced jalapenos, fresh cilantro, and crushed blue corn chips,a wonderful combination that was spicy with a slightly peanut undertone.

He also made a cheesy sauce from flour, cheddar cheese, heavy cream, and the succulent drippings from the chicken roast.

Here's that chicken roast with the beans, Spanish rice, cheesy sauce, and a little creme Mexicana


And he vacuum sealed the leftovers.


Vacuum sealed chicken roast


Saturday, December 29, 2012

Surprise Chicken Thighs

Sometimes I get caught off guard, and I am completely unprepared for what comes out of the kitchen. Sometimes I really have no idea what is going on in there. Tonight was one of those occasions. When my counterpart asked what I thought of chicken and mushrooms over pasta (with a little leftover lamb to round out the two chicken thighs in the house), I assumed I would be getting a fairly workaday dinner - tasty, to be sure, but nothing extravagant. Well, that is never a safe bet at my house.

While I was relaxing in front of the fire, my counterpart was preparing an exceptional pasta dish. I will provide what details I can, but I did not fully realize what he was up to for quite some time. In fact, by the time I started paying attention, he had the chicken thighs cooked, the lamb reheated, the pasta dough resting, and a little stock going. And this was no ordinary stock. He was stocking our little bag of giblets.

We save our giblets from everything - turkey, chicken, the occasional small game. We keep them in a ziplock bag in the freezer, and every few months we make pate. Regular readers know that we have been eating quite a bit of small game over the last few months - squab, rabbit, pheasant, to name a few. Each of these little delicacies has come with an equally delectable packet of giblets. So, we had quite the exotic collection on hand. Gareth simmered these with some of the smaller lamb bones left from our Christmas shoulder roast, some leek, onion, and bay leaves and made an aromatic stock that became the base for the mushroom sauce.

The mushrooms themselves were sauteed in goat butter and marsala. Once cooked, a little flour and the stock were added, along with Gareth's favorite secret ingredients - sriracha and a little Thai fish sauce, both of which add a little depth to the sauce. The sriracha provides a little spicy zing while the fish sauce brings a little umami undertone that is not readily identifiable beyond a rich, savory quality. That, combined with the irony flavor of the gizzard stock and the robust marsala made for a complex layering of flavors that the mushrooms took with grace and panache, holding the sauce while it clung to them and supporting those flavors with just a little hint of earthiness.

Then, Gareth added the crowning touch. He pulled some of the more tender giblets out of the stock pot, minced them up, and gave them a quick saute in more goat butter and marsala. He added this to the sauce, plus just a splash of cream, and my so-called chicken and mushrooms was ready.

And, because I wasn't paying attention, the only shot I got was plated up and on the table. I could tell by the aroma that I had missed out on a quality cooking experience. Then I tasted it, and as the meaty, savory mushrooms and tender meat and hearty pasta mixed in my mouth, I thought of nothing else until my plate was clean.


Tuesday, April 17, 2012

Mary Cooks: Tempura

Tempura is deceptively simple. The batter consists of just a few ingredients, and you don't even have to mix it thoroughly. It's one of my favorite foods, so, armed with explicit instructions from the Japanese Food section of About.com, I embarked on another cooking adventure.

Mis en place


Veggies prepped
As always, first I prepped my veg. I selected carrot, zucchini, and red bell pepper. I cut them into sticks as the restaurant tempura I've found easiest to eat has been in this shape. According to About.com, all you need is 1 egg, 1 cup ice water, and 1 cup flour. Beat the egg and then gently mix in the water and flour.

I think this looks about right


Once I had my batter, I heated a inch or two of oil in a heavy skillet. I used small kitchen tongs to dredge my veg through the batter and place in the hot oil and then placed the cooked tempura on a plate lined with paper towel.


Carrot tempura cooling while zucchini cooks in the background


And I learned the complexities of tempura that reflect its true nature. My tempura was soggy. Not greasy, but.....soggy. This can result from several factors, including over-mixing the batter, not using cold enough water, too much excess moisture in the veg, and not laying the cooked tempura in a single layer to cool. This can also be prevented by paying closer attention to all of those things, and by adding a little potato starch to the batter.  Even so, I was pleased enough with the results to pack up the left overs for lunch tomorrow.

I also prepared a little meat to accompany my tempura. Last year, I went to the Towson location of Pho Dat Thanh and had caramel fish for the first time. I've been fascinated with it ever since. I attempted to recreate the flavor of that dish this evening. I used chicken instead of fish and set bite-sized pieces to marinade in soy sauce liberally seasoned with ginger and pepper while I cooked my tempura.

Chicken in ginger soy sauce marinade


To get the caramel flavor, I preheated my pan but I let it get really hot. I then added the chicken and all of the marinade, followed quickly with about half a cup of water. I reduced the heat and let it come up to a boil, then added some sugar. When the liquid was reduced by half, I added some of Sunday's left over rice and let it simmer until the rice was sufficiently reheated. The sauce thickened as it cooked down.


The sauce thickening as it cooks down


The result was a very gingery brown sauce with a slight hint of caramel. Unlike the soggy tempura, the caramel chicken was a definite success.

Dinner for one

Monday, March 12, 2012

Mary Cooks: Chicken with Roasted Lemon, Green Olives and Capers

Experiences that engage multiple senses make solid and lasting memories. This is part of the reason why a certain smell or taste can evoke vivid childhood experiences. It's also part of why eating and family meals are so important. And, it's part of what led to Monday's dinner. As I was perusing recipes on epicurious.com, I came across this. Even though lemon + olives + capers = a very bitter sauce, the recipe reminded me so much of the food I had in Milan, I suffered a wave of nostalgia so strong that, against all reason, I decided this was the dish to make for dinner. So, without further ado, I present Monday's dinner: Chicken with Roasted Lemons, Green Olives, and Capers


Mis en place


Roasted Lemons
12 thin lemon slices (from 2 lemons) - I used a single lemon and got 8 thin slices
Olive oil

Preheat oven to 325°F. Line baking sheet with parchment paper. Arrange lemon slices in single layer on prepared sheet. Brush lemon slices with olive oil; sprinkle lightly with salt. Roast until slightly dry and beginning to brown around edges, about 25 minutes. (Lemons can be made 1 day ahead. Transfer to container. Cover; chill.)

Roasted lemon slices


Chicken
4 large skinless boneless chicken breast halves - I used thighs and cut them into bite-sized pieces. After the unfortunate cashew chicken from last week, everything is in bite-sized pieces. If it looks the same, it cooks the same. Which means: for even cooking, make sure everything is cut the same size.
All purpose flour
5 tablespoons olive oil - I used half for my meat and the other half for some veg
1/2 cup sliced pitted green Sicilian olives or other brine-cured green olives
2 tablespoons drained capers
1 1/2 cups chicken stock or canned low-salt chicken broth
1/4 cup (1/2 stick) butter, cut into 4 pieces - I totally left this out
3 tablespoons chopped fresh parsley - I substituted cilantro

I also added a vegetable medley consisting of:
1/2 white onion, diced
1 red bell pepper, diced
1 jalapeno, diced
1 small zucchini, cut into matchsticks
1 large clove garlic

Before you even start cooking, prep the veg. Then, on a separate cutting board, prep the meat. Remember that the veg to meat ratio should be about 5:2.

Still not enough veg, but an improvement over last week


Sprinkle chicken with salt and pepper. Dredge chicken in flour to coat both sides; shake off excess. I sprinkled salt, pepper, and flour on my chicken bites and tossed it all together to coat. 


Heat 5 tablespoons oil in heavy large skillet over high heat. Add chicken and cook until golden brown, about 3 minutes per side. Stir in olives and capers. Add stock and bring to boil, scraping up browned bits from bottom of skillet. Boil until liquid is reduced to syrup consistency, turning chicken over after 3 minutes, about 5 minutes. Reading this passage, it sounds like if you flour your meat and then add stock to it as it cooks, you will get meat simmering in a beautiful sauce. This is a blatant fallacy. The sauce will separate as soon as you remove the heat. Which mine did. 

Magic sauce

While the chicken was cooking, I heated a separate pan for my veg. The onion, peppers and garlic will all cook at about the same speed. The zucchini cooks quicker, even in larger pieces, so I let everything else cook for about 7 minutes before I added it to the mix.


Note that the veg will cook down to about half the original volume


 I also started a pot of pasta.

Three pans on the stove top and something roasting in the oven - that's very chefy

 
Add butter, roasted lemon slices, and 2 tablespoons parsley; simmer until butter melts and chicken is cooked through, about 2 minutes. Season with salt and pepper. Transfer to platter. Sprinkle with remaining 1 tablespoon parsley. OK, so I skipped the butter, but did add the roasted lemon and cilantro and let it simmer until the pasta cooked. The sauce separated and had to be reconstituted with a little cream and some additional stock. Gareth topped it off with a hard cheese.

The finished product. Even cheese can't save this dish.


Now, here's where I have to say that some recipes are just not good ideas. This might be one of them. While it was only marginally edible, Gareth could see the direction I was trying to go with this. There are several fundamental things wrong with this recipe that need to be addressed for any level of success:
  1. The lemons. Lemon zest and lemon juice are both very good things in a sauce. Actual lemon slices? Not so much. On his third bite, my counterpart got a lemon slice in his mouth and was unable to continue.
  2. The capers. They are pungent. They are vinegary. They are bitter. There are really only two dishes in which capers will really work: a bagel with lox, and pate. Both contain other strong flavors for which the caper is a counterpoint, and both contain a high volume of dairy. Unless you;re using a quart of cream, leave the capers out of it.
  3. The sauce. There is no magic sauce that thickens in the cooking process because the meat is coated with flour. This is really cooking code for "lazy-ass sauce". Whenever you see cooking instructions like this, just break out your medium sauce pan and make a roux like you're supposed to. 
So, Monday's dinner was not exactly a success. But it wasn't a complete failure, either. I learned a little more about food and cooking. Plus we both had a pretty good laugh.

Saturday, March 10, 2012

Mary Cooks: Week 1

This week, I managed to produce three fairly decent evening meals.They were all very different, so even though they were all chicken, they all had their own distinct flavor. And no one got food poisoning. Which is progress for me.

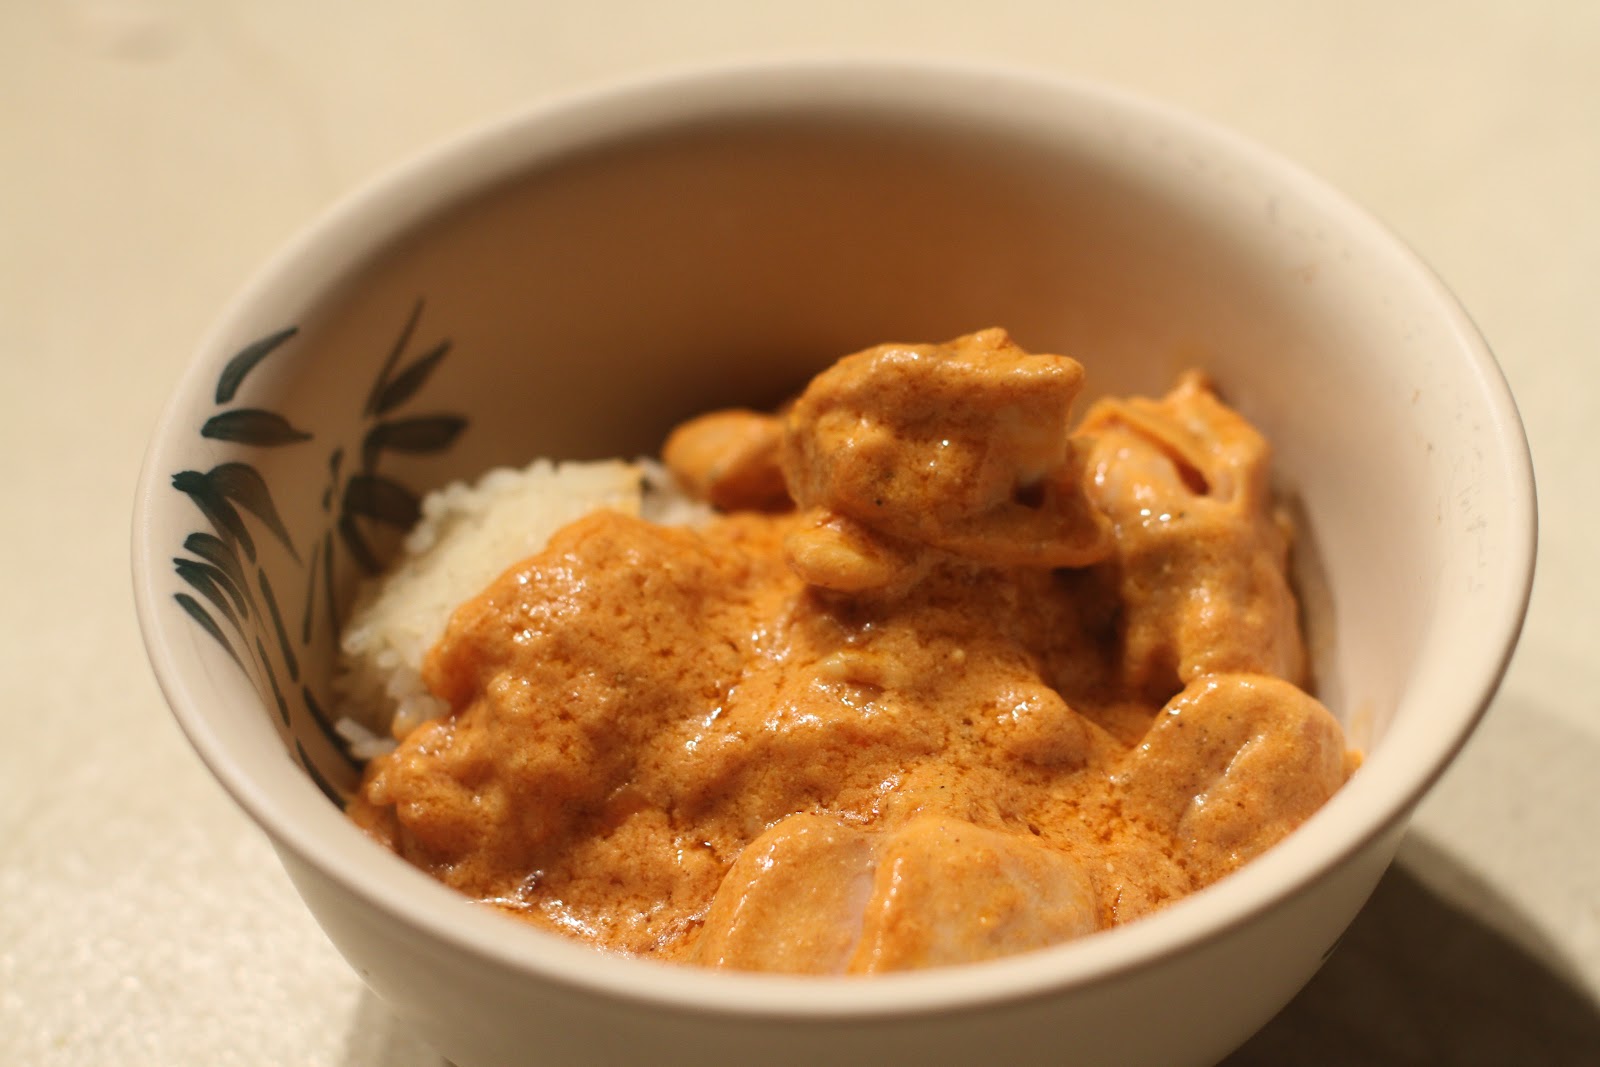
Monday: Butter Chicken
Indian Butter Chicken
This was really the strongest meal of the week. This one also had the most pre-planning. We started discussing this on the previous Friday. I looked at maybe a dozen different recipes before I found the one I wanted to use. And I followed the recipe fairly closely. And even though I had never cooked Indian food before, the result was a well-cooked meal that even tasted fairly authentic. Thinking about a meal for three days before you sit down to cook is not going to get you dinner every night. However, a bit of planning is a definite success factor in the kitchen. It's best to be familiar with what you are cooking - whether through comparing various recipes or talking it over with a friend - so that when it comes time to start cooking, you have an approach.

Dubious Cashew Chicken
Tuesday: Cashew Chicken
This was the disaster of the week. It was random and haphazard. Even though we talked about this one over the weekend, I never really got a concept in my brain for this dish until I found the Peanut Chili Chicken recipe I based it on. With no solid approach, I made several mistakes which resulted in undercooked chicken and a serious lack of veg. Like everything else in life, in the kitchen failure to prepare is preparation for failure. While the cashew coconut chili sauce was rich and flavorful, the other shortcomings of the meal made it mediocre at best.

Wednesday: Bad Meal Resuscitation
All that being said, the Cashew Chicken really wasn't too far off and only had a couple of things that needed correction.

First, to completely cook the chicken, we cut it off the bone and into bite-sized pieces. This is almost always a winning plan for meat for the novice cook. It will cook quickly and completely, and provides maximum visibility into the cooking progress.

Second, we cut up five times the amount of vegetables I used the previous night. We used cabbage and some additional onion, which was cooked in a separate pan and added to the chicken at the end

Third, we had to salvage the sauce. Overnight, the oil in the cashew butter separated from everything else. Once the chicken had been pulled out for remedial action, the sauce was reheated over moderate heat to pull it back together. My counterpart took the lead as I was at a loss. He added some cream to help keep it together. The additional dairy muted the impact of the three Thai chilis, so he added some Tabasco and a generous does of Korean garlic chili sauce. He also made sure it got hot enough to bubble. After sitting overnight in the same container as undercooked chicken, this is necessary to ensure any harmful bacteria from the raw meat are sufficiently dealt with.

These three simple steps moved the dish into the successful area. Even though I was frustrated and disappointed with the whole Cashew Chicken experience, the work I did on Tuesday wasn't too far off. A little more planning and a little more prep work would have made all the difference.

Thursday: Spanish Style Chicken with Saffron
Spanish Style Chicken with Saffron, Take 1
Here's where I stepped outside my typical working zone in the kitchen. I found this recipe on Thursday morning and didn't give it a second thought - I knew this was dinner. I read it several times and thought about how the dish should feel and taste and be presented, moving from the basic mechanics of assembling ingredients based on a recipe to considering the overall intent of that recipe. While I still had some missteps - the recipe called for peas, which turned out to be not quite right - I really liked the end result. The sauce itself makes this worth a second try. I'll be preparing this again next week with a slightly different approach. And more veg. American recipes never have enough veg.

Friday: Prep Night
On Fridays, we typically hit the grocery store to buy the following week's supplies, and to discuss the meal plan. I'll be taking the lead again next week, so there will be more chicken. I'll be boning and skinning the chicken today, and making stock from the skin and bones. I'll pack up my meat into separate packages that contain enough for dinner plus leftovers for lunch. I know my raw veg content should be about five times the volume of my raw meat, which means about 20 minutes of prep work before I even start to cook. And I know how and when to deglaze a pan. Which is considerable progress.