2013 was another exciting year for us in the kitchen. We continued our exploration of cooking techniques, new and old, with delicious results. Here are our ten favorite posts from the last year:
Ballotine of Pheasant
This was the first of many pheasant cooking techniques and our first (and so far only) foray into modernist cooking. We introduced meat glue into the classic ballotine meat binding process with passable results.
How to Debone a Whole Chicken
We demonstrate the deboning technique depicted in Larousse Gastronomique using the tools from our home kitchen, proving that with a little practice the hobbyist cook can master Olde World cooking skills.
Traditional Bouillabaisse
Every year we post a variation on my favorite seafood dish. In 2013, we went old school and replicated the process advocated by Larousse Gastronomique.
Limas and Ham
We delved more deeply into traditional Americana cooking last year, including this superior take on good old pork and beans.
A Primer on Fiddlehead Ferns
After seeing these tender little shoots appear at our local Wegmans for several springs, 2013 was the year we took the plunge. The result was one of my favorite meals of the year.
Filleting Fish and Prepping Fava Beans
This two-for-one post shows how to fillet a fish in your own kitchen, as well as how simple it is to prepare the tender, buttery fava beans.
Ultimate Pancakes
2013 was the year we perfected pancakes. The secret - cultured dairy. While buttermilk is a favorite, we used labne for a more delicate flavor.
All About the Gravy
Just in time for Thanksgiving, my counterpart shares his best gravy secrets.
Weekday Coq au Vin
We employed the slow cooker to achieve this classic French dish on a Thursday night, made entirely from ingredients found in most home kitchens.
Boeuf Bourguignon
We wrapped up the year with another French classic that was a big hit at the holiday potluck.
And, our year in review wouldn't be complete without a shout out to last year's birthday gift to ourselves - the VacMaster VP112 chamber vacuum sealer for the home. This one tool has reduced food spoilage and waste in our kitchen, allowing us to preserve cheeses, sauces, and leftovers for future use.
Showing posts with label cooking. Show all posts
Wednesday, January 1, 2014
Sunday, December 15, 2013
Bœuf Bourguignon
My favorite fellow foodie from work was gracious enough to invite me to her annual holiday party again this year. The last time, I was in the throws of Last Minute Holiday Panic and ended up bringing a store-bought cake (ugh). This year, I wanted to make up for that by providing something extra special that she and her guests might not ever make for themselves. I solicited the support of my very chefy counterpart, and after some discussion, we agreed on that classic French holiday party favorite: Beef Bourguignon.
| Beef, wine, lardon, olive oil, and a bit of brandy - the basis for our dish |
Like its chicken sibling, Coq au Vin, Beef Burgundy originated in French Wine country and was popularized in the States by the singular Julia Child. This traditional country stew is designed to give new life to middling cuts of beef. Basically, we are dressing up economical cuts of beef into something really quite special. And, chuck is an economical cut to be sure. Here are some of the things we considered when selecting our chuck:
Choosing Beef:
The Beef should come from the Chuck section of the cow. Meaning the top muscle section that supports the neck and connects to the back of the ribs.
In the actual Chuck Eye Roll, there are a combination of different meats, varying in toughness. The Tender top portion is the Chuck eye, and underneath that is a tougher bottom section. This roast is not usually used for Dry Cooking, but is used for BBQ and stews.
![]() |
From PressureCookerDiaries.com |
In the actual Chuck Eye Roll, there are a combination of different meats, varying in toughness. The Tender top portion is the Chuck eye, and underneath that is a tougher bottom section. This roast is not usually used for Dry Cooking, but is used for BBQ and stews.
We also researched several approaches, including the classic recipe from Julia Child, as well as the very brief entry in Larousse Gastronomique. My counterpart crafted a recipe that seemed to capture the essence of the dish. Here is his recipe with my photos.
Ingredients:
8 oz. (generous) Pork Belly
5 lbs Beef Chuck Roast or very thick chuck steak from the Chuck Eye. (“Beef Chuck eye Roll”)
Olive Oil.
White Flour for dusting
6 Cups of Burgundy Wine (1.5 liters)
3 Large (restaurant size) Carrots
2 Leeks
1 Large (restaurant size) Onion
Celeriac Root.
1 ½ Small Pearl Onions
2 lbs. Small White New Potatoes
Bouquet Garnie, of Bay Leaf, Thyme, Sage, and a little oregano
Salt for seasoning the meat
1 Cup (8oz) Tomato Paste (Goya Latino, Salsa de tomato)
3 sprigs Thyme
Directions:
Cook Pork belly in Olive Oil. To prepare the pork belly, freeze it until it is firm, and then slice it with a sharp knife. Cut it down into small strips and fry it in a heavy pot with a generous pour of olive oil.
Cube beef and dry. Trim off any fat or gristle using a sharp knife or kitchen shears.
Season with Salt, Pepper, with a little ground Oregano and a little ground sage, then dust with white flour.
Then, place it in a warm oven at 175 for a few minutes to dry.
Fry in Pan, high heat, until Gratin (Brown Crust) is formed on the outside of the meat. Remove the meat and separate out the pork belly and discard.
Add 1 large onion, and Thyme. Continue to cook in the fat. Deglaze the pan with ½ of a bottle of Burgundy Wine.
| Sliced pork belly fat is a good source of lardon |
| Fry it up until it is crisp |
Cube beef and dry. Trim off any fat or gristle using a sharp knife or kitchen shears.
Season with Salt, Pepper, with a little ground Oregano and a little ground sage, then dust with white flour.
| Just dust it, do not bread it |
Then, place it in a warm oven at 175 for a few minutes to dry.
| A warm oven is a good way to dry meat |
Fry in Pan, high heat, until Gratin (Brown Crust) is formed on the outside of the meat. Remove the meat and separate out the pork belly and discard.
| Dried beef browned with lardon |
Add 1 large onion, and Thyme. Continue to cook in the fat. Deglaze the pan with ½ of a bottle of Burgundy Wine.
Add Carrots, Leek, Celeriac to a Large Stewing pot, with the Bouquet Garni,
Pour Beef mixture over vegetables in the stewing pot. Add a generous pour of brandy and flame it to burn off the alcohol.
Transfer to a large roasting pan and add the rest of the bottle of burgundy.
Bake for about an hour at 350, then add small potatoes. If you do not see the sauce bubbling, turn up the heat. Bake for 1 more hour, and then add pearl onions. Portion out some of the sauce and thicken it with sugar, a can of tomato paste, and some potato starch. Add the sauce to the pan and bake for 1 further hour. Total bake time is about 3 hours.
Remove from the oven and let it rest for about 10 minutes before serving.
Pour Beef mixture over vegetables in the stewing pot. Add a generous pour of brandy and flame it to burn off the alcohol.
Transfer to a large roasting pan and add the rest of the bottle of burgundy.
| Add the entire bottle of wine |
Bake for about an hour at 350, then add small potatoes. If you do not see the sauce bubbling, turn up the heat. Bake for 1 more hour, and then add pearl onions. Portion out some of the sauce and thicken it with sugar, a can of tomato paste, and some potato starch. Add the sauce to the pan and bake for 1 further hour. Total bake time is about 3 hours.
Remove from the oven and let it rest for about 10 minutes before serving.
Friday, December 6, 2013
Weekday Coq au Vin
What I love most about winter is my counterpart invariably pulls out Le Gastronomique for a little old school comfort food. This week, he tried his had at that old classic Coq au Vin. As the name implies, this is basically chicken in a wine sauce. And it is a very old recipe with some accounts tracing it back to Julius Caesar in Gaul. A variant of the dish first appeared in print in 1864. Then, about 100 years later, Julia Child brought it to the U.S. in her seminal cookbook and featured it often on her cooking show.
The recipe was most likely developed as a means of preparing old rooster, so there is a certain amount of time devoted to simmering the chicken in the wine to help season it. Even if you used a conventional bird from the grocery store, you still want to allow sufficient simmering time for that authentic flavor to develop. You need to create a sauce that is flavorful enough to both compensate for the mildness of the slow-cooked meat, but also complements it without overpowring it. And, while many have tried, there is no real getting around the long, slow cook required to get this right. But there is a way to mitigate it so that you can even have authentic coq au vin on a school night. The trick is the slow cooker.
Empty the contents of the slow cooker into a colander to strain the sauce from the meat and veg. Then strain the liquid again through a mesh colander or something similar. This is also a necessary step to remove the sediment from the sauce. Here's a photo depicting why you should do this.
| The basis of Coq au Vin - chicken and wine |
So, the night before, you will have left overs because you will be prepping your authentic coq au vin. One of the truly nice things about this dish is that it does not require any esoteric ingredients. We had everything we needed on hand for this without needing to stop by the grocery store. And in the 30-45 minutes it takes for your leftovers to reheat in the oven, you will be able to brown your meat and prep your veg.
You will need:
- About 4 pounds of chicken, cut up (We used a pack of chicken thighs with the skin on that we deboned)
- About 3 oz of bacon, also cut up
- Onions
- Mushrooms
- Leek
- Carrot
- Potato
- A heavy hand of Mediterranean seasoning on our chicken
- Brandy
- About half a bottle of a nice wine
- A bit of habanero sauce or some other hot sauce to help cut the richness of the dish
- A bit of sugar to help cut the bitter
- A bit of flour
Continue to cook the chicken in the bacon fat while you prep your veg, remembering to turn the chicken a couple of times with your tongs.
You'll also want to sprinkle a handful of flour over the chicken. This will mix with the fats and will help things thicken in this first cooking.
| Heavily seasoned chicken cooking in the bacon |
You'll also want to sprinkle a handful of flour over the chicken. This will mix with the fats and will help things thicken in this first cooking.
And, prepping the veg is not so bad for this dish as you will want large chunks of veg. Make sure to peel the potatoes and carrots, and to thoroughly clean your leek.
| Large chunks of veg |
Once the chicken has cooked through and the outside has browned, add a generous pour of brandy to the pot. If you have the time and you want to be truly authentic, light it up and flame it off. We passed on this step and just let the heat of the pot cook off the booze.
| When it looks like this, it's ready for the booze |
You'll also want to add that nice wine, and also a bit of sugar. While the French may say you'll get the sugar from the wine, we used a domestic and were not hedging our bets.
| A splash of brandy |
Give the wine some time to cook as well. Then, gently transfer the contents of your pot to your 2-quart measuring cup. Once it has cooled a bit, place a lid on it and let it rest in the refrigerator overnight for the flavors to mingle.
| When it looks like this, it's done for the night |
| A large measuring cup is ideal for overnight storage |
Bag up your veg for the night also.
The next morning, get out that slow cooker. Place the potatoes in first at the bottom of the pot. Then add the rest of the veg. Then place the meat on top, pouring the liquid from the meat over the whole thing and add a couple of cups of water as well.
Set your slow cooker for 4-6 hours and go on your merry way to work. When you get home, your coq au vin will be cooked, and you'll just have to make the sauce. This is a necessary and quick step, so don't get over-excited and skip it, no matter how good the kitchen smells.
| This is what I came home to on Thursday |
| Why you need to strain that sauce |
Place the strained sauce in a pan on the stove over medium heat. Dissolve some potato starch in a bit of water and add it to the sauce and simmer until slightly thickened.
| Thickening the sauce on the stovetop |
Arrange your chicken pieces and veg in a wide, shallow bowl and top with the sauce. And go easy on that sauce. That golden color and delicious flavor comes from animal fat. Plus, the surprise best-tasting element of this dish - the onions. They come out sweet and fatty and melt in your mouth. And that's how you get coq au vin on a Thursday night.
Tuesday, November 26, 2013
Holiday Baking: Old School Pumpkin Pie
I've never made a pumpkin pie. This is primarily because I've never had a pumpkin pie that I like as much as a good fruit pie. So, for the holidays, my counterpart gets what was traditional for my family growing up in close proximity to Wisconsin's cherry orchards - a nice tart cherry pie. Even on Thanksgiving.
This year I decided to give the man a break and muster up a home made, fresh pumpkin pumpkin pie. I always kind of liked my mom's approach. She uses a standard recipe but doubles the spice except for the clove, which she halves. This creates a nice spicy pie. But, there's still something weird about the texture of most pumpkin pies. Maybe it's the prevalence of canned pumpkin?
I did a bit if research and found an old-school recipe for pumpkin pie on the Food52 blog. And, by old school, I mean it predates the era in which I was raised, where condensed milk was as ubiquitous in the kitchen as flour, sugar, and eggs. I feel as if the women who raised me put that stuff in everything. My first fudge recipe called for a fair amount of the stuff.
And, maybe this is also part of my issue with pumpkin pie. I can't get beyond that tinned milk flavor of so many fillings. So when I found a recipe that used good old fashioned cream, I knew I had a winner.
Food52 attributes this recipe to Meta Given, who published the two-volume Encyclopedia of Modern Cooking sometime in the 1940's. It calls for caramelizing the pumpkin, as well as limiting the spice to cinnamon and ginger. It also bakes in about 25 minutes.

For Meta Given's Caramelized Pumpkin Pie you will need:
A 9-inch pie pan lined with pastry (I like the Deluxe Butter Pastry from Joy of Cooking)
1 3/4 cups cooked pureed pumpkin
3/4 cups sugar
1/2 teaspoon salt
1 teaspoon ground cinnamon
1/2 teaspoon ground ginger
2 eggs
1 cup cream
1/2 cup milk
To prepare the pureed pumpkin, you'll want a sharp knife, a kitchen shears, and a vegetable peeler. First, cut the pumpkin into quarters and use the kitchen shears to cut out the seeds an all those little threads. Then, use the vegetable peeler to peel the skin. Roast them in the oven at about 350 until the internal temperature of the pumpkin is 140 or so. While your pumpkin is roasting, you can prepare your crust.
When your pumpkin is out of the oven and has cooled a bit, use a parking knife to cut it down into smaller pieces. Then mash it with your potato masher before pureeing it with an immersion blender.
Make sure to roll out your pie crust and get it in your pie pan before you start the filling. This comes together quickly, and the recipe calls to pour the fresh-from-the-stove-top filling into a chilled pie shell. So, get your crust in your pie pan and place it in the freezer to chill while you make the filling. Also, I made enough pie crust for two pies. This is a good thing to do if you are making a recipe for the first time, or if you are a holiday baker only and haven't really baked since new year's brunch. This way, if the pie doesn't turn out, you've got another crust on hand to quickly try again.
Here's something else that will help, especially with this recipe. Basically, you've got three main components: the pumpkin, your dry ingredients, and your wet ingredients. Premix the sugar, salt, and spices and set aside. Then, beat your eggs and pre-mix the egg, cream, and milk.
Now you are ready to caramelize your pureed pumpkin. Place it in a heavy saucepan over direct heat. I started mine out on high heat and watched while it looked (and smelled) like it was scorching. It stuck to the pan and really made me more than a little anxious. So, I turned the heat down a bit and kept going. The recipe says it should take about 10 minutes to caramelize. And, after about 5 minutes, the scent changed, and it did indeed begin to smell a bit like caramelized sugar. After about 8 minutes, the pumpkin was starting to brown and had achieved a slightly dry texture.
Remove the pumpkin from the heat and fold the sugar mixture into the still-hot pumpkin. Use a good spatula, too, as the sugar is going to react with the hot pumpkin. As I mixed the sugar, I noticed that all the pumpkin residue that I saw sticking to my pan came right off and mixed in with the rest.
Once everything is well combined, mix in the cream mixture. I used my immersion blender, but a hand mixer would probably be more appropriate.
Now, here's the second area of concern for me. The filling is liquid. Like really liquid. I got a little concerned that I had skipped a step or something. But, no, it is supposed to be this way. There are eggs in there, and they will cook. So, I removed my pie shell from the freezer and used a small soup ladle to gently transfer my steaming hot pie filling into the very chilled pastry, ladling some off into a small glass dish to serve as a taste test. This is another good thing to do if you are trying a new recipe as it gives you a chance to sample the filling before the pie is out on the table in front of guests.
Bake the pie in a pre-heated 400-degree oven for about 25 minutes, or until the filling has set. The recipe says this is when it is slightly jiggly and the area in the center is still liquid. It also says that a pumpkin pie that has been cooked properly has a smooth surface that has not cracked. My pie cooked in about 30 minutes and was somewhere in between these two guide posts.
Plus, it looked burnt. So, after allowing my taste test some time to cool, I gave it a try. This is a unique pie filling that does indeed taste strongly of pumpkin. The light spicing of ginger and cinnamon allow the actual flavor of the pumpkin to dominate, as the recipe promised. Plus, there is an undertone of caramel that is subtle but noticeable. The texture is clearly an egg-based filling, although not quite a custard. Overall, I am pleased. I hope my counterpart is also.
This year I decided to give the man a break and muster up a home made, fresh pumpkin pumpkin pie. I always kind of liked my mom's approach. She uses a standard recipe but doubles the spice except for the clove, which she halves. This creates a nice spicy pie. But, there's still something weird about the texture of most pumpkin pies. Maybe it's the prevalence of canned pumpkin?
I did a bit if research and found an old-school recipe for pumpkin pie on the Food52 blog. And, by old school, I mean it predates the era in which I was raised, where condensed milk was as ubiquitous in the kitchen as flour, sugar, and eggs. I feel as if the women who raised me put that stuff in everything. My first fudge recipe called for a fair amount of the stuff.
And, maybe this is also part of my issue with pumpkin pie. I can't get beyond that tinned milk flavor of so many fillings. So when I found a recipe that used good old fashioned cream, I knew I had a winner.
Food52 attributes this recipe to Meta Given, who published the two-volume Encyclopedia of Modern Cooking sometime in the 1940's. It calls for caramelizing the pumpkin, as well as limiting the spice to cinnamon and ginger. It also bakes in about 25 minutes.
For Meta Given's Caramelized Pumpkin Pie you will need:
A 9-inch pie pan lined with pastry (I like the Deluxe Butter Pastry from Joy of Cooking)
1 3/4 cups cooked pureed pumpkin
3/4 cups sugar
1/2 teaspoon salt
1 teaspoon ground cinnamon
1/2 teaspoon ground ginger
2 eggs
1 cup cream
1/2 cup milk
To prepare the pureed pumpkin, you'll want a sharp knife, a kitchen shears, and a vegetable peeler. First, cut the pumpkin into quarters and use the kitchen shears to cut out the seeds an all those little threads. Then, use the vegetable peeler to peel the skin. Roast them in the oven at about 350 until the internal temperature of the pumpkin is 140 or so. While your pumpkin is roasting, you can prepare your crust.
When your pumpkin is out of the oven and has cooled a bit, use a parking knife to cut it down into smaller pieces. Then mash it with your potato masher before pureeing it with an immersion blender.
Make sure to roll out your pie crust and get it in your pie pan before you start the filling. This comes together quickly, and the recipe calls to pour the fresh-from-the-stove-top filling into a chilled pie shell. So, get your crust in your pie pan and place it in the freezer to chill while you make the filling. Also, I made enough pie crust for two pies. This is a good thing to do if you are making a recipe for the first time, or if you are a holiday baker only and haven't really baked since new year's brunch. This way, if the pie doesn't turn out, you've got another crust on hand to quickly try again.
Here's something else that will help, especially with this recipe. Basically, you've got three main components: the pumpkin, your dry ingredients, and your wet ingredients. Premix the sugar, salt, and spices and set aside. Then, beat your eggs and pre-mix the egg, cream, and milk.
Now you are ready to caramelize your pureed pumpkin. Place it in a heavy saucepan over direct heat. I started mine out on high heat and watched while it looked (and smelled) like it was scorching. It stuck to the pan and really made me more than a little anxious. So, I turned the heat down a bit and kept going. The recipe says it should take about 10 minutes to caramelize. And, after about 5 minutes, the scent changed, and it did indeed begin to smell a bit like caramelized sugar. After about 8 minutes, the pumpkin was starting to brown and had achieved a slightly dry texture.
| Caramelized Pumpkin |
Remove the pumpkin from the heat and fold the sugar mixture into the still-hot pumpkin. Use a good spatula, too, as the sugar is going to react with the hot pumpkin. As I mixed the sugar, I noticed that all the pumpkin residue that I saw sticking to my pan came right off and mixed in with the rest.
| With sugar and spice |
Once everything is well combined, mix in the cream mixture. I used my immersion blender, but a hand mixer would probably be more appropriate.
| With cream and egg mixed in |
Now, here's the second area of concern for me. The filling is liquid. Like really liquid. I got a little concerned that I had skipped a step or something. But, no, it is supposed to be this way. There are eggs in there, and they will cook. So, I removed my pie shell from the freezer and used a small soup ladle to gently transfer my steaming hot pie filling into the very chilled pastry, ladling some off into a small glass dish to serve as a taste test. This is another good thing to do if you are trying a new recipe as it gives you a chance to sample the filling before the pie is out on the table in front of guests.
| Ready for the oven |
Bake the pie in a pre-heated 400-degree oven for about 25 minutes, or until the filling has set. The recipe says this is when it is slightly jiggly and the area in the center is still liquid. It also says that a pumpkin pie that has been cooked properly has a smooth surface that has not cracked. My pie cooked in about 30 minutes and was somewhere in between these two guide posts.
Plus, it looked burnt. So, after allowing my taste test some time to cool, I gave it a try. This is a unique pie filling that does indeed taste strongly of pumpkin. The light spicing of ginger and cinnamon allow the actual flavor of the pumpkin to dominate, as the recipe promised. Plus, there is an undertone of caramel that is subtle but noticeable. The texture is clearly an egg-based filling, although not quite a custard. Overall, I am pleased. I hope my counterpart is also.
![]() |
| The finished product |
Sunday, November 17, 2013
All About the Gravy
Thanksgiving is about 10 days away, so it's time to get serious about cooking again. The nice thing about Thanksgiving is that it is really all about the meal - that opulent turkey dinner that most of us only muster this one day of the year. And because that turkey is really the cornerstone of the day, you want to bring your A game.
To help prepare for this major cooking event, today's posting is all about the gravy.
But first, an important note about the turkey, because the wrong bird will stop you dead in your tracks. I bring this up because over the last few years I've seen an increase in turkeys that come with a sad little packet of pre-made gravy instead of the traditional packet of neck and giblets. Read the packaging carefully and make sure you pick up a bird with the giblets. Pull them out of the carcass, and trim the ends off the wings, and set them all aside for a moment.
Here's also a nice trick for roasting that will keep the bird moist and flavorful. Turkeys are pretty lean and are prone to drying out in the cooking process. While a free range bird is less likely to dry out than conventional birds, many of us keep it from drying out by adding fat like butter. Put the butter away and try this: Mix dried rubbed sage and salt into a couple of tablespoons of duck fat and rub that on the exterior of your turkey. Duck fat is easy enough to come by. Sometime between now and Thanksgiving, pick up a duck and treat yourself to a duck dinner. Drain off the fat and save it until Thanksgiving.
Once the turkey is in the oven, go back to those giblets. Now, most of us just cover them with water and leave them on the back burner to stock all afternoon. The key to a really flavorful giblet gravy is to brown them first - neck and all - in about a tablespoon of butter with some more sage and maybe a bit of oregano.
A bit if veg will also boost up the flavor. You'll want to add some carrot, leek, onion, and celery hearts as if you were preparing a mirepoix. Let the veg cook until softened. Then add a couple of cups of water to the pot and throw in about half a bullion cube. Now you can set it aside to simmer while the turkey roasts.
When the turkey is cooked through, you'll want to let it rest for a moment. While it is resting, go ahead and cut off some of those nice fatty bits near the butt. And, if you really want all those juices, pull the stuffing and turn the bird on its end to let everything drip down into the roasting pan.
With giblets, stock, pan drippings, and some nice fatty meat, you are now ready to make your gravy. You will also need flour, butter, olive oil, heavy cream, and some variety of flavoring like Worcestershire sauce. We use a bit of sriracha sauce and some Pik-a-Peppa.
Start with a simple roux. In a heavy pan, melt down 3 tablespoons butter and 1/2 tablespoon olive oil. Add to that about 4 tablespoons flour and mix with a spatula until the flour has blended with the fats and has cooked off. This is important because cooked flour makes sauce but raw flour only makes paste. Mind the heat so that you don't end up at the other extreme with scorched flour as this is not appropriate for this application.
Add your flavoring to the roux along with some heavy cream.
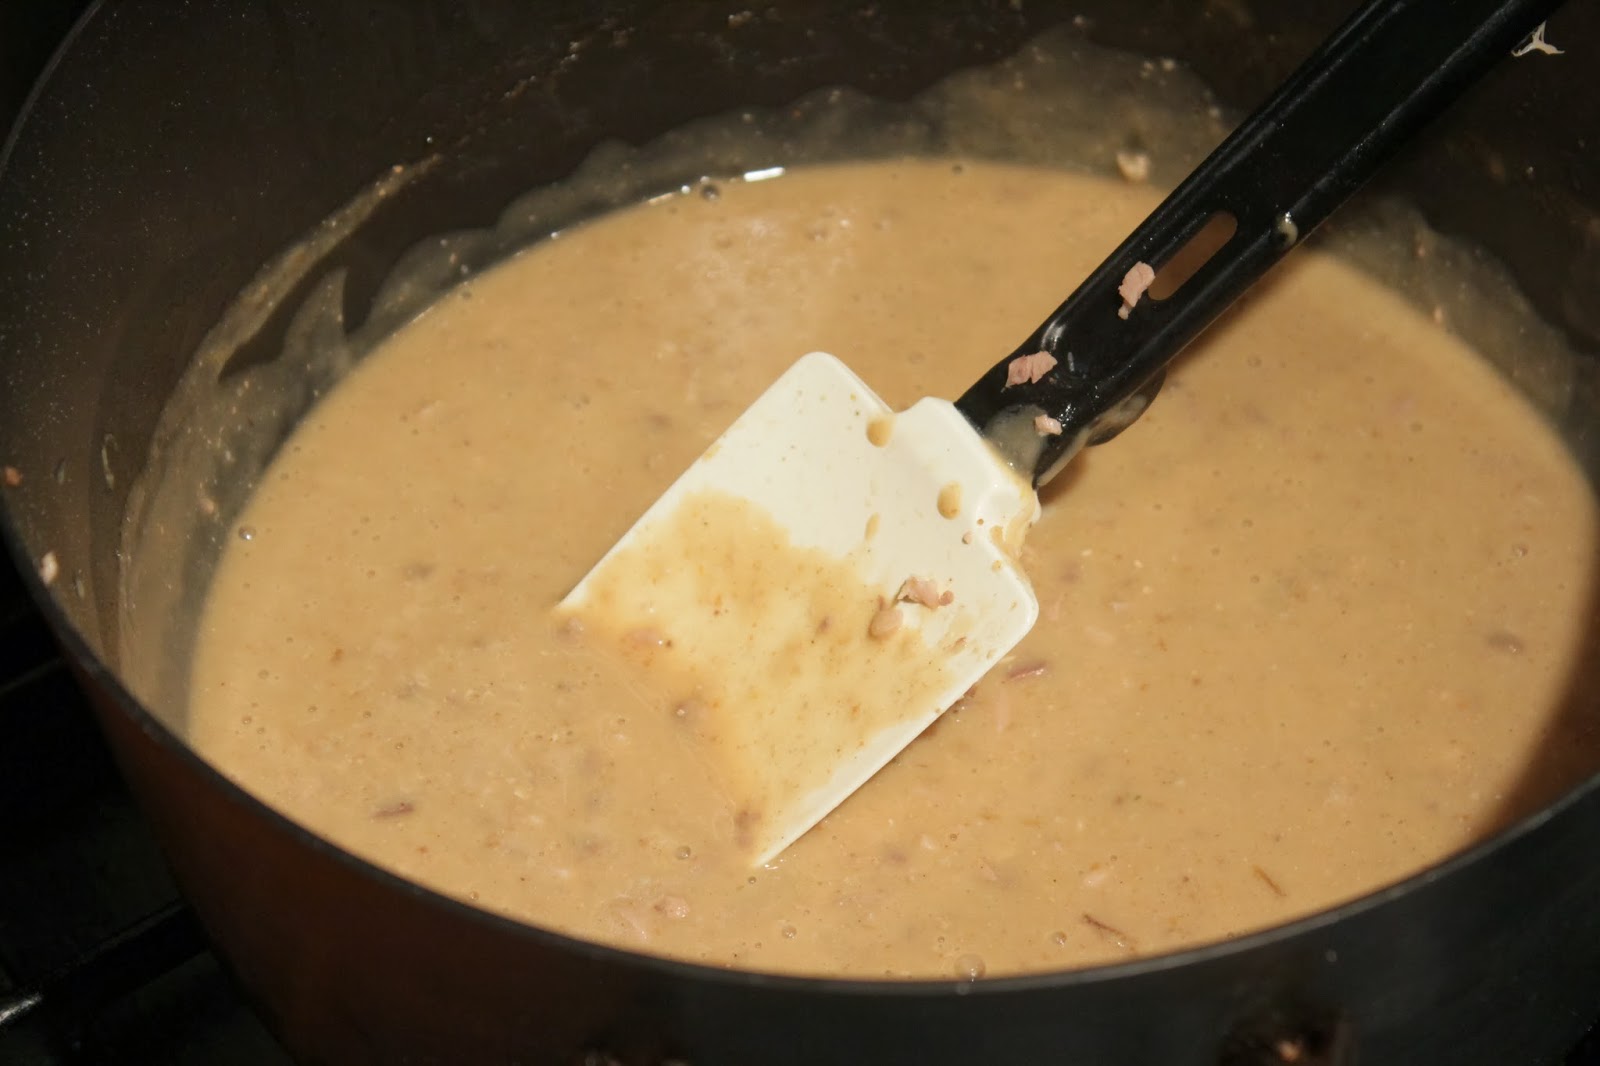
Use a spatula to scrape everything off the sides and bottom of the pan and carefully pour it into your gravy. Then, take those giblets off the back burner and strain the stock into the roasting pan to deglace the remaining sucs and add this to the gravy, keeping the heat fairly low.
Now, before you add the giblets, you'll want to get out the immersion blender to smooth out the roux. If you have a uniform texture to your gravy before you add the meat, your gravy will be much more like a sauce. Which is actually what it is.
You'll now want to mince the giblets and that fatty turkey butt meat and add them to the pot. And, finally, you'll take on the neck. This will need to be done by hand to ensure you get the maximum amount of meat without also getting any of the bone. And it's worth it. This is some tender flavorful meat. Carefully pick as much as you can from the neck and mince it up before adding it to the gravy.
Give everything a good stir. If it is not as thick as you'd like, get out the potato starch.You can find this at Asian markets, as well as at some kosher grocers. Mix a little with some water before adding to your gravy; then give it a couple of minutes to thicken up.
And, that is the perfect Thanksgiving gravy.
To help prepare for this major cooking event, today's posting is all about the gravy.
| Perfect giblet gravy |
But first, an important note about the turkey, because the wrong bird will stop you dead in your tracks. I bring this up because over the last few years I've seen an increase in turkeys that come with a sad little packet of pre-made gravy instead of the traditional packet of neck and giblets. Read the packaging carefully and make sure you pick up a bird with the giblets. Pull them out of the carcass, and trim the ends off the wings, and set them all aside for a moment.
Here's also a nice trick for roasting that will keep the bird moist and flavorful. Turkeys are pretty lean and are prone to drying out in the cooking process. While a free range bird is less likely to dry out than conventional birds, many of us keep it from drying out by adding fat like butter. Put the butter away and try this: Mix dried rubbed sage and salt into a couple of tablespoons of duck fat and rub that on the exterior of your turkey. Duck fat is easy enough to come by. Sometime between now and Thanksgiving, pick up a duck and treat yourself to a duck dinner. Drain off the fat and save it until Thanksgiving.
| Neck, giblets, wing tips, and butter |
| Mirepoix |
A bit if veg will also boost up the flavor. You'll want to add some carrot, leek, onion, and celery hearts as if you were preparing a mirepoix. Let the veg cook until softened. Then add a couple of cups of water to the pot and throw in about half a bullion cube. Now you can set it aside to simmer while the turkey roasts.
| Giblet stock |
When the turkey is cooked through, you'll want to let it rest for a moment. While it is resting, go ahead and cut off some of those nice fatty bits near the butt. And, if you really want all those juices, pull the stuffing and turn the bird on its end to let everything drip down into the roasting pan.
| Letting gravity do its thing |
With giblets, stock, pan drippings, and some nice fatty meat, you are now ready to make your gravy. You will also need flour, butter, olive oil, heavy cream, and some variety of flavoring like Worcestershire sauce. We use a bit of sriracha sauce and some Pik-a-Peppa.
| A little extra flavor |
Start with a simple roux. In a heavy pan, melt down 3 tablespoons butter and 1/2 tablespoon olive oil. Add to that about 4 tablespoons flour and mix with a spatula until the flour has blended with the fats and has cooked off. This is important because cooked flour makes sauce but raw flour only makes paste. Mind the heat so that you don't end up at the other extreme with scorched flour as this is not appropriate for this application.
| Cooked flour makes a sauce |
Add your flavoring to the roux along with some heavy cream.
Then, remove your turkey from the roasting pan and place it on a platter because it's time to add the drippings.
| Pan drippings |
Use a spatula to scrape everything off the sides and bottom of the pan and carefully pour it into your gravy. Then, take those giblets off the back burner and strain the stock into the roasting pan to deglace the remaining sucs and add this to the gravy, keeping the heat fairly low.
| Making use of the giblet stock |
Now, before you add the giblets, you'll want to get out the immersion blender to smooth out the roux. If you have a uniform texture to your gravy before you add the meat, your gravy will be much more like a sauce. Which is actually what it is.
| Emulsification |
You'll now want to mince the giblets and that fatty turkey butt meat and add them to the pot. And, finally, you'll take on the neck. This will need to be done by hand to ensure you get the maximum amount of meat without also getting any of the bone. And it's worth it. This is some tender flavorful meat. Carefully pick as much as you can from the neck and mince it up before adding it to the gravy.
| Giblets |
| Neck meat |
| Just needs a quick stir |
Give everything a good stir. If it is not as thick as you'd like, get out the potato starch.You can find this at Asian markets, as well as at some kosher grocers. Mix a little with some water before adding to your gravy; then give it a couple of minutes to thicken up.
And, that is the perfect Thanksgiving gravy.
Subscribe to:
Posts (Atom)