Any day that starts with pancakes and ends with steak is a good day, regardless of what happens in between. And, while I was not conscious enough this morning to capture the pancakes, I did manage to get something of tonight's steak.
This Sunday's dinner was a tribute to summer foods, and summer foods are truly wonderful. We picked up some fresh corn on the cob from the Hopkins produce stand just down the street from us that we worked into a beautiful medley with some red peppers and fresh fava beans on the side.
And the steak - a couple of 12-ounce striploins from D'Artagnan. These are strip steaks cut from the loin near the butt-end just below the ribs. It's cut from a tender part of the cow, albeit not as tender as the ribeye. My counterpart topped this all natural pasture-grazed beef with a garlic-jalapeno caramel glaze.
Now those who doubt that a garlic jalapeno caramel will work out here, just consider the typical steak sauce and then remove what doesn't work. What you end up with is garlic, peppers, salt, sugar, and vinegar. This was the basis for our sauce.
First, my counterpart sauteed slices of garlic and jalapeno in olive oil. He then added salt and a generous pour of sugar and continued cooking it until the sugar dissolved. He added a healthy pour of mild white vinegar, plus a good pour of white wine and continued to cook it, using a deglazing motion with a spatula to remove any residue from the pan. He finished it with a bit of King syrup and let it boil for a few minutes before removing it from the heat to rest.
The corn medley began with our fresh corn. If you are planning on removing it form the cob, here's another use for the MAP torch in the kitchen, once again proving that it's not just for creme brulee.
After you have husked your corn, use the torch to sear off the remaining corn silk, being careful not to actually sear the corn. Once that's done, cut the cobs in half and use a knife to gently cut off the kernels.
With corn that fresh and pristine, we wanted our red peppers to achieve a similar perfection, so Gareth took the extra step of skinning them. This can be done with a vegetable peeler and a gentle touch. Once peeled, he sliced them, as well as some onion and leek. This was our medley for this evening, and one that would prove to work out well with our caramel.
The best way to cook a steak is medium rare, While I have long maintained that this is a bit over-cooked, Gareth took care to cook tonight's steaks to this generally-accepted state of perfection. To do this at home, you'll want a generous amount of olive oil heated in a heavy skillet until just about smoking. First, pat down the steaks to remove any moisture. This will prevent things from becoming a bloody mess in your skillet.
Using two sets of tongs, carefully sear each side of the steak, starting with the fatty edge. If you do this right, you'll end up with a thin exterior that is seared and an interior that is red and slightly warm and just cooked enough to be on the civilized side of raw. When cooked in this manner, the juices are sealed inside, and you can cut through the tender meat easily with a sharp knife.
When all sides have been seared, remove the steaks from your pan and let them rest. The best way to do this is to set a small rack over a plate and rest the meat on the rack. This will allow some of the oil to drain.
The garlic and jalapeno caramel provided a bold counterpoint to the tender, mild steak, and was a great compliment to the sweet corn medley. With starchy fava beans on the side, this was a most excellent summer meal.
Showing posts with label summer. Show all posts
Sunday, August 18, 2013
Thursday, August 8, 2013
Perfect Pesto
We were both driving home from our separate jobs in our separate cars when we both heard the same story on NPR and both had the same thoughts about dinner tonight. With the abundance of fresh basil this time of year and the rising cost of pine nuts, on this evening's program they featured a recipe for Pistachio Pesto. It was presented by the author of an Italian cookbook, and even though we disagreed with her about basil (she says it's sweet when it's really a bitter) and olive oil (she says it's fruity when it's actually nutty), we trusted her on the whole pistachio as a substitute for pine nuts thing.
It's been a while since we have had pesto. I have had a long-standing prejudice against nuts that has been respected for about eight years now. But, after my own personal cooking experience with them a few months back, I was able to identify the root cause of my nut issue (the skin that clings to the nut after it has been shelled - disconcerting in its texture and bitter flavor), and the nut prohibition has been lifted. This is our first dinner featuring nuts since.
Your basic pesto is basil, garlic, pine nuts, and olive oil. You could stop there if you wanted and still have something quite nice to toss with your pasta. Or you could go a little further and end up with something truly amazing.
Your first step is to cook that garlic. Mince it and brown it on the stovetop with minced onions. This will cut the bitterness and will release what natural sugars exist in these bulbs. Once they are translucent with golden edges, add some coarsely chopped nuts - for our dinner, we used pistachio, but you can also substitute macadamia nuts for a more mild nut flavor.
Let the nuts cook until heated through. Then, toss in the chopped basil, but also add some fresh oregano and parsley. These additional herbs will cut the bitter of the basil and bring out its sweeter notes. it will also boost the aroma and fresh flavor of your pesto.
Don't let the herbs cook too long before you pull it from the heat. Let it cool slightly, and the toss it with finely grated hard cheese - say, asiago or romano - and a dollop of a soft cheese like a mild goat cheese. Add some olive oil to help bind it together and it's ready for pasta.

Served over hand cut pasta, this was pesto perfection. The pistachio was a little stronger than the traditional pine nuts, but was less bitter and really did work out very well in this application.
It's been a while since we have had pesto. I have had a long-standing prejudice against nuts that has been respected for about eight years now. But, after my own personal cooking experience with them a few months back, I was able to identify the root cause of my nut issue (the skin that clings to the nut after it has been shelled - disconcerting in its texture and bitter flavor), and the nut prohibition has been lifted. This is our first dinner featuring nuts since.
Your basic pesto is basil, garlic, pine nuts, and olive oil. You could stop there if you wanted and still have something quite nice to toss with your pasta. Or you could go a little further and end up with something truly amazing.
Your first step is to cook that garlic. Mince it and brown it on the stovetop with minced onions. This will cut the bitterness and will release what natural sugars exist in these bulbs. Once they are translucent with golden edges, add some coarsely chopped nuts - for our dinner, we used pistachio, but you can also substitute macadamia nuts for a more mild nut flavor.
Let the nuts cook until heated through. Then, toss in the chopped basil, but also add some fresh oregano and parsley. These additional herbs will cut the bitter of the basil and bring out its sweeter notes. it will also boost the aroma and fresh flavor of your pesto.
Don't let the herbs cook too long before you pull it from the heat. Let it cool slightly, and the toss it with finely grated hard cheese - say, asiago or romano - and a dollop of a soft cheese like a mild goat cheese. Add some olive oil to help bind it together and it's ready for pasta.
Pesto pairs well with mild protein like chicken. Tonight, we roasted some chicken thighs and then topped them with uncured bacon and a little goat cheese.
Served over hand cut pasta, this was pesto perfection. The pistachio was a little stronger than the traditional pine nuts, but was less bitter and really did work out very well in this application.
Tuesday, July 16, 2013
Mary Cooks: Shrimp Burritos
Here's a quick and easy summer meal that comes together fast and doesn't heat up the whole house. By keeping this burrito simple, the light flavor of the shrimp and fresh salsa come through for a satisfying dinner that doesn't leave you feeling bloated. As if the heat weren't already enough.
For my Shrimp Burritos, you will need start with the salsa. Salsa in its simplest form is tomatoes, peppers, and onions. Many feel that cilantro is a must. While it does add a little palate-cleansing freshness, personally I can live without it. What I need in my salsa is citrus.
For tonight's salsa, I used heirloom cherry tomatoes, jalapenos, a little garlic, and a little shallot. I also learned why you should take inventory of your ingredients before you start cooking. Once I had everything cut and ready for the immersion blender, I realized that we had no citrus fruit in the house.
In a move that my counterpart is sure to comment on later, I added a splash of lemonade. Here's why this works: It adds the necessary zip that comes from citrus (lemon, lime, orange, whatever). But it also adds some sugar to cut the bitter in the peppers, garlic, and shallots without clashing with the sugar in the tomatoes or blunting the heat from the peppers. I pulsed the immersion blender about five times and placed the salsa in the fridge to chill.
For the shrimp, you will want to steam them on the stovetop. How long this takes will depend on the size and quantity of your shrimp. I used four tiger shrimp that were only partially defrosted. They cooked through in about 15 minutes. Also, you should steam your shrimp in the shells and shell them once they are cooked.
And, if you are using large shrimp like mine, you'll want to cut them up once they are shelled.
Once the shrimp is cooked and cut, you'll also need an avocado and some sour cream. Note that I am forgoing the beans and cheese ans they will weigh this down and won't taste right here. Well, maybe the right kind of cheese, but certainly not the beans. I am also omitting the cabbage slaw that usually adorns fish tacos. I consider the cabbage to be a proper culinary mistake on the tacos and certainly a disaster here.
To prep your tortilla, heat it in a flat skillet over low heat on the stovetop. You'll want to warm it so that it loses some of its stiffness. This will make it easier to roll and will prevent tearing.
To assemble the burrito, place the warm tortilla on a large plate. Add the avocado first, placing it in the center. Then place the shrimp on top of it. Spoon the sour cream on one side of the shrimp and the salsa on the other side. Carefully fold up the bottom over the filling. Then bring one of the sides over and line it up with the other and roll tightly, tucking in the bottom securely.
Thursday, July 4, 2013
Freedom Pheasant
On my birthday, I usually get some variety of game, so it only makes sense that on our nation's birthday, this also holds true. And, since it is July, it's going to be grilled.
To mark Independence Day, my counterpart grilled up another pheasant. There are some preparations you need to make for grilling a game bird that are not necessary with a domesticated bird like your typical chicken. First, you'll need to understand that pheasants are only partially domesticated. Even the ones at the grocery store most likely were not raised on a farm but were allowed to fly freely in an open space. They don't go through a factory for cleaning and packaging like our mass-produced chickens and turkeys. They are most likely plucked and packaged by hand. This, combined with their more muscular physique, means that the first step to preparing your pheasant is to ensure that there are no little down feathers or quills on the carcass. You'll need to remove any plucking residue by hand.
And here's one of the rare occasions when you can use your MAP torch in the kitchen as this is a good way to finish the job. Remember you are not trying to sear the bird. You're just trying to burn off any little hairs that might remain.
To ensure even cooking on the grill, you'll want to split it down the middle, or even quarter it. We decided to quarter our bird.
Once it's split, you can season it with a little spice rub. For today's freedom pheasant, my counterpart combined mostly bitter flavors with a little heat, which tend to go well with the irony flavor of this game bird. This is a good spice mix for pheasant and other birds:
Ground oregano
Rubbed sage
Ground coriander
Chinese five spice
All spice
Red Tandoori spice
Salt
One of the problems with doing a spice rub is the presence of moisture from the cleaned bird. My counterpart resolves this by using a couple of large, shallow bowls. He placing his quarters in the first bowl for the rub. As he rubs each piece, he places it into the second bowl. Most of the moisture stays in int he first bowl, and the spices end up more evenly distributed.
For grilling meat, we are partial to the charcoal grill. It generates a nice smoke that is easily controlled for both heat and flavor. We didn't do anything fancy with any of the various types of natural wood we have been known to add to the grill. We simply started up the charcoal in our chimney starter, poured it into the grill, and let the flames die down until we had a nice smoldering heat.
Here's a nice thing you can do when grilling: place several lengthy sprigs of fresh rosemary on the grill and put your bird skin side up on the rosemary. Cover it and let it cook slowly, checking on it every so often to flip it. Ours cooked for about 90 minutes over low heat, which was long enough to cook it through without drying it out.
Once it's off the grill, you can glaze it with a sauce before serving. Glazing the bird after it is off the grill rather than while it's cooking prevents the sauce from scorching, especially if you're using a sweet sauce. And, today we definitely went sweet.
While the grilled pheasant was resting, my counterpart make a quick herbed caramel sauce using some of the same flavors from the spice rub. He sauteed fresh basil, sage, and thyme in a good amount of butter. He then added allspice and red Tandoori spice. Once the butter was completely melted, he added a splash of white wine, a couple of drops of habanero sauce, and a generous pour of King syrup. He let it boil for a few minutes before removing it from the stove and pouring it over our pheasant.
Paired with herbed potatoes, this was a spicy sweet sticky greasy mess of a perfect summer grill dinner. I live the robust and gamy flavor of pheasant. The stronger taste and firmer texture make it a superior alternative to chicken. While the price differential means it will never replace its domesticated cousin. But for something a little special from the grill, it's a very good choice.
Thursday, June 6, 2013
DIY Ham
With Gareth telecommuting to Pittsburgh and the warm weather upon us, grilling season is in full swing. The remote work schedule allows him to perform some amazing feats of slow cooking over the course of the afternoon. Today, while I was toiling away int he office, he smoked up the grill and turned an average pork loin into a very tasty ham.
In last summer's post on how to make perfect pork ribs, I provided instruction on how to prepare your charcoal grill to generate a a smoky fire that is well suited to slow cooking pork products. You'll follow a similar technique here. To prepare your grill for converting pork loin into ham, you will:
- Line the inside of the grill with foil. This is a no brainer as it makes clean up a snap.
- Use a chimney to start a couple of charcoal briquettes. This prevents the flavor of the lighter fluid from tainting your food.
- Place the lit briquettes on one end of the grill and let them burn down. You'll want smoke for this process, but not fire.
- Place fresh twigs on the other end of the grill. These should be small, plentiful, and still green. These will also generate smoke with the added bonus of releasing moisture into your smoking environment without needing a separate container of water in there.
Gareth prepped our pork loin with a dry rub rather than a marinade or barbecue sauce. His dry rub consisted of:
- Sage
- Salt
- Oregano
- Cumin
- Paprika
- Pepper
- Sugar
with a heavy hand on the sage and salt.
Once the pork was rubbed and the grill was smoking, he let that pork loin smoke for a good three or so hours. During this smoking process, you'll want to check on the grill from time to time to feed it more green twigs and to ensure that there is no flame.
The result is remarkably close to ham, and a very good ham at that. Our pork loin ham came out moist and tender with a rich exterior rind. It was neither too sweet, too salty, nor too smoky, but struck the perfect balance of all those ham-like qualities so many of us love. It paired well with the vegetable and cheese-laden pasta salad he made on the side.
Tuesday, July 3, 2012
Perfect Pork Ribs
The best part of summer holidays - aside form the sunshine and hot weather - is the prominent role of the grill. In the days beforehand, you can find some really excellent deals on meat. For Memorial Day, we were back in Wisconsin and returned with some brats. For Father's Day, we scored some serious duck breast. As Independence Day approached, we picked up an amazing load of ribs.
Just in time for your Independence Day cook out, here is the best pork barbecue sauce ever, followed by some basic grill instructions.
For the Sauce, you will need:
Salt
Sugar
White Wine Vinegar
Apple Juice
1 Lemon, Juiced
2 Jalapenos, Coarsely Chopped
Golden Raisins
You will also need a blender. My counterpart is partial to the immersion blender.
In your blender cup, add several handfuls of raisins and the jalapenos and blend until thick and coarse.
Proceed to add in small quantities the remaining ingredients, blending and tasting until you have a smooth sauce that is spicy and tangy and sweet.
Prepare the Grill
My counterpart is also partial to the charcoal grill, and the small ones work out well for us.
First, line the grill and the lid with heavy duty aluminum foil. This will help conduct the heat and will make clean up much easier.
Using more foil, create a small shallow pan for water. This will create a water bath that will help control heat levels and prevent the meat form drying out. You can also purchase these in the store in packages of 3 for about $2.50, but it is also pretty easy to make your own.
Place it inside the grill on the lower grate and add water.
To protect the flavor of the meat, start the charcoal in a separate fire-safe container, like a charcoal chimney pictured below.
To get a nice smoke, ad some wood chips. If you have trees in your yard, select some green branches as they will create a highly desirable smoke that will add to the flavor of the meat without burning too hot and charring the exterior. Wood smoke contains some trace minerals, like chromium and iron, which are transferred to the meat while it smokes. Smoking the wood also releases the naturally-occurring sugars, called cellulose, which mingle with the rendering fat and help form the meat glaze.
Add the top grate and cover until some smoke has built up inside the grill.
Grilling the Meat
The best grill results come from slowly cooking the meat over low heat. Periodically, you will want to check on things to add more wood chips, moisten the meat with apple juice, and to make sure that there are no flames.
Smoke the meat until it is heated through. The most reliable method of determining this is still the meat thermometer.
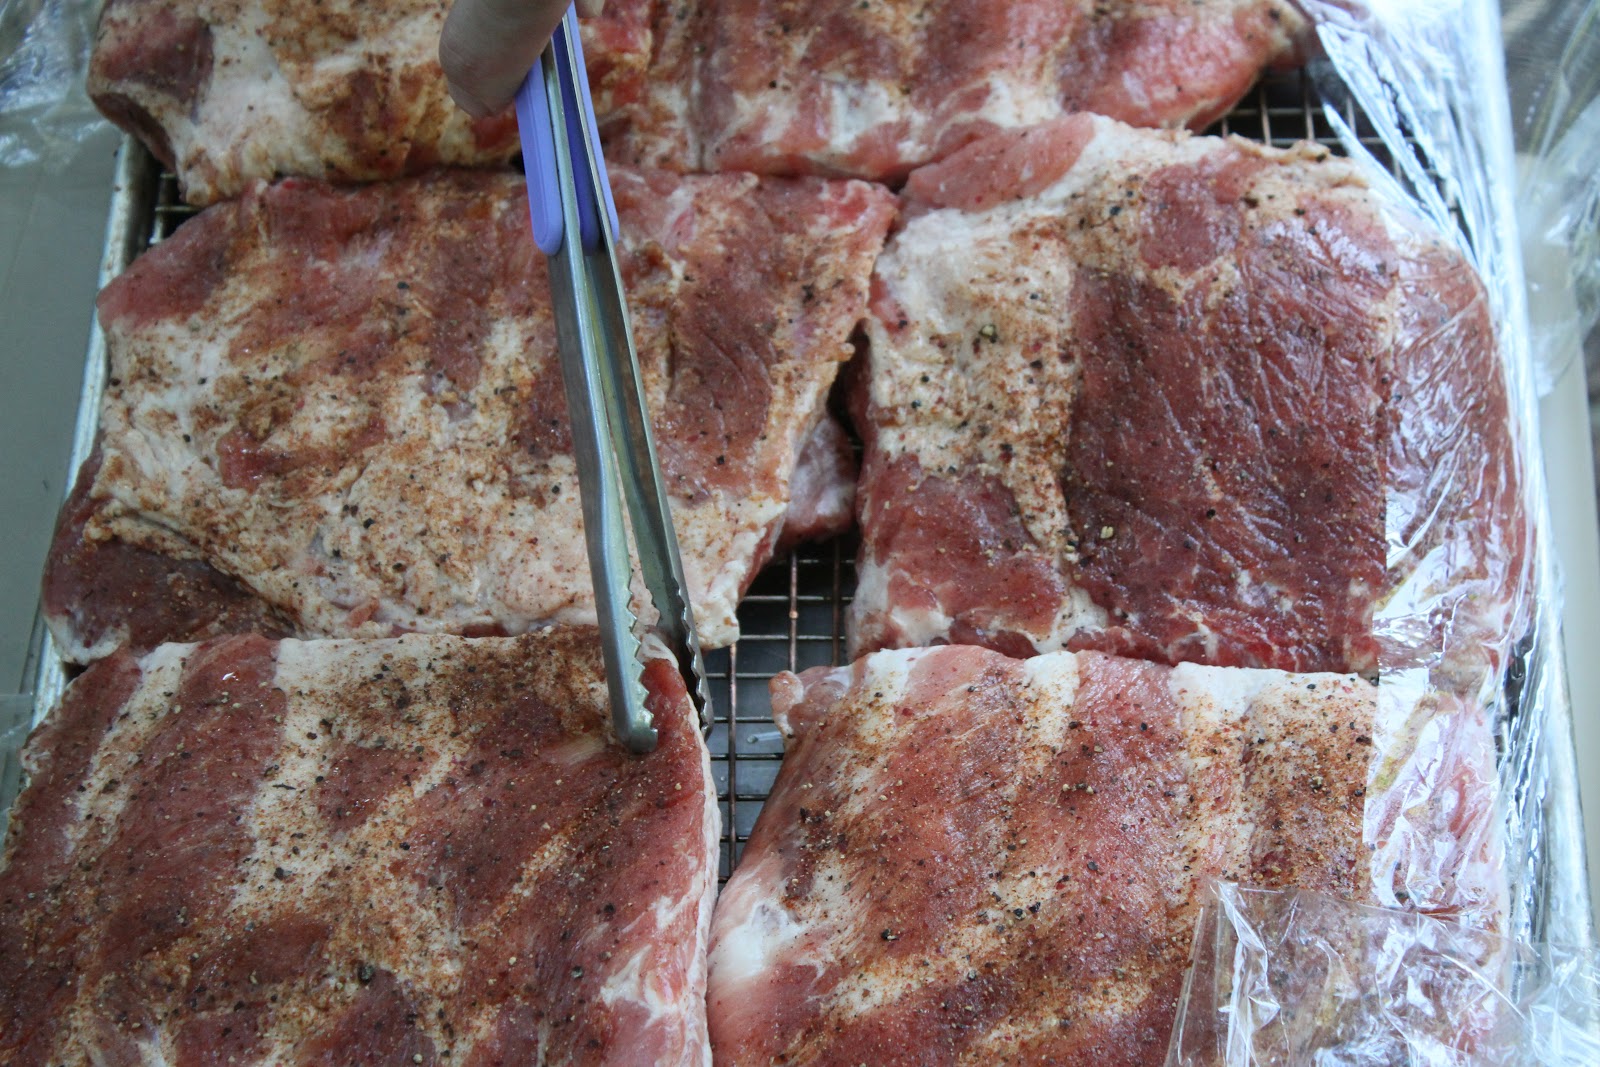
| A small sampling of our recent rib purchase, pre-seasoned and ready to grill |
Just in time for your Independence Day cook out, here is the best pork barbecue sauce ever, followed by some basic grill instructions.
For the Sauce, you will need:
Salt
Sugar
White Wine Vinegar
Apple Juice
1 Lemon, Juiced
2 Jalapenos, Coarsely Chopped
Golden Raisins
| All you need for perfect sauce |
You will also need a blender. My counterpart is partial to the immersion blender.
In your blender cup, add several handfuls of raisins and the jalapenos and blend until thick and coarse.
| Raisins and jalapeno make a sweet-spicy pork glaze |
Proceed to add in small quantities the remaining ingredients, blending and tasting until you have a smooth sauce that is spicy and tangy and sweet.
| Blend well |
Prepare the Grill
My counterpart is also partial to the charcoal grill, and the small ones work out well for us.
First, line the grill and the lid with heavy duty aluminum foil. This will help conduct the heat and will make clean up much easier.
| Line the grill with foil and crease it |
| Also line the lid |
Using more foil, create a small shallow pan for water. This will create a water bath that will help control heat levels and prevent the meat form drying out. You can also purchase these in the store in packages of 3 for about $2.50, but it is also pretty easy to make your own.
| Fold in the edges of your foil to create a rim |
| Fold up the edges again making a wider fold. These are your sides. |
| Pinch the corners together |
| Here is your water bin |
Place it inside the grill on the lower grate and add water.
| It really holds water |
To protect the flavor of the meat, start the charcoal in a separate fire-safe container, like a charcoal chimney pictured below.
| To prevent the lighter fluid from tainting your meat, start the charcoal outside the grill |
Let the lighter fluid burn off and the fire die down and then add the smoldering coals to the grill.
| Hot coals but no flame |
To get a nice smoke, ad some wood chips. If you have trees in your yard, select some green branches as they will create a highly desirable smoke that will add to the flavor of the meat without burning too hot and charring the exterior. Wood smoke contains some trace minerals, like chromium and iron, which are transferred to the meat while it smokes. Smoking the wood also releases the naturally-occurring sugars, called cellulose, which mingle with the rendering fat and help form the meat glaze.
| Remove leaves |
Add the top grate and cover until some smoke has built up inside the grill.
| Mmmmmmm smoke |
Grilling the Meat
Place your meat in the cool end of the grill, away from the direct heat of the charcoal and over the water bath.
Have a spray bottle of apple juice on hand. This will keep the meat moist and will also help a nice grill glaze form on the meat. Place the cover on the grill and relax.
The best grill results come from slowly cooking the meat over low heat. Periodically, you will want to check on things to add more wood chips, moisten the meat with apple juice, and to make sure that there are no flames.
| While cats are very good at detecting when meat is ready to eat, we still recommend the meat thermometer |
As the meat is smoking, you will also want to introduce the sauce. My counterpart gets good results from using a squeeze bottle he picked up at the green Bay Restaurant Supply store, but you can also use an old ketchup or mustard bottle that has been well cleaned.
Smoke the meat until it is heated through. The most reliable method of determining this is still the meat thermometer.
If you are grilling vegetables, use a separate grill. The grills we used can be found at Wal-Mart and run about $10.
Cut the ribs apart and serve with more sauce.
Subscribe to:
Posts (Atom)