A few years back, I decided to learn how to make fruitcake. It is a holiday classic, and I strongly felt that it should be in my repertoire. I found a clever little recipe on Epicurious that called for only a couple of varieties of dried fruit, and I worked with it until i got it just right. At the request of my counterpart, I chose to give it a rest last year and pulled it from the cookie basket. And I heard about it. So, at the request of those regulars on the cookie lit, I brought it back this year.
My variation of this recipe cuts back significantly on the fruit and leaves out the booze entirely. What you have left is a light, most, golden cake with sweet maple flavor and a handful of compatible fruits - dried fruits instead of the usual candied concoctions.
Here's my take:
1/2 pounds pitted dried cherries, chopped
1/2 pounds dried apricots, chopped
2 cups unbleached all purpose flour
1 tablespoon baking powder
1 teaspoon salt
1/2 cup (1 stick) unsalted butter, room temperature
3/4 cup (packed) golden brown sugar
1/2 cup sugar
6 large eggs, room temperature
1 teaspoon run flavor
3 tablespoons pure maple syrup
1 tablespoon vanilla extract
Preheat oven to 325°F. Butter and flour 10-inch-diameter angel food cake pan, a standard loaf pan, or six mini loaf pans. Toss the chopped dried fruit with 1/2 cup flour in large bowl to coat.
Combine the remaining 1 1/2 cups flour, baking powder, and salt in medium bowl to blend. Beat butter and
both sugars in another large bowl until fluffy. Beat in eggs 1 at a time, blending well after each addition. Add the rum flavoring, maple syrup, and vanilla. Add flour mixture and beat until just combined. Stir in dried fruit mixture. Using a small soup ladle, spoon the batter into prepared pan, flattening to eliminate air pockets. This technique is particularly useful if you are baking min loaves. Bake until tester inserted near center of cake comes out clean and cake is deep golden brown, about 90 minutes for a full-sized cake, or about 60 minutes for mini loaves.
The original recipe also includes a hard sauce that I omit because it doesn't package well, and I tend to give to families and co-workers. Here is a link to the recipe in Epicurious for you to work with as you like.

Showing posts with label dessert. Show all posts
Showing posts with label dessert. Show all posts
Sunday, December 15, 2013

Holiday Baking: Butterscotch Brownies
The one no-fail, sure-fire, knock-it-out-of-the-ballpark cookie recipe I include in my cookie basket every year is my mother's butterscotch brownie recipe. I grew up eating these - not just during the holidays, but all year round. Friends, neighbors, and co-workers alike snarf these down with child-like abandon, and I know I would hear about it if I stopped including them.
My mother's recipe comes from The Boston School of Cooking cookbook by Fannie Farmer. A single batch makes a small 8x8 square pan of brownies - hardly enough to get through the season. This year, I made two triple-batches. Here's the triple-batch recipe.
1 cup butter - this is two full sticks
3 cups brown sugar, packed
3 eggs
3/4 teaspoon salt
2 1/4 cups flour
3 tsp baking powder
1 1/2 teaspoons vanilla
Melt the butter the butter on the stovetop over low heat, making sure it doesn't get too hot. Mix the remaining ingredients together in a large bowl. When the butter has just about melted, remove it from the heat and let it cool for a few minutes. Then add it to the remaining ingredients, folding everything together with a large spatula or wooden spoon. Even though I have the Kitchen Aid Pro, I still prefer to mix these by hand. I've tried getting modern and fancy with this recipe and it hasn't worked for me, although my mom adds chocolate chips and walnuts to this recipe these days.
One the batter is well,mixed, spread it into a buttered 9x13 pan. Bake for about 25 minutes at 350 and use a toothpick to check the doneness. Cool on a wire rack.
And that's it.
My mother's recipe comes from The Boston School of Cooking cookbook by Fannie Farmer. A single batch makes a small 8x8 square pan of brownies - hardly enough to get through the season. This year, I made two triple-batches. Here's the triple-batch recipe.
1 cup butter - this is two full sticks
3 cups brown sugar, packed
3 eggs
3/4 teaspoon salt
2 1/4 cups flour
3 tsp baking powder
1 1/2 teaspoons vanilla
Melt the butter the butter on the stovetop over low heat, making sure it doesn't get too hot. Mix the remaining ingredients together in a large bowl. When the butter has just about melted, remove it from the heat and let it cool for a few minutes. Then add it to the remaining ingredients, folding everything together with a large spatula or wooden spoon. Even though I have the Kitchen Aid Pro, I still prefer to mix these by hand. I've tried getting modern and fancy with this recipe and it hasn't worked for me, although my mom adds chocolate chips and walnuts to this recipe these days.
One the batter is well,mixed, spread it into a buttered 9x13 pan. Bake for about 25 minutes at 350 and use a toothpick to check the doneness. Cool on a wire rack.
And that's it.
Holiday Baking: Spiced Apple Cookies
I like a little spice cookie and am always looking for new recipes to incorporate spice into my holiday cookie basket. I found this interesting recipe on Food52 from user Kelsey the Naptime Chef, who credits a neighbor for this recipe. It's a straight-forward recipe that results in a moist, cake-like cookie with a nice apple pie-like flavor as promised by the baker.
Serves 3 dozen
1 cup raisins I omitted these out of personal bias
1/2 cup shortening I used butter instead - this does change the flavor and character of the cookie, but I was not disappointed with this choice
1 1/3 cup brown sugar, packed
1 egg
1/4 cup whole milk
2 1/4 cups all-purpose flour
1 teaspoon baking soda
1 teaspoon ground cinnamon
1/2 teaspoon ground cloves
1/2 teaspoon ground nutmeg
1 cup chopped walnuts I also omitted these as with the raisins
1 cup chopped unpeeled apple (seeds and core removed)
1. Preheat oven to 375.
2. In a small saucepan add the raisins and fill with water until raisins are just covered. Bring to a boil and then
remove pan from heat. Allow to stand for 5 minutes. Drain raisins and reserve.
3. In a mixer fitted with a paddle attachment beat together shortening and brown sugar. Then, beat in the egg
and the milk.
4. In a separate bowl stir together the flour, baking soda, cinnamon, salt, cloves and nutmeg. With the mixer
on low, slowly add this to the shortening mixture. Beat until everything is well blended.
5. With a wooden spoon stir in the nuts, apple and drained raisins. Drop by heaping teaspoonful onto cookie
sheet. Press the tops of the cookies down slightly with two fingers. Bake at 375 for 8-10 minutes. In my oven, these took about 15 minutes.
I had no troubled with this recipe, and I really liked these cookies, but my counterpart felt they could use a bit of icing. The next time I try this recipe, I'll take his advice.
Serves 3 dozen
1 cup raisins I omitted these out of personal bias
1/2 cup shortening I used butter instead - this does change the flavor and character of the cookie, but I was not disappointed with this choice
1 1/3 cup brown sugar, packed
1 egg
1/4 cup whole milk
2 1/4 cups all-purpose flour
1 teaspoon baking soda
1 teaspoon ground cinnamon
1/2 teaspoon ground cloves
1/2 teaspoon ground nutmeg
1 cup chopped walnuts I also omitted these as with the raisins
1 cup chopped unpeeled apple (seeds and core removed)
1. Preheat oven to 375.
2. In a small saucepan add the raisins and fill with water until raisins are just covered. Bring to a boil and then
remove pan from heat. Allow to stand for 5 minutes. Drain raisins and reserve.
3. In a mixer fitted with a paddle attachment beat together shortening and brown sugar. Then, beat in the egg
and the milk.
4. In a separate bowl stir together the flour, baking soda, cinnamon, salt, cloves and nutmeg. With the mixer
on low, slowly add this to the shortening mixture. Beat until everything is well blended.
5. With a wooden spoon stir in the nuts, apple and drained raisins. Drop by heaping teaspoonful onto cookie
sheet. Press the tops of the cookies down slightly with two fingers. Bake at 375 for 8-10 minutes. In my oven, these took about 15 minutes.
I had no troubled with this recipe, and I really liked these cookies, but my counterpart felt they could use a bit of icing. The next time I try this recipe, I'll take his advice.
Holiday Baking: Figgy Pudding Butter Cookies
Last year, I decided to try to incorporate fig into my holiday baking. It's one of those traditional holiday flavors, and many classic recipes can be found that feature dried fig. But, when it comes to incorporating figs into my annual holiday cookie basket, I've had little success. Last year I tried Anise Fig and Date pinwheels, a challenging recipe that I am not entirely sure ended up tasting the way it should. This year, I opted for what I hoped would result in a sweeter cookie with a more pronounced fig flavor - Figgy Pudding Butter Cookies from Food52.
First, a note on the level of difficulty, because the recipe appears to be simple enough. This recipe calls for powdered sugar, which means you will end up with a very different dough that what you get with granulated sugar. It will be stiff and tacky and unforgiving. If you are a seasonal baker like me, this is probably outside our weight class and should be either left to the uber bakers out there or tackled outside of the holiday baking marathon when there is quite frankly too much else going on to pull this off.
Still, I thought I could do this and tried to time it so that the dough had the requisite 2+ hours to chill and I wouldn't have to deal with it until immediately after lunch. This did not help. The recipe calls for rolling and cutting the dough into think circles that most likely bake into golden crisps. I couldn't get my dough to roll and ended up making drop cookies that I tried to flatten. This was a mistake. The dough does not want to flatten in this manner, and it didn't. I ended up with mis-shapen cookie blobs that also did not have the strong fig flavor I was seeking.
This recipe also calls for icing the cookies. You must do this. The flavor of the cookie was enhanced by a mild royal icing, although the recipe calls for an adult brandy-laced icing that I felt would be too strong. This might also have been a misstep, but I wasn't sure how the brandy icing would set.
So, here it is as it appeared on Food52 by member HelenTheNanny with some additional notes from my own experience. She notes that this her own creation and provides a photo with the recipe of what these should look like:
Serves 3 dozen small cookies
For the Cookies:
1 tablespoon orange zest (from one orange)
8-10 large dried Turkish or Caliymirna Figs (the light brown ones)
1 teaspoon freshly ground nutmeg
1 teaspoon ground cinnamon
1 cup whole milk
1 1/2 cup All Purpose Flour
1 teaspoon kosher salt
3/4 cups (or 1 1/2 sticks) unsalted butter, softened
3/4 cups Confectioners sugar
1 large egg
For the Brandy-Sugar Glaze:
1 1/2 cup Confectioners sugar
1/2 cup unsalted butter, softened
2 tablespoons Brandy
1/2 teaspoon Vanilla Extract
1. Sift together flour, salt, nutmeg and cinnamon in a bowl and set it aside.
2. Dice figs into small chunks and put them in a saucepan with the milk. Heat on low, stirring occasionally for
about 15 minutes. When I did this, I didn't pay attention and I let my milk boil. The figs and the milk kind of homogeonized into a thick sauce. I don't think this is what HelenTheNanny intended. This might also explain the trouble I had working with this dough.
3. Put 1 1/2 sicks of softened butter in the bowl of the electric mixer fitted with the paddle attachment. Mix
on med-high until the butter is fluffy, about two minutes.
4. Sift 3/4 cup of confectioners sugar into the fluffy butter and mix until smooth.
5. Add in one egg and reduce speed to low.
6. Add in flour mixture and mix until just combined.
7. Strain the figs from the milk. When I did this, I only got about a tablespoon of liquid. I feel I must note again that I don't think this is right. Add them, along with the orange zest, to the dough. Fold in until the
ingredients are evenly distributed. Wrap the dough in plastic and refrigerate for 2 hours.
8. After the dough has cooled, preheat the oven to 350 degrees. On a well-floured surface, roll out the
dough until it is 1/8 inch thick. Using a 2 inch round cookie cutter, cut out the cookies and place them on a
parchment lined cookie sheet, spaced one inch apart. Bake for 10-12 minutes or until the edges are
golden brown.
9. While the cookies are baking, combine all the ingredients for the Brandy-Sugar Glaze in a saucepan on
med-low heat, and stir often, until the sauce comes together. After the cookies have cooled, use a fork to
drizzle the warm glaze on them. I used the traditional royal icing but probably should have just made Helen's glaze.
So, if any readers try this out at home, try not to deviate the way I did. I may try this one again as written when I can focus on it. If it works out for me, I'll let you know.
First, a note on the level of difficulty, because the recipe appears to be simple enough. This recipe calls for powdered sugar, which means you will end up with a very different dough that what you get with granulated sugar. It will be stiff and tacky and unforgiving. If you are a seasonal baker like me, this is probably outside our weight class and should be either left to the uber bakers out there or tackled outside of the holiday baking marathon when there is quite frankly too much else going on to pull this off.
Still, I thought I could do this and tried to time it so that the dough had the requisite 2+ hours to chill and I wouldn't have to deal with it until immediately after lunch. This did not help. The recipe calls for rolling and cutting the dough into think circles that most likely bake into golden crisps. I couldn't get my dough to roll and ended up making drop cookies that I tried to flatten. This was a mistake. The dough does not want to flatten in this manner, and it didn't. I ended up with mis-shapen cookie blobs that also did not have the strong fig flavor I was seeking.
This recipe also calls for icing the cookies. You must do this. The flavor of the cookie was enhanced by a mild royal icing, although the recipe calls for an adult brandy-laced icing that I felt would be too strong. This might also have been a misstep, but I wasn't sure how the brandy icing would set.
So, here it is as it appeared on Food52 by member HelenTheNanny with some additional notes from my own experience. She notes that this her own creation and provides a photo with the recipe of what these should look like:
Serves 3 dozen small cookies
For the Cookies:
1 tablespoon orange zest (from one orange)
8-10 large dried Turkish or Caliymirna Figs (the light brown ones)
1 teaspoon freshly ground nutmeg
1 teaspoon ground cinnamon
1 cup whole milk
1 1/2 cup All Purpose Flour
1 teaspoon kosher salt
3/4 cups (or 1 1/2 sticks) unsalted butter, softened
3/4 cups Confectioners sugar
1 large egg
For the Brandy-Sugar Glaze:
1 1/2 cup Confectioners sugar
1/2 cup unsalted butter, softened
2 tablespoons Brandy
1/2 teaspoon Vanilla Extract
1. Sift together flour, salt, nutmeg and cinnamon in a bowl and set it aside.
2. Dice figs into small chunks and put them in a saucepan with the milk. Heat on low, stirring occasionally for
about 15 minutes. When I did this, I didn't pay attention and I let my milk boil. The figs and the milk kind of homogeonized into a thick sauce. I don't think this is what HelenTheNanny intended. This might also explain the trouble I had working with this dough.
3. Put 1 1/2 sicks of softened butter in the bowl of the electric mixer fitted with the paddle attachment. Mix
on med-high until the butter is fluffy, about two minutes.
4. Sift 3/4 cup of confectioners sugar into the fluffy butter and mix until smooth.
5. Add in one egg and reduce speed to low.
6. Add in flour mixture and mix until just combined.
7. Strain the figs from the milk. When I did this, I only got about a tablespoon of liquid. I feel I must note again that I don't think this is right. Add them, along with the orange zest, to the dough. Fold in until the
ingredients are evenly distributed. Wrap the dough in plastic and refrigerate for 2 hours.
8. After the dough has cooled, preheat the oven to 350 degrees. On a well-floured surface, roll out the
dough until it is 1/8 inch thick. Using a 2 inch round cookie cutter, cut out the cookies and place them on a
parchment lined cookie sheet, spaced one inch apart. Bake for 10-12 minutes or until the edges are
golden brown.
9. While the cookies are baking, combine all the ingredients for the Brandy-Sugar Glaze in a saucepan on
med-low heat, and stir often, until the sauce comes together. After the cookies have cooled, use a fork to
drizzle the warm glaze on them. I used the traditional royal icing but probably should have just made Helen's glaze.
So, if any readers try this out at home, try not to deviate the way I did. I may try this one again as written when I can focus on it. If it works out for me, I'll let you know.
Tuesday, November 26, 2013
Holiday Baking: Old School Pumpkin Pie
I've never made a pumpkin pie. This is primarily because I've never had a pumpkin pie that I like as much as a good fruit pie. So, for the holidays, my counterpart gets what was traditional for my family growing up in close proximity to Wisconsin's cherry orchards - a nice tart cherry pie. Even on Thanksgiving.
This year I decided to give the man a break and muster up a home made, fresh pumpkin pumpkin pie. I always kind of liked my mom's approach. She uses a standard recipe but doubles the spice except for the clove, which she halves. This creates a nice spicy pie. But, there's still something weird about the texture of most pumpkin pies. Maybe it's the prevalence of canned pumpkin?
I did a bit if research and found an old-school recipe for pumpkin pie on the Food52 blog. And, by old school, I mean it predates the era in which I was raised, where condensed milk was as ubiquitous in the kitchen as flour, sugar, and eggs. I feel as if the women who raised me put that stuff in everything. My first fudge recipe called for a fair amount of the stuff.
And, maybe this is also part of my issue with pumpkin pie. I can't get beyond that tinned milk flavor of so many fillings. So when I found a recipe that used good old fashioned cream, I knew I had a winner.
Food52 attributes this recipe to Meta Given, who published the two-volume Encyclopedia of Modern Cooking sometime in the 1940's. It calls for caramelizing the pumpkin, as well as limiting the spice to cinnamon and ginger. It also bakes in about 25 minutes.

For Meta Given's Caramelized Pumpkin Pie you will need:
A 9-inch pie pan lined with pastry (I like the Deluxe Butter Pastry from Joy of Cooking)
1 3/4 cups cooked pureed pumpkin
3/4 cups sugar
1/2 teaspoon salt
1 teaspoon ground cinnamon
1/2 teaspoon ground ginger
2 eggs
1 cup cream
1/2 cup milk
To prepare the pureed pumpkin, you'll want a sharp knife, a kitchen shears, and a vegetable peeler. First, cut the pumpkin into quarters and use the kitchen shears to cut out the seeds an all those little threads. Then, use the vegetable peeler to peel the skin. Roast them in the oven at about 350 until the internal temperature of the pumpkin is 140 or so. While your pumpkin is roasting, you can prepare your crust.
When your pumpkin is out of the oven and has cooled a bit, use a parking knife to cut it down into smaller pieces. Then mash it with your potato masher before pureeing it with an immersion blender.
Make sure to roll out your pie crust and get it in your pie pan before you start the filling. This comes together quickly, and the recipe calls to pour the fresh-from-the-stove-top filling into a chilled pie shell. So, get your crust in your pie pan and place it in the freezer to chill while you make the filling. Also, I made enough pie crust for two pies. This is a good thing to do if you are making a recipe for the first time, or if you are a holiday baker only and haven't really baked since new year's brunch. This way, if the pie doesn't turn out, you've got another crust on hand to quickly try again.
Here's something else that will help, especially with this recipe. Basically, you've got three main components: the pumpkin, your dry ingredients, and your wet ingredients. Premix the sugar, salt, and spices and set aside. Then, beat your eggs and pre-mix the egg, cream, and milk.
Now you are ready to caramelize your pureed pumpkin. Place it in a heavy saucepan over direct heat. I started mine out on high heat and watched while it looked (and smelled) like it was scorching. It stuck to the pan and really made me more than a little anxious. So, I turned the heat down a bit and kept going. The recipe says it should take about 10 minutes to caramelize. And, after about 5 minutes, the scent changed, and it did indeed begin to smell a bit like caramelized sugar. After about 8 minutes, the pumpkin was starting to brown and had achieved a slightly dry texture.
Remove the pumpkin from the heat and fold the sugar mixture into the still-hot pumpkin. Use a good spatula, too, as the sugar is going to react with the hot pumpkin. As I mixed the sugar, I noticed that all the pumpkin residue that I saw sticking to my pan came right off and mixed in with the rest.
Once everything is well combined, mix in the cream mixture. I used my immersion blender, but a hand mixer would probably be more appropriate.
Now, here's the second area of concern for me. The filling is liquid. Like really liquid. I got a little concerned that I had skipped a step or something. But, no, it is supposed to be this way. There are eggs in there, and they will cook. So, I removed my pie shell from the freezer and used a small soup ladle to gently transfer my steaming hot pie filling into the very chilled pastry, ladling some off into a small glass dish to serve as a taste test. This is another good thing to do if you are trying a new recipe as it gives you a chance to sample the filling before the pie is out on the table in front of guests.
Bake the pie in a pre-heated 400-degree oven for about 25 minutes, or until the filling has set. The recipe says this is when it is slightly jiggly and the area in the center is still liquid. It also says that a pumpkin pie that has been cooked properly has a smooth surface that has not cracked. My pie cooked in about 30 minutes and was somewhere in between these two guide posts.
Plus, it looked burnt. So, after allowing my taste test some time to cool, I gave it a try. This is a unique pie filling that does indeed taste strongly of pumpkin. The light spicing of ginger and cinnamon allow the actual flavor of the pumpkin to dominate, as the recipe promised. Plus, there is an undertone of caramel that is subtle but noticeable. The texture is clearly an egg-based filling, although not quite a custard. Overall, I am pleased. I hope my counterpart is also.
This year I decided to give the man a break and muster up a home made, fresh pumpkin pumpkin pie. I always kind of liked my mom's approach. She uses a standard recipe but doubles the spice except for the clove, which she halves. This creates a nice spicy pie. But, there's still something weird about the texture of most pumpkin pies. Maybe it's the prevalence of canned pumpkin?
I did a bit if research and found an old-school recipe for pumpkin pie on the Food52 blog. And, by old school, I mean it predates the era in which I was raised, where condensed milk was as ubiquitous in the kitchen as flour, sugar, and eggs. I feel as if the women who raised me put that stuff in everything. My first fudge recipe called for a fair amount of the stuff.
And, maybe this is also part of my issue with pumpkin pie. I can't get beyond that tinned milk flavor of so many fillings. So when I found a recipe that used good old fashioned cream, I knew I had a winner.
Food52 attributes this recipe to Meta Given, who published the two-volume Encyclopedia of Modern Cooking sometime in the 1940's. It calls for caramelizing the pumpkin, as well as limiting the spice to cinnamon and ginger. It also bakes in about 25 minutes.
For Meta Given's Caramelized Pumpkin Pie you will need:
A 9-inch pie pan lined with pastry (I like the Deluxe Butter Pastry from Joy of Cooking)
1 3/4 cups cooked pureed pumpkin
3/4 cups sugar
1/2 teaspoon salt
1 teaspoon ground cinnamon
1/2 teaspoon ground ginger
2 eggs
1 cup cream
1/2 cup milk
To prepare the pureed pumpkin, you'll want a sharp knife, a kitchen shears, and a vegetable peeler. First, cut the pumpkin into quarters and use the kitchen shears to cut out the seeds an all those little threads. Then, use the vegetable peeler to peel the skin. Roast them in the oven at about 350 until the internal temperature of the pumpkin is 140 or so. While your pumpkin is roasting, you can prepare your crust.
When your pumpkin is out of the oven and has cooled a bit, use a parking knife to cut it down into smaller pieces. Then mash it with your potato masher before pureeing it with an immersion blender.
Make sure to roll out your pie crust and get it in your pie pan before you start the filling. This comes together quickly, and the recipe calls to pour the fresh-from-the-stove-top filling into a chilled pie shell. So, get your crust in your pie pan and place it in the freezer to chill while you make the filling. Also, I made enough pie crust for two pies. This is a good thing to do if you are making a recipe for the first time, or if you are a holiday baker only and haven't really baked since new year's brunch. This way, if the pie doesn't turn out, you've got another crust on hand to quickly try again.
Here's something else that will help, especially with this recipe. Basically, you've got three main components: the pumpkin, your dry ingredients, and your wet ingredients. Premix the sugar, salt, and spices and set aside. Then, beat your eggs and pre-mix the egg, cream, and milk.
Now you are ready to caramelize your pureed pumpkin. Place it in a heavy saucepan over direct heat. I started mine out on high heat and watched while it looked (and smelled) like it was scorching. It stuck to the pan and really made me more than a little anxious. So, I turned the heat down a bit and kept going. The recipe says it should take about 10 minutes to caramelize. And, after about 5 minutes, the scent changed, and it did indeed begin to smell a bit like caramelized sugar. After about 8 minutes, the pumpkin was starting to brown and had achieved a slightly dry texture.
 |
| Caramelized Pumpkin |
Remove the pumpkin from the heat and fold the sugar mixture into the still-hot pumpkin. Use a good spatula, too, as the sugar is going to react with the hot pumpkin. As I mixed the sugar, I noticed that all the pumpkin residue that I saw sticking to my pan came right off and mixed in with the rest.
 |
| With sugar and spice |
Once everything is well combined, mix in the cream mixture. I used my immersion blender, but a hand mixer would probably be more appropriate.
 |
| With cream and egg mixed in |
Now, here's the second area of concern for me. The filling is liquid. Like really liquid. I got a little concerned that I had skipped a step or something. But, no, it is supposed to be this way. There are eggs in there, and they will cook. So, I removed my pie shell from the freezer and used a small soup ladle to gently transfer my steaming hot pie filling into the very chilled pastry, ladling some off into a small glass dish to serve as a taste test. This is another good thing to do if you are trying a new recipe as it gives you a chance to sample the filling before the pie is out on the table in front of guests.
 |
| Ready for the oven |
Bake the pie in a pre-heated 400-degree oven for about 25 minutes, or until the filling has set. The recipe says this is when it is slightly jiggly and the area in the center is still liquid. It also says that a pumpkin pie that has been cooked properly has a smooth surface that has not cracked. My pie cooked in about 30 minutes and was somewhere in between these two guide posts.
Plus, it looked burnt. So, after allowing my taste test some time to cool, I gave it a try. This is a unique pie filling that does indeed taste strongly of pumpkin. The light spicing of ginger and cinnamon allow the actual flavor of the pumpkin to dominate, as the recipe promised. Plus, there is an undertone of caramel that is subtle but noticeable. The texture is clearly an egg-based filling, although not quite a custard. Overall, I am pleased. I hope my counterpart is also.
 |
| The finished product |
Monday, December 24, 2012
Holiday Baking: Mary Cherry Christmas Pie
When my counterpart and I started discussing Christmas dinner a few weeks back, I knew I wanted a cherry pie. I grew up in Northeast Wisconsin, and we spent our Christmases with my grandparents and cousins in Sturgeon Bay on the Door Peninsula, where orchards of tart cherries littered the landscape from Brussels bordering Kewaunee County in the south up to Gills Rock on the northern tip of the mainland where a ferry could take you to the islands on the very northern tip between Upper and Lower Michigan. Every Christmas, every holiday, ended with a tart cherry pie.
I haven't had a cherry pie for Christmas since that last Christmas with my grandmother in 2004. While I can usually count on my brother-in-law for a sweet potato pie - a regional favorite out here in Maryland - this year I decided that I was having a nice tart cherry pie like when I was a kid.
I have long been a fan of the basic pie crust in the Betty Crocker cookbook, but this year I deviated. I tried the Deluxe Butter Flaky Pastry Pie Dough from The Joy of Cooking, 1997 edition.
This is a double-crust recipe for a 10-inch pie. After recently discovering that my 9-inch pie pan is actually 9.5, I felt confident that this recipe would yield enough crust. For this pie crust, you will need:
2.5 cups all-purpose flour
1 teaspoon sugar
1 teaspoon salt
2 sticks of cold unsalted butter
1/4 cup vegetable shortening
1/3 cup plus 1 tablespoon ice water
Mix together your dry ingredients and set aside.
Cut your butter down into small pieces about 1/4 inch thick. Cut the butter into your dry ingredients using a pastry blender. The recipe - and really all pie crust recipes - claim you can use two butter knives cutting in a cross-wise motion against each other for this process. This has never worked for me, and I doubt it has worked for anyone. If you are a baker, even if only around the end of the year, get a pastry blender.
Now, the point of pie crust is fairly contrary to the point of many other baked items. For pie crust, you want to keep everything cold. Especially so with a butter crust like this one, so don't over work it. Cut everything together until there are still some pea-sized lumps of butter.
At this point, the recipe calls for the vegetable shortening, but also mentions that you can just use more butter if you like. The authors note that an all-butter crust is more difficult to work with. I was undeterred, and cut another half stick of cold butter into my dough.
The dough should still be pretty coarse but also somewhat mixed. Here's where I work it by hand, adding that ice water a little at a time. You want just enough to pull it all together. The third cup plus tablespoon was all I needed.
Divide it in half, shape each half into a flat disk, and chill for at least 30 minutes.
When the pie crust is chilling, I took a little rest, then moved on to the filling.I used the Cherry Pie with Canned or Bottled Fruit, also in The Joy of Cooking. For this filling you will need:
4 cups canned or bottled cherries, juice drained but 1/2 cup added back
1.25 cups sugar for tart cherries
3 tablespoons corn starch
1 tablespoon lemon juice - I used the juice from one lemon
1/4 teaspoon almond extract
2/3 tablespoons butter
I did not have any Door County cherries on hand, and I hear they are not as easy to come by as they used to be, most of the orchards having been sold or developed or let go to rot and ruin. This actually makes me quite sad. But, I had a good substitution with Oregon Tart Cherries in Water. I needed three 14.5 ounce cans to get the required four cups of fruit.
Mix the cherries and juice with the sugar, lemon juice, almond extract, and corn starch, and let the mixture sit for about 15 minutes.
While it's sitting, you can preheat your oven to 425 and roll out your bottom crust. Despite the warning about the all-butter crust being difficult to work with, I had less trouble with this dough than with any other pastry dough I've ever attempted. I had enough to line my pie pan without tears or holes or patches. Cut off any overhang with a clean kitchen shears, leaving enough to crimp the top crust.
Now, I know there are strong opinions among bakers about the lattice crust being the preferred topping for a fruit pie. A raging debate on this takes place in my own family. My niece has perfected the lattice top crust just to let us older women know that it really isn't that difficult. And it isn't. But, this is my Christmas pie, and I have something special in mind. So, I rolled out my top crust.
And reached for the Christmas tree cookie cutter. After some careful measuring, I determined where the center of my top crust would be and gently cut out five Christmas trees, tops pointing center. I used my pastry blade to ease the dough off the board and into position atop the pie, lining it up based on my measurements. I used the tried-and-true crimping tool of my forebears - a dinner fork - to secure the crust in place. Then, for the crowning touch, I took a small star cookie cutter and cut one out of the dough scraps. I used a little egg white to affix it to the center of my top crust to make Christmas pie perfection.
So, whether you use a whole crust with vents or a lattice crust, bake your pie at 425 for about 30 minutes. Then, turn the oven down to 350 and slip a cookie sheet under the pie. Bake it for another 25-35 minutes, until the crust is golden and the filling is bubbling. During this second half of baking, use your nose to make sure the edges of the crust aren't overcooking. If they start to get too dark, cover them with foil.
Let the pie cool on a wire rack. You can store it at room temperature for only a couple of days, so clear a spot for it in the fridge.
I haven't had a cherry pie for Christmas since that last Christmas with my grandmother in 2004. While I can usually count on my brother-in-law for a sweet potato pie - a regional favorite out here in Maryland - this year I decided that I was having a nice tart cherry pie like when I was a kid.
I have long been a fan of the basic pie crust in the Betty Crocker cookbook, but this year I deviated. I tried the Deluxe Butter Flaky Pastry Pie Dough from The Joy of Cooking, 1997 edition.
This is a double-crust recipe for a 10-inch pie. After recently discovering that my 9-inch pie pan is actually 9.5, I felt confident that this recipe would yield enough crust. For this pie crust, you will need:
2.5 cups all-purpose flour
1 teaspoon sugar
1 teaspoon salt
2 sticks of cold unsalted butter
1/4 cup vegetable shortening
1/3 cup plus 1 tablespoon ice water
Mix together your dry ingredients and set aside.
Cut your butter down into small pieces about 1/4 inch thick. Cut the butter into your dry ingredients using a pastry blender. The recipe - and really all pie crust recipes - claim you can use two butter knives cutting in a cross-wise motion against each other for this process. This has never worked for me, and I doubt it has worked for anyone. If you are a baker, even if only around the end of the year, get a pastry blender.
Now, the point of pie crust is fairly contrary to the point of many other baked items. For pie crust, you want to keep everything cold. Especially so with a butter crust like this one, so don't over work it. Cut everything together until there are still some pea-sized lumps of butter.
At this point, the recipe calls for the vegetable shortening, but also mentions that you can just use more butter if you like. The authors note that an all-butter crust is more difficult to work with. I was undeterred, and cut another half stick of cold butter into my dough.
The dough should still be pretty coarse but also somewhat mixed. Here's where I work it by hand, adding that ice water a little at a time. You want just enough to pull it all together. The third cup plus tablespoon was all I needed.
Divide it in half, shape each half into a flat disk, and chill for at least 30 minutes.
When the pie crust is chilling, I took a little rest, then moved on to the filling.I used the Cherry Pie with Canned or Bottled Fruit, also in The Joy of Cooking. For this filling you will need:
4 cups canned or bottled cherries, juice drained but 1/2 cup added back
1.25 cups sugar for tart cherries
3 tablespoons corn starch
1 tablespoon lemon juice - I used the juice from one lemon
1/4 teaspoon almond extract
2/3 tablespoons butter
I did not have any Door County cherries on hand, and I hear they are not as easy to come by as they used to be, most of the orchards having been sold or developed or let go to rot and ruin. This actually makes me quite sad. But, I had a good substitution with Oregon Tart Cherries in Water. I needed three 14.5 ounce cans to get the required four cups of fruit.
 |
| Oregon tart cherries - almost as good as my childhood memories of Door County |
Mix the cherries and juice with the sugar, lemon juice, almond extract, and corn starch, and let the mixture sit for about 15 minutes.
 |
| Cherry pie filling |
While it's sitting, you can preheat your oven to 425 and roll out your bottom crust. Despite the warning about the all-butter crust being difficult to work with, I had less trouble with this dough than with any other pastry dough I've ever attempted. I had enough to line my pie pan without tears or holes or patches. Cut off any overhang with a clean kitchen shears, leaving enough to crimp the top crust.
 |
| A single blemish on an otherwise perfect pie crust |
If your 15 minutes have passed, pour the fruit filling into the pie crust and dot it with the butter.
Now, I know there are strong opinions among bakers about the lattice crust being the preferred topping for a fruit pie. A raging debate on this takes place in my own family. My niece has perfected the lattice top crust just to let us older women know that it really isn't that difficult. And it isn't. But, this is my Christmas pie, and I have something special in mind. So, I rolled out my top crust.
And reached for the Christmas tree cookie cutter. After some careful measuring, I determined where the center of my top crust would be and gently cut out five Christmas trees, tops pointing center. I used my pastry blade to ease the dough off the board and into position atop the pie, lining it up based on my measurements. I used the tried-and-true crimping tool of my forebears - a dinner fork - to secure the crust in place. Then, for the crowning touch, I took a small star cookie cutter and cut one out of the dough scraps. I used a little egg white to affix it to the center of my top crust to make Christmas pie perfection.
 |
| The top crust with Christmas tree cutouts |
 |
| And in position atop the pie |
So, whether you use a whole crust with vents or a lattice crust, bake your pie at 425 for about 30 minutes. Then, turn the oven down to 350 and slip a cookie sheet under the pie. Bake it for another 25-35 minutes, until the crust is golden and the filling is bubbling. During this second half of baking, use your nose to make sure the edges of the crust aren't overcooking. If they start to get too dark, cover them with foil.
Let the pie cool on a wire rack. You can store it at room temperature for only a couple of days, so clear a spot for it in the fridge.
 |
| The finished product - Mary Cherry Christmas Pie |
Wednesday, December 19, 2012
Surviving the Holiday Baking Marathon
Despite my optimism back in September and the very best of intentions, I did not start my holiday baking until about four days ago. This is late, even for me. I usually get going shortly after Thanksgiving. This gives me sufficient time to try out new recipes and to just start over if I need to. I manage to produce two successful varieties of cookies a weekend for about three weeks and end up with a nice variety of offerings that I package up and deliver to work and friends. This year, I had a bunch of new recipes and just a single weekend to make everything work out. This weekend, I executed my first Holiday Baking Marathon.
Now, my initial intent is similar to what I did last year, in which I shared recipes and techniques while I baked my way through the weeks between Thanksgiving and Yule. And at first I was taking photos. But, once the reality of five batches of cookies in a single day sunk in, I realized there was no time for a do-over. I abandoned the camera and focused solely on my technique to ensure that everything turned out right. While I will try to get a couple of recipes up this weekend, this posting will focus on how to survive the holiday baking marathon. Here are 10 tips to ensure you get through:
1. Put On Your Sneakers
You will be on your feet for a long time - I was in motion for a good eight hours on Saturday. If you are not wearing proper footwear, your back will give out, and you will fatigue that much quicker. Get those sneakers out of the gym bag and lace up. You're in for a long haul.
2. Hydrate
While coffee is a wonderful companion to cookie dough (you've got to taste it, right?), you will want to make sure you drink a lot of water. Why? You will be in motion for a good, long day. This really is a bit of a marathon, and you should not underestimate your body's need for water.
3. Eat a Good Breakfast
You will need to taste a lot of cookie dough, as well as the finished products. Get a good layer of protein in you first. Nothing fancy - a couple of eggs with cheese and a glass of milk should put you in a good place.
4. Start With a Clean Kitchen
This will save valuable time later. That the time to clean and organize your workspace. Think about the volume of cookies you will be producing and ensure you have sufficient space to mix, roll, cut, sheet, and cool everything. Rearrange if you need to - just get that workspace established and ensure there is enough of it.
5. Assemble Your Ingredients
Look at your recipes and get out all the ingredients you will need for all of them. This is not as daunting as it sounds as cookies are made of the same basic stuff - butter, sugar, flour, vanilla, eggs, baking powder, spices. Get it all out, plus any tools and utensils you will need, and arrange it all in your workspace.
6. Use Basic Good Cookie Technique
Regular readers may remember these from last year's sugar cookie post - start with room temperature ingredients, preheat the oven, line your sheets with parchment paper, rotate them halfway through baking. Oh, and use your portion-control cookie scoop, because if it looks the same, it cooks the same.
Bonus New Technique: For shortbread or any other dry dough that is chilled and then rolled and cut, put away that rolling pin and get out the pastry blade. Work the dough by hand initially. Then shape it into a square, drop it on your board - sans flour - and use a smoothing action with the pastry blade and your hands to flatten the dough. When it starts to loose that basic square or rectangular shape, use the pastry blade to press the edges back in place. Here's a little photo essay to demonstrate:


7. Take a Break
After once recipe has finished backing and you're cleaned your tools for the next round, sit down for 5-10 minutes. Drink some water. Breathe. Think about the next recipe. Give your feet and back a break. Bend down and touch your toes for a moment to stretch everything out before starting up again.
8. Clean Up Right Away
Do not procrastinate on this one. You're dealing with butter and sugar - greasy and sticky and messy. You are best off cleaning up as soon as you can.
9. Package Properly
The best way to store your cookies is a plain old ZipLoc bag. Use one of the jumbo-sized baggies. Lay it flat on the counter and arrange a double-layer of completely cooled cookies inside. If you are planning on storing the cookies for over a week, lay the bagged cookies flat on a shelf in the freezer.
10. Prepare for the Inevitable Sugar Hangover
I posted about this last year as well. Once you are done with your baking for the day, break out the V-8 and get some veg in you to counter-balance all that sugar.
Happy Baking!
Now, my initial intent is similar to what I did last year, in which I shared recipes and techniques while I baked my way through the weeks between Thanksgiving and Yule. And at first I was taking photos. But, once the reality of five batches of cookies in a single day sunk in, I realized there was no time for a do-over. I abandoned the camera and focused solely on my technique to ensure that everything turned out right. While I will try to get a couple of recipes up this weekend, this posting will focus on how to survive the holiday baking marathon. Here are 10 tips to ensure you get through:
1. Put On Your Sneakers
You will be on your feet for a long time - I was in motion for a good eight hours on Saturday. If you are not wearing proper footwear, your back will give out, and you will fatigue that much quicker. Get those sneakers out of the gym bag and lace up. You're in for a long haul.
2. Hydrate
While coffee is a wonderful companion to cookie dough (you've got to taste it, right?), you will want to make sure you drink a lot of water. Why? You will be in motion for a good, long day. This really is a bit of a marathon, and you should not underestimate your body's need for water.
3. Eat a Good Breakfast
You will need to taste a lot of cookie dough, as well as the finished products. Get a good layer of protein in you first. Nothing fancy - a couple of eggs with cheese and a glass of milk should put you in a good place.
4. Start With a Clean Kitchen
This will save valuable time later. That the time to clean and organize your workspace. Think about the volume of cookies you will be producing and ensure you have sufficient space to mix, roll, cut, sheet, and cool everything. Rearrange if you need to - just get that workspace established and ensure there is enough of it.
5. Assemble Your Ingredients
Look at your recipes and get out all the ingredients you will need for all of them. This is not as daunting as it sounds as cookies are made of the same basic stuff - butter, sugar, flour, vanilla, eggs, baking powder, spices. Get it all out, plus any tools and utensils you will need, and arrange it all in your workspace.
 |
| Getting the workspace together |
6. Use Basic Good Cookie Technique
Regular readers may remember these from last year's sugar cookie post - start with room temperature ingredients, preheat the oven, line your sheets with parchment paper, rotate them halfway through baking. Oh, and use your portion-control cookie scoop, because if it looks the same, it cooks the same.
Bonus New Technique: For shortbread or any other dry dough that is chilled and then rolled and cut, put away that rolling pin and get out the pastry blade. Work the dough by hand initially. Then shape it into a square, drop it on your board - sans flour - and use a smoothing action with the pastry blade and your hands to flatten the dough. When it starts to loose that basic square or rectangular shape, use the pastry blade to press the edges back in place. Here's a little photo essay to demonstrate:
Once you have it as thick as you want it, cut your cookies. I am partial to British soldiers, and using this technique, I got perfectly shaped shortbread. Of course it helps that my counterpart did the flattening.....
 |
| Shortbread soldiers |
7. Take a Break
After once recipe has finished backing and you're cleaned your tools for the next round, sit down for 5-10 minutes. Drink some water. Breathe. Think about the next recipe. Give your feet and back a break. Bend down and touch your toes for a moment to stretch everything out before starting up again.
8. Clean Up Right Away
Do not procrastinate on this one. You're dealing with butter and sugar - greasy and sticky and messy. You are best off cleaning up as soon as you can.
9. Package Properly
The best way to store your cookies is a plain old ZipLoc bag. Use one of the jumbo-sized baggies. Lay it flat on the counter and arrange a double-layer of completely cooled cookies inside. If you are planning on storing the cookies for over a week, lay the bagged cookies flat on a shelf in the freezer.
10. Prepare for the Inevitable Sugar Hangover
I posted about this last year as well. Once you are done with your baking for the day, break out the V-8 and get some veg in you to counter-balance all that sugar.
Happy Baking!
Sunday, September 9, 2012
If the Stores are Already Planning for Christmas, Why Shouldn't I?
Last night was the first really cool night of the season. I slept with the windows open and awoke cocooned in the comforter, my counterpart similarly wrapped in a blanket he pulled off the bed in the guest bedroom. Despite the 90-degree weather we saw yesterday, it was a bracing 55 when I got up this morning.
We felt the cool air moving in yesterday after a spate of thunder showers. We picked up some chicken, gathered all the miscellaneous veg from the fridge, and set about making soup.
And I started thinking about holiday baking in earnest. I feel this is justified because I did indeed see Christmas stuff out on display this weekend. If the stores are already planning for Christmas, why shouldn't I? After all, it takes me much longer to get it together than it does them.
Depending on what type of baker you are, the holiday baking season begins at different times and requires a varied amount of planning. If you bake all the time, the end of the year is an opportunity for you to showcase your best stuff. If you only bake during the holidays but have a set collection of specialties, you can adhere to the tradition you have established.
Then there are the rest of us. We who only bake during the holidays, yet feel we need to have a new and exciting theme each year. Which means new and exciting recipes each year. Many that we are trying for the first time. Typically I start baking around Thanksgiving. Things go awry. Recipes don't work out right. I invariably end up baking chocolate chip cookies and butterscotch brownies on December 20 in the hopes of filling the cookie tins with something edible.
This year, I am getting a jump start. I have my theme - Old Timey Holiday Favorites.
I have my recipes. Most of these are from the Gourmet cookbook but also appear on Epicurious. I've added the links for the recipes I could find there:
Penuche - I will not be using the recipe from Gourmet. I tried it about a month ago and it really didn't work.
Anise-Scented Fig and Date Swirls
Chocolate Sambuca Crinkle Cookies
Five Spice Ginger Snaps
Pistachio Dark Chocolate Crisps
Ginger Honey Cookies
These are all new recipes for me, so I will need to start trial runs fairly soon and adjust my plan for anything that doesn't work out.
And, even though I am starting the holiday baking season before the autumnal equinox, please feel free to join me and provide any baking recipes you'd like to see me try. Email me at mdirlam@gmail.com.
We felt the cool air moving in yesterday after a spate of thunder showers. We picked up some chicken, gathered all the miscellaneous veg from the fridge, and set about making soup.
And I started thinking about holiday baking in earnest. I feel this is justified because I did indeed see Christmas stuff out on display this weekend. If the stores are already planning for Christmas, why shouldn't I? After all, it takes me much longer to get it together than it does them.
Depending on what type of baker you are, the holiday baking season begins at different times and requires a varied amount of planning. If you bake all the time, the end of the year is an opportunity for you to showcase your best stuff. If you only bake during the holidays but have a set collection of specialties, you can adhere to the tradition you have established.
Then there are the rest of us. We who only bake during the holidays, yet feel we need to have a new and exciting theme each year. Which means new and exciting recipes each year. Many that we are trying for the first time. Typically I start baking around Thanksgiving. Things go awry. Recipes don't work out right. I invariably end up baking chocolate chip cookies and butterscotch brownies on December 20 in the hopes of filling the cookie tins with something edible.
This year, I am getting a jump start. I have my theme - Old Timey Holiday Favorites.
I have my recipes. Most of these are from the Gourmet cookbook but also appear on Epicurious. I've added the links for the recipes I could find there:
Penuche - I will not be using the recipe from Gourmet. I tried it about a month ago and it really didn't work.
Anise-Scented Fig and Date Swirls
Chocolate Sambuca Crinkle Cookies
Five Spice Ginger Snaps
Pistachio Dark Chocolate Crisps
Ginger Honey Cookies
These are all new recipes for me, so I will need to start trial runs fairly soon and adjust my plan for anything that doesn't work out.
And, even though I am starting the holiday baking season before the autumnal equinox, please feel free to join me and provide any baking recipes you'd like to see me try. Email me at mdirlam@gmail.com.
Sunday, August 5, 2012
Penuche Follow Up
I discussed yesterday's penuche episode with my counterpart, the real cook in the house. I have the follow addendum to yesterday's post:
- The instructions to cook the milk, butter, and sugar all together? When have I ever seen my very chefy counterpart do this? He typically melts the butter first, then slowly adds the sugar to ensure it dissolves, then slowly brings it to a boil and adds the dairy.
- That burning smell I noticed when my sugar mixture started to reach temperature? It was actually burning sugar. I most likely cooked my sugar at too high a temperature instead of letting it gradually simmer up to soft ball stage. This contributed to the uneven texture and the resulting rock-hard set.
- That heavy cream I used to help pull it together? It may have smoothed out the texture, but I probably should have continued blending my gravelly mixture until to smoothed out on its own. Using cream instead prevented this necessary step in the process from completing.
This is something I want to perfect. I'll continue working at this and will post again when I get it right.
Saturday, August 4, 2012
Mary Cooks: Penuche
Fudge recipes are written by optimists. The typical fudge recipe is deceptively simple. I am going to write the truth about fudge.
First, some context. I had the day to myself, and a lengthy to-do list. Out of all the highly productive things I could have done, why did I decide to make fudge? This week, I wrapped up a particularly lengthy and frustrating project, one of those projects that lingers in the stabilization phase as more and more issues with the software are discovered and need to be addressed until finally there is no more money, and the project is declared complete. It was a long, rough ride for the team and I wanted to make a special treat for them. I decided on fudge as it is phonetically very close to an oath that was uttered so often during the project that many of us forgot it was a cuss word.
In my search for a fudge recipe, I came across a treat from my childhood - brown sugar fudge, also called penuche. One of the ironies of my mother is that despite what she served for dinner, she was capable of incredible desserts. Penuche was one of them. So when I found the penuche recipe in the Gourmet cookbook, I had to try it.
For Penuche, you will need:
1/2 cup plus 2 tbsp evaporated milk
2 cups packed light brown sugar
1 1/2 sticks butter, cut into tbsp
1/4 tsp salt
1/2 tsp vanilla extract
1 3/4 confectioners sugar
Simple enough, right? Keep in mind that fudge is actually a candy, and candy is an art that must be practiced. If you are a regular candy maker, you will not have any trouble with this. If you are out of practice, though, or a beginner, proceed with caution and understand that you will spend a lot of time stirring and waiting.
OK, so combine the milk, brown sugar, butter, and salt in a 3-quart heavy saucepan and bring just to a boil over moderate heat, stirring until the sugar is dissolved. From these instructions, I wasn't sure if I should have a liquid like a caramel sauce or what. I actually had something thicker than a liquid but not quite a solid. I also thought I would know when the sugar had dissolved. In retrospect, I did not.
I let the mixture come to a boil and then reduced it to low heat to simmer as the recipe instructed. In less than a minute, it no longer looked like my mixture was simmering, so I brought it up to a boil again. I did this several times over the next ten minutes until I felt I had everything at the right temperature.
So, back to the recipe. Reduce heat to low and simmer, stirring frequently, until mixture registers 238 F on a thermometer and a teaspoon of the mixture dropped into a small bowl of cold water holds a soft ball when pressed between your fingers. This will take about 30 minutes.
The best part of this recipe is the reference to the old school method of checking on your sugar mixture. When you are cooking this stuff, it will hit 180-200 fairly quickly, and then will hover around 200 for so long you will feel as if your candy thermometer is broken. The old fashioned soft ball test will let you keep track of how far along you actually are. Then, after about 20 minutes at just over 200, the sugar mixture will change rapidly. I noticed a burnt sugar smell that I found disconcerting. But the temperature was rising and quickly reached 238. I did the soft ball test just to be sure.
Transfer mixture to a heatproof bowl. I used a large Pyrex measuring cup. Beat in the vanilla with an electric mixer at medium speed. Which was also disconcerting. When I added the vanilla to my 238 degree soft ball mixture, it bubbled, boiled, and seemed to evaporate. Undeterred, I proceeded with my hand blender and began adding the confectioner's sugar, a little at a time, as the recipe instructed.
Now the recipe says that in about five minutes, the whole thing will be thick and smooth. After five minutes, my fudge resembled course gruel. But if I've learned anything from my counterpart, it's that there are few things in the kitchen that cannot be salvaged with a little heavy cream, egg yolk, or both. I reached for the heavy cream and added a generous dollop to my mixture. A few minutes later I had a smooth mixture, albeit a bit grainy. And that is the sign of fudge failure. If you get to this point and still have graininess, you do not have fudge.
I divided my mixture evenly between two small pans - the intent was one for my team and one for Gareth's - and placed the pans uncovered in the refrigerator to set. While today's efforts are not fit to share with the team, I think we can work this into our ice cream activities.
First, some context. I had the day to myself, and a lengthy to-do list. Out of all the highly productive things I could have done, why did I decide to make fudge? This week, I wrapped up a particularly lengthy and frustrating project, one of those projects that lingers in the stabilization phase as more and more issues with the software are discovered and need to be addressed until finally there is no more money, and the project is declared complete. It was a long, rough ride for the team and I wanted to make a special treat for them. I decided on fudge as it is phonetically very close to an oath that was uttered so often during the project that many of us forgot it was a cuss word.
In my search for a fudge recipe, I came across a treat from my childhood - brown sugar fudge, also called penuche. One of the ironies of my mother is that despite what she served for dinner, she was capable of incredible desserts. Penuche was one of them. So when I found the penuche recipe in the Gourmet cookbook, I had to try it.
 |
| Mis en place |
For Penuche, you will need:
1/2 cup plus 2 tbsp evaporated milk
2 cups packed light brown sugar
1 1/2 sticks butter, cut into tbsp
1/4 tsp salt
1/2 tsp vanilla extract
1 3/4 confectioners sugar
Simple enough, right? Keep in mind that fudge is actually a candy, and candy is an art that must be practiced. If you are a regular candy maker, you will not have any trouble with this. If you are out of practice, though, or a beginner, proceed with caution and understand that you will spend a lot of time stirring and waiting.
OK, so combine the milk, brown sugar, butter, and salt in a 3-quart heavy saucepan and bring just to a boil over moderate heat, stirring until the sugar is dissolved. From these instructions, I wasn't sure if I should have a liquid like a caramel sauce or what. I actually had something thicker than a liquid but not quite a solid. I also thought I would know when the sugar had dissolved. In retrospect, I did not.
I let the mixture come to a boil and then reduced it to low heat to simmer as the recipe instructed. In less than a minute, it no longer looked like my mixture was simmering, so I brought it up to a boil again. I did this several times over the next ten minutes until I felt I had everything at the right temperature.
 |
| Is my sugar dissolved now? |
 |
| Is it dissolved now? |
So, back to the recipe. Reduce heat to low and simmer, stirring frequently, until mixture registers 238 F on a thermometer and a teaspoon of the mixture dropped into a small bowl of cold water holds a soft ball when pressed between your fingers. This will take about 30 minutes.
The best part of this recipe is the reference to the old school method of checking on your sugar mixture. When you are cooking this stuff, it will hit 180-200 fairly quickly, and then will hover around 200 for so long you will feel as if your candy thermometer is broken. The old fashioned soft ball test will let you keep track of how far along you actually are. Then, after about 20 minutes at just over 200, the sugar mixture will change rapidly. I noticed a burnt sugar smell that I found disconcerting. But the temperature was rising and quickly reached 238. I did the soft ball test just to be sure.
 |
| Get comfortable - you're going to be here for a while |
 |
| Still not sure if that burnt sugar action is right, but we are at temperature |
Transfer mixture to a heatproof bowl. I used a large Pyrex measuring cup. Beat in the vanilla with an electric mixer at medium speed. Which was also disconcerting. When I added the vanilla to my 238 degree soft ball mixture, it bubbled, boiled, and seemed to evaporate. Undeterred, I proceeded with my hand blender and began adding the confectioner's sugar, a little at a time, as the recipe instructed.
 |
| Not fudge |
Now the recipe says that in about five minutes, the whole thing will be thick and smooth. After five minutes, my fudge resembled course gruel. But if I've learned anything from my counterpart, it's that there are few things in the kitchen that cannot be salvaged with a little heavy cream, egg yolk, or both. I reached for the heavy cream and added a generous dollop to my mixture. A few minutes later I had a smooth mixture, albeit a bit grainy. And that is the sign of fudge failure. If you get to this point and still have graininess, you do not have fudge.
 |
| Heavy cream to the rescue |
 |
| Looks can be deceiving - a pan of grainy fudge is not worth sharing |
Sunday, July 29, 2012
Good Things Come to Those Who Wait
No matter how you do it, ice cream takes all afternoon.
My counterpart started with the basic vanilla ice cream recipe that came with the Kitchen Aid ice cream attachment but soon noticed several flaws. Declaring it a product of the Marketing Department, he quickly improvised his own.

My counterpart started with the basic vanilla ice cream recipe that came with the Kitchen Aid ice cream attachment but soon noticed several flaws. Declaring it a product of the Marketing Department, he quickly improvised his own.
 |
| The original |
 |
| The finished product |
For a Very Chefy ice cream, you will need:
1 cup water
1 cup castor sugar
8 egg yolks
4 cups heavy whipping cream
1/2 tsp salt
1 tbsp vanilla
Seeds from 2 vanilla pods
 |
| Mis en place |
Our ice cream started with a simple syrup of castor sugar, water, and vanilla. Castor sugar is really just regular sugar run through a coffee grinder to create a super fine sugar. It dissolves quickly into the syrup and prevents any chance of graininess in the finished product.
 |
| Making castor sugar |
 |
| Seeds from two vanilla pods |
 |
| Simple syrup |
Once the syrup is finished cooking, transfer it to a heavy glass container and gradually add in half a cup of cream and egg yolks. Here's how to separate your eggs:
 |
| Break all the eggs into one bowl |
 |
| Using very clean hands, gently worry the yolk form the white |
 |
| Drop the yolks into a separate bowl |
The heat of the simple syrup will ensure that the egg yolk cooks. Use an immersion blender to mix everything together. This will prevent the yolk from curdling and will homogenize the mix. Gradually add the rest of the cream and blend until smooth.
 |
| Adding the egg yolks |
 |
| Adding the cream |
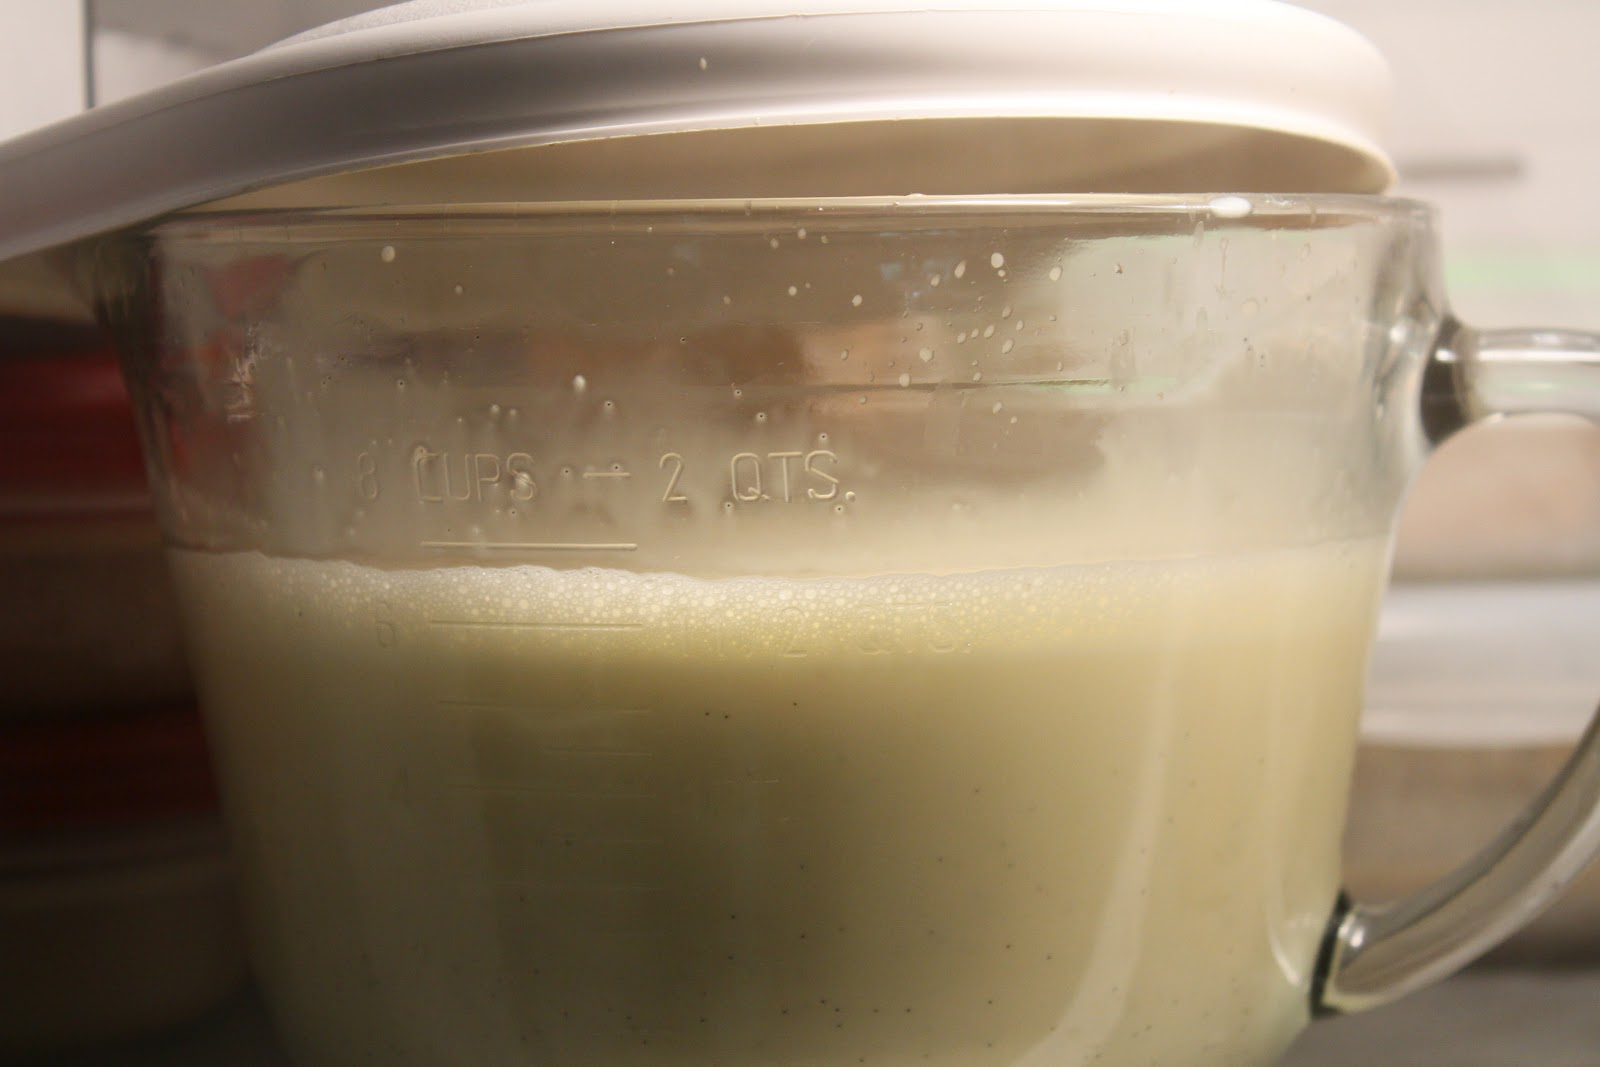
This method is preferable to the method in the recipe as it gradually brings the mixture down to room temperature. The original recipe called for moving the mixture from the stovetop to the freezer in a covered container. This is a risky move that can create the perfect environment for botulism bacteria. We also felt that by cooling the mixture before freezing, we would cut down the initial curing time. The recipe called for 8 hours. Our ice cream cured in 90 minutes.
 |
| The first set |
Then began the churn. We did follow the instructions and allowed the ice cream mixing bowl to freeze for at least 24 hours. This is important as the churn will take some time. The ice cream bowl is really just a very thick insulated bowl that keeps everything cold while you churn.
 |
| The longest 40 minutes of my life |
According to the recipe, the churn should take about 20 minute, and you end up with ready-to-eat ice cream. Our churn took about 40 minutes and we ended up with a milkshake.
Undeterred, the mixture was transferred back to our heavy glass container and went back in the freezer for a second curing. Four hours later, we had ice cream.
 |
| After the second cure |
But not just ice cream. We also had a home made caramel sauce.
This is a work of genius. This sauce is buttery, sweet, salty, and boozy all at the same time. for this sauce, you need:
Butter
A splash of grape seed oil
Sugar
Brandy, although we started with Benedictine - they are not interchangeable
Salt
Vanilla bean
Heavy cream
Melt the butter, sugar, and grape seed oil on the stovetop.
 |
| Adding castor sugar to butter and grape seed oil |
When it reaches a boil, add the brandy and let it simmer long enough to cook the alcohol out.
 |
| A little brandy goes a long way |
Then, add the salt, vanilla bean, and cream and let boil a few minutes longer.
 |
| Salty caramel is good |
 |
| Add the cream last |
Transfer to a glass container and blend with the immersion blender.
 |
| Everything should be homogenized |
Drizzle over ice cream.

At the end of the day - and I do mean at the end - I'm not sure we saved much time, but I am sure we ended up with a superior ice cream than that recipe would have produced.
 |
| At the end of the weekend, this is what we have to show for ourselves |
Friday, February 3, 2012
Not All Carrot Cake is Created Equal
I have never met a carrot cake I could refuse (see here and here and here). I am also an unapologetic cupcake lover. You may remember my cupcake fixation of last summer and the regular Friday visits to the IcedGems cupcake truck that parks outside my office (see here and here and here). Part of this weekly habit included lengthy discussions with the IcedGems employee within about the merits of carrot cake. Even though I gave up the cupcake habit several months ago, I walked out to the truck last week with a colleague. And, even though I didn't buy anything, I did pitch my weekly appeal for carrot cake.
This week, my efforts paid off. As I strolled past the truck during my lunchtime outing, I spotted on the menu the long awaited carrot cake.
A few moments and about $3 later (the price was recently increased), I had my IcedGems carrot cake in hand. The guy in the truck let me know that my persistance was one of the reasons for the carrot cake addition. He says that the owners of IcedGems take their customers' options very seriously and value their high regard. I have to admit I find this to be a sound business practice, especially since they decided to agree with me.
Back at my desk, I lapsed into another "bad" habit and promptly wipped out the iPhone to take some photos, and my apologies for the poor quality. It's unfortunate that my current life prohibits me from taking the Canon 7D everywhere. Believe me, I would if I could.
The cupcake was much smaller than usual, but the exterior looked as appealing and promising as always. It was crowned with a perfect dollop of icing and an attractive garnish. I liked that they substituted sprinkles for the more traditional icing carrot, too, for the whimsical aesthetic it presents - very much in keeping with their overall image.
Now, after months of customer devotion to these guys, and a consistent level of satisfaction, my expectations were pretty high. I was braced for a little disappointment when the guy in the truck warned me of the raisins at the time of purchase. Even so, I was not prepared for the sheet volume of raisins - both regular and golden - that filled the cupcake. That, combined with a very coarse grate of carrot, made for a less than satisfying carrot cake experience for several reasons:
IcedGems is still my favorite guilty pleasure. I will continue to bring my coworkers out to their truck on Friday afternoons. As I recover from the endless January flu, I'll probably break a couple of Resolutions and resume my Friday habit.
I'm also quite happy that they presented me with a carrot cake option today. There are few things as valuable as a business that listens to their customers. IcedGems is not only a superlative bakery, but a contientious business and a vital component of the Baltimore food scene.
This week, my efforts paid off. As I strolled past the truck during my lunchtime outing, I spotted on the menu the long awaited carrot cake.
A few moments and about $3 later (the price was recently increased), I had my IcedGems carrot cake in hand. The guy in the truck let me know that my persistance was one of the reasons for the carrot cake addition. He says that the owners of IcedGems take their customers' options very seriously and value their high regard. I have to admit I find this to be a sound business practice, especially since they decided to agree with me.
Back at my desk, I lapsed into another "bad" habit and promptly wipped out the iPhone to take some photos, and my apologies for the poor quality. It's unfortunate that my current life prohibits me from taking the Canon 7D everywhere. Believe me, I would if I could.
The cupcake was much smaller than usual, but the exterior looked as appealing and promising as always. It was crowned with a perfect dollop of icing and an attractive garnish. I liked that they substituted sprinkles for the more traditional icing carrot, too, for the whimsical aesthetic it presents - very much in keeping with their overall image.
 |
| The promise of impending satisfaction |
Now, after months of customer devotion to these guys, and a consistent level of satisfaction, my expectations were pretty high. I was braced for a little disappointment when the guy in the truck warned me of the raisins at the time of purchase. Even so, I was not prepared for the sheet volume of raisins - both regular and golden - that filled the cupcake. That, combined with a very coarse grate of carrot, made for a less than satisfying carrot cake experience for several reasons:
- All that fruit weighs down the cake batter and prevents the normal leavening that occurs during the baking process. You end up with a short, squat cake that is missing that delectable golden mound of cake rising up out of the cupcake paper. If it's the best part of the muffin, it's certainly the best part of the cupcake.
- It also interferes with the texture of the cake and weakens the crumb. Usually when I get a cupcake, I break off the top. This is partly to test the texture of the cake, and partly because it makes it easier to eat. A good cupcake should have a nice separation point just below the mark left by the paper cup, leaving two complete halves. Some crumb is nice, but a crumble is a sign of a dry cake. The IcedGems carrot cake did not want to separate. It took great care on my part to remove the crown without destroying it altogether. This is what too much stuff can do to a cake.
- It mutes the wonderful flavor of what is usually a very nice cake. Similar to the CakeLove carrot cake, the IcedGems carrot cake was just plain overstuffed. Which is unfortunate because they really do make the best cake in town. And the actual cake part of their carrot cake was excellent. It was spicy with nutmeg and cinnamon and what tasted like a hint of ginger and was the most perfectly-spiced carrot cake I've ever had.
 |
| There's more raisin than cake |
The icing was also spot-on - dense and tangy with cream cheese that coated the inside of my mouth and clung to my teeth as they cried out in agony. This slightly-tart, supremely-sweet icing was the perfect complement to their wonderfully-earthy, perfectly-spiced cake.
IcedGems is still my favorite guilty pleasure. I will continue to bring my coworkers out to their truck on Friday afternoons. As I recover from the endless January flu, I'll probably break a couple of Resolutions and resume my Friday habit.
I'm also quite happy that they presented me with a carrot cake option today. There are few things as valuable as a business that listens to their customers. IcedGems is not only a superlative bakery, but a contientious business and a vital component of the Baltimore food scene.
Subscribe to:
Posts (Atom)