Showing posts with label kitchen. Show all posts

Sunday, July 29, 2012

Good Things Come to Those Who Wait

No matter how you do it, ice cream takes all afternoon.

My counterpart started with the basic vanilla ice cream recipe that came with the Kitchen Aid ice cream attachment but soon noticed several flaws. Declaring it a product of the Marketing Department, he quickly improvised his own.

The original


The finished product


For a Very Chefy ice cream, you will need:
1 cup water
1 cup castor sugar
8 egg yolks
4 cups heavy whipping cream
1/2 tsp salt
1 tbsp vanilla
Seeds from 2 vanilla pods

Mis en place


Our ice cream started with a simple syrup of castor sugar, water, and vanilla. Castor sugar is really just regular sugar run through a coffee grinder to create a super fine sugar. It dissolves quickly into the syrup and prevents any chance of graininess in the finished product.

Making castor sugar


Seeds from two vanilla pods


Simple syrup


Once the syrup is finished cooking, transfer it to a heavy glass container and gradually add in half a cup of cream and egg yolks.  Here's how to separate your eggs:

Break all the eggs into one bowl

Using very clean hands, gently worry the yolk form the white

Drop the yolks into a separate bowl

The heat of the simple syrup will ensure that the egg yolk cooks. Use an immersion blender to mix everything together. This will prevent the yolk from curdling and will homogenize the mix. Gradually add the rest of the cream and blend until smooth.

Adding the egg yolks


Adding the cream

This method is preferable to the method in the recipe as it gradually brings the mixture down to room temperature. The original recipe called for moving the mixture from the stovetop to the freezer in a covered container. This is a risky move that can create the perfect environment for botulism bacteria. We also felt that by cooling the mixture before freezing, we would cut down the initial curing time. The recipe called for 8 hours. Our ice cream cured in 90 minutes.
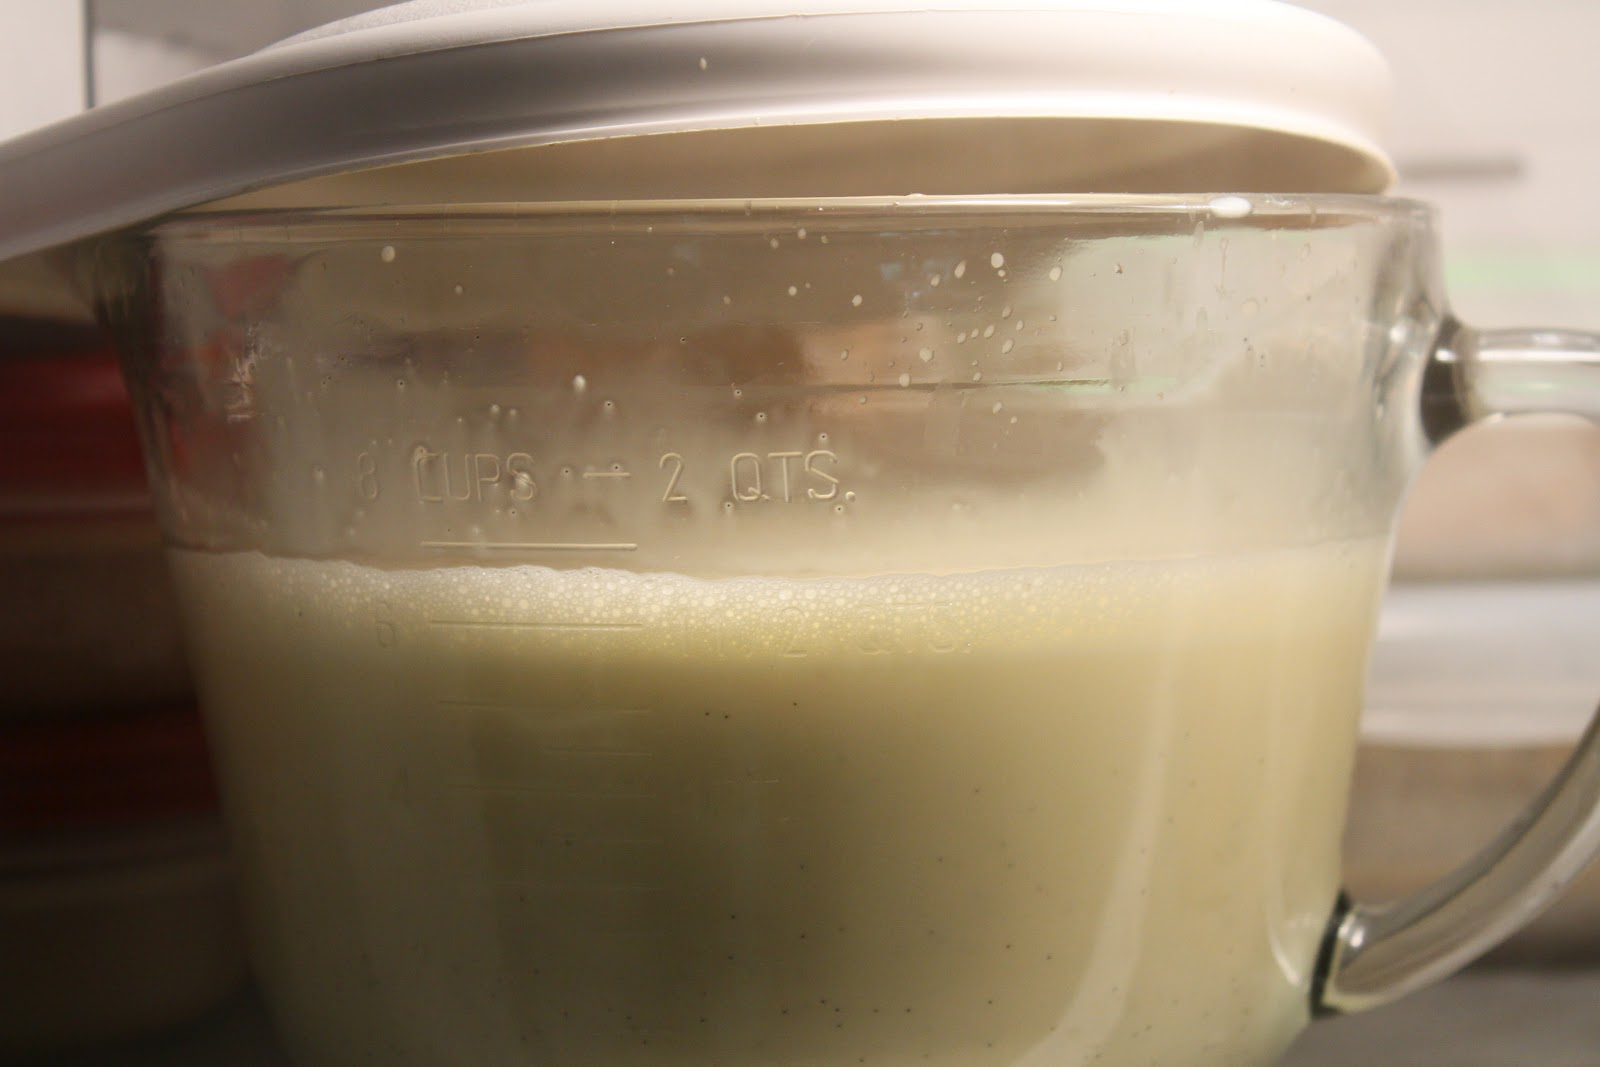
The first set

Then began the churn. We did follow the instructions and allowed the ice cream mixing bowl to freeze for at least 24 hours. This is important as the churn will take some time. The ice cream bowl is really just a very thick insulated bowl that keeps everything cold while you churn. 


The longest 40 minutes of my life


According to the recipe, the churn should take about 20 minute, and you end up with ready-to-eat ice cream. Our churn took about 40 minutes and we ended up with a milkshake. 

Undeterred, the mixture was transferred back to our heavy glass container and went back in the freezer for a second curing. Four hours later, we had ice cream.

After the second cure


But not just ice cream. We also had a home made caramel sauce.

This is a work of genius. This sauce is buttery, sweet, salty, and boozy all at the same time. for this sauce, you need:

Butter
A splash of grape seed oil
Sugar
Brandy, although we started with Benedictine - they are not interchangeable
Salt
Vanilla bean
Heavy cream

Melt the butter, sugar, and grape seed oil on the stovetop. 


Adding castor sugar to butter and grape seed oil


When it reaches a boil, add the brandy and let it simmer long enough to cook the alcohol out.


A little brandy goes a long way

 Then, add the salt, vanilla bean, and cream and let boil a few minutes longer.


Salty caramel is good

Add the cream last


 Transfer to a glass container and blend with the immersion blender.


Everything should be homogenized


Drizzle over ice cream.


At the end of the day - and I do mean at the end - I'm not sure we saved much time, but I am sure we ended up with a superior ice cream than that recipe would have produced.


At the end of the weekend, this is what we have to show for ourselves


Wednesday, June 6, 2012

How to Make Bouillabaisse Out of Common Household Items

Bouillabaisse is the quintessential fish dish. Originating in France, it has an air of sophisticated gourmet. It is a complex collection of flavors and exotic seafood that generally takes the better part of an afternoon to pull together. That is, if you can find all the ingredients.

Garlic and onion


Well, you actually can. And, in the grocery section of the Wal-Mart. The defining flavors of bouillabaisse are citrus, cardamom, and coriander. (Note the absence of saffron. Despite the unmistakable flavors of sunshine and happiness this best loved seasoning brings to anything it is added to, I have been told by those who know more than I that saffron is not a defining flavor of bouillabaisse.) 


As for the fish, you really need an oily fish, a firm fish, and a couple of varieties of shellfish. Add some tomato, some veg, and some olive oil, and you've got it.

To make bouillabaisse out of common household items, you will need:

2 lemons, juiced and zested
1 orange, juiced and zested
2 cloves garlic, pressed
Half a white onion, sliced into strips
1 leek, minced
2 red peppers, slices into strips
1 medium zucchini, sliced
The liquid from one can of stewed tomatoes
2 tuna steaks
2 trout or salmon steaks
1 small bag of medium shrimp
1 small bag of medium scallops
Half a bunch of parsley, stemmed

Cardamom
Coriander
Cinnamon
Nutmeg
Salt

Most of us purchase most of these items regularly. What you don't have on hand, you can find fairly easily.

Here is the veg you will need for this dish


Prep your veg first. This will take the longest. Depending on your tools and how much assistance you have, this will take 30-60 minutes. We worked together and have a mandolin, a micro-planer, a citrus juicer, and a good set of knives. Our prep time was 30 minutes and entailed juicing and zesting the citrus, slicing the peppers, onion, and zucchini, pressing the garlic, and stemming the parsley.

Ahhh, the mandolin


Zest from the micro-planer


The cooking can actually be done in about 30-45 minutes, and you can still get that complex, layered flavor. The trick is to cook everything in the right order, and to cook the right things together. So, with veg prepped, preheat a generous amount of olive oil in a stock pot and a large frying pan. While they are heating up, season your fish with the zest and spices, going light on the cinnamon and nutmeg.

Seasoned fish steaks


Seasoned shellfish


Cook the shrimp and scallops together in the stock pot until the scallops are nearly done.

This is the base


Transfer the scallops to the frying pan to sear and add butter to the shrimp.

Scallops are better seared


Once both shrimp and scallops have cooked, transfer them to a platter to rest.


We'll come back to these in a bit


Add the onions and leek to the stock pot, where they will pick up some of the flavor form the shellfish.

Layering on onions and leek


At the same time, add the red pepper, garlic, and about a third of the tomato liquid to the frying pan. Use a deglazing motion to remove any scallop bits from the pan.

Preparing a layer of peppers and tomato


When the peppers are tender and the pan is deglazed, add this to the stock pot.


Add a light oil like grapeseed to the pan. Once it has heated, add the fish steaks to cook.

Fish steaks are the next layer


While the fish is cooking, gradually add a couple of splashes of the citrus juice and more of the tomato liquid to the stock pot. When the fish is nearly cooked, add it to the stock pot, along with the cooked shellfish.

Use a little brandy or cognac to deglaze the frying pan, adding this to the stock pot once the alcohol has cooked out.


A little brandy adds to the complexity


Finally, saute the zucchini in a little light oil and add to the stock pot. Let everything simmer together for about 5 or 10 minutes. Transfer to a large platter.

To the table


Serve in shallow bowls with bread. Portion out some of the broth into small bowls on the side to dip your bread in.

On the plate

Saturday, March 17, 2012

Mary Bakes Potato Bread

After a series of increasingly bad dinners that culminated with me being assured that I never actually have to cook ever again, I decided to return to more familiar kitchen terrain, and today I am baking bread.

I learned how to bake bread at my mother's bosom. It was Green Bay WI in the 1970's and grocery stores didn't have bakeries and she had seven mouths to feed on one income. Making bread at home was cost effective and probably more convenient than buying it. Later, when she re-entered the workforce and there was less time and more money, we would frequent the Dolly Madison outlet off of East Main in what is now known as the Three Corners neighborhood. But before such cushy times, I remember a childhood full of a different type of comfort - the smell and taste of home made bread.

This was also before bread machines, and my mother made her bread by hand. I follow this practice even with such modern conveniences as the Kitchen Aid (complete with dough hook) in the house. What I learned from my mother is that it's not just about the finished product. I learned that bread is about family, and that a lot of love goes into it. Bread is also about the process. And the process you follow shapes the end result.

I also learned that dough feels good. I learned this when I was four. Making bread was a family ritual shared by me, my mom, and eventually my younger sisters while my dad was at work and my older brother and sister were at school. Only we younger ones got to punch down the warm dough after the first rise and help knead out the air created by the yeast. And once the bread had baked, only we got slices of still-steaming bread covered with Mom's home made jelly, often made with fruit growing wild in our back yard.


Mis en place

While my mom made a very nice, hearty loaf of white - and then later whole wheat - bread, I make potato bread. I use the Joy of Cooking recipe as my guide. Bread is one of those things that, because it so hands-on, absorbs the energy you put into it. If you knead the dough to work out your anger and frustration, the dough won't rise properly. You also get better results from your yeast when the moon is full. And, all ingredients should be at room temperature when you start as cold eggs or milk will result in sluggish yeast. For potato bread, the type of spud you use also has an impact based on the starch content. I get results that I like best with red potatoes. They have a strong potato flavor and are not too starchy.


Sweating eggs are still too cold


Buttermilk Potato Bread

3/4 cup mashed potatoes, still warm
1 stick very soft butter
4 tsp active dry yeast
2 cups buttermilk
2 large eggs, lightly beaten
2 tbsp sugar
2 1/2 tsp salt
about 6 1/2 cups flour

I'll start with reheated left-over mashed potatoes if we have any. If not, I'll make my own. a couple of good-sized potatoes should be enough. I don't usually measure them out but then add enough flour at the end to make it work. I also season the potatoes with salt, pepper, butter, cream, and herbs.

Using a large bowl, mix the softened butter into the potatoes until fully integrated. Add the yeast, buttermilk, egg, sugar, and salt.

NOTE: If you don't have buttermilk on hand - I know I never do - you can make your own by adding a couple of dashes of a light vinegar - not Balsamic - to regular milk.


Regular milk


Add some vinegar to curdle slightly


Add the first three cups of flour and blend in with a spatula or wooden spoon. Once integrated, begin adding the remaining flour one cup at a time. After for or five cups of flour have been added, you'll need to give up the utensils and mix by hand. This is a wonderful experience. If the dough is still sticky after all the flour has been added, add a little more until the dough is smooth and elastic.


Smooth and elastic dough


Once it's the right texture, shape it into a ball and place it in an oiled bowl, flipping it to coat with the oil. Cover with a towel and leave it alone to rise until it has doubled in size, about an hour or so. This can be done at room temperature. However, if  the various factors cited above prevent you from getting a rise out of the dough, place it in a warm oven (175 or lower) with the door ajar.


Doubled in size


Once the rise is complete, knead out the air, using additional flour if the dough becomes sticky. Shape the dough into two loaves and place into greased loaf pans with any seams or creases facing down. I am partial to Pyrex glass pans as the glass provides an even baking temperature and creates a nice crust. I also recommend using the full 8- or 9-inch loaf pans rather than mini-loaf pans for a yeast bread.

Cover and let rise again, keeping an eye on things as this rise is usually quicker - about 45 minutes or less.

Bake at 375 for 45 minutes to an hour, depending on how your oven behaves. Pay attention to things after the first 30 minutes. Things baked in my oven tend to develop a dark outer crust before the insides are completely cooked. When the upper crust is just about the right color, I cover the loaves with foil until the rest of the bread catches up. Once I see a golden brown crust forming on the bread in the pan (I can see this because I'm using Pyrex), the bread is done.


Fresh from the oven

Cool in the pans on a wire rack for at least 30 minutes before cutting a piping hot slice, slathering it in butter, and enjoying thoroughly.

Monday, March 12, 2012

Mary Cooks: Chicken with Roasted Lemon, Green Olives and Capers

Experiences that engage multiple senses make solid and lasting memories. This is part of the reason why a certain smell or taste can evoke vivid childhood experiences. It's also part of why eating and family meals are so important. And, it's part of what led to Monday's dinner. As I was perusing recipes on epicurious.com, I came across this. Even though lemon + olives + capers = a very bitter sauce, the recipe reminded me so much of the food I had in Milan, I suffered a wave of nostalgia so strong that, against all reason, I decided this was the dish to make for dinner. So, without further ado, I present Monday's dinner: Chicken with Roasted Lemons, Green Olives, and Capers


Mis en place


Roasted Lemons
12 thin lemon slices (from 2 lemons) - I used a single lemon and got 8 thin slices
Olive oil

Preheat oven to 325°F. Line baking sheet with parchment paper. Arrange lemon slices in single layer on prepared sheet. Brush lemon slices with olive oil; sprinkle lightly with salt. Roast until slightly dry and beginning to brown around edges, about 25 minutes. (Lemons can be made 1 day ahead. Transfer to container. Cover; chill.)

Roasted lemon slices


Chicken
4 large skinless boneless chicken breast halves - I used thighs and cut them into bite-sized pieces. After the unfortunate cashew chicken from last week, everything is in bite-sized pieces. If it looks the same, it cooks the same. Which means: for even cooking, make sure everything is cut the same size.
All purpose flour
5 tablespoons olive oil - I used half for my meat and the other half for some veg
1/2 cup sliced pitted green Sicilian olives or other brine-cured green olives
2 tablespoons drained capers
1 1/2 cups chicken stock or canned low-salt chicken broth
1/4 cup (1/2 stick) butter, cut into 4 pieces - I totally left this out
3 tablespoons chopped fresh parsley - I substituted cilantro

I also added a vegetable medley consisting of:
1/2 white onion, diced
1 red bell pepper, diced
1 jalapeno, diced
1 small zucchini, cut into matchsticks
1 large clove garlic

Before you even start cooking, prep the veg. Then, on a separate cutting board, prep the meat. Remember that the veg to meat ratio should be about 5:2.

Still not enough veg, but an improvement over last week


Sprinkle chicken with salt and pepper. Dredge chicken in flour to coat both sides; shake off excess. I sprinkled salt, pepper, and flour on my chicken bites and tossed it all together to coat. 


Heat 5 tablespoons oil in heavy large skillet over high heat. Add chicken and cook until golden brown, about 3 minutes per side. Stir in olives and capers. Add stock and bring to boil, scraping up browned bits from bottom of skillet. Boil until liquid is reduced to syrup consistency, turning chicken over after 3 minutes, about 5 minutes. Reading this passage, it sounds like if you flour your meat and then add stock to it as it cooks, you will get meat simmering in a beautiful sauce. This is a blatant fallacy. The sauce will separate as soon as you remove the heat. Which mine did

Magic sauce

While the chicken was cooking, I heated a separate pan for my veg. The onion, peppers and garlic will all cook at about the same speed. The zucchini cooks quicker, even in larger pieces, so I let everything else cook for about 7 minutes before I added it to the mix.


Note that the veg will cook down to about half the original volume


 I also started a pot of pasta.

Three pans on the stove top and something roasting in the oven - that's very chefy

 
Add butter, roasted lemon slices, and 2 tablespoons parsley; simmer until butter melts and chicken is cooked through, about 2 minutes. Season with salt and pepper. Transfer to platter. Sprinkle with remaining 1 tablespoon parsley. OK, so I skipped the butter, but did add the roasted lemon and cilantro and let it simmer until the pasta cooked. The sauce separated and had to be reconstituted with a little cream and some additional stock. Gareth topped it off with a hard cheese.

The finished product. Even cheese can't save this dish.


Now, here's where I have to say that some recipes are just not good ideas. This might be one of them. While it was only marginally edible, Gareth could see the direction I was trying to go with this. There are several fundamental things wrong with this recipe that need to be addressed for any level of success:
  1. The lemons. Lemon zest and lemon juice are both very good things in a sauce. Actual lemon slices? Not so much. On his third bite, my counterpart got a lemon slice in his mouth and was unable to continue.
  2. The capers. They are pungent. They are vinegary. They are bitter. There are really only two dishes in which capers will really work: a bagel with lox, and pate. Both contain other strong flavors for which the caper is a counterpoint, and both contain a high volume of dairy. Unless you;re using a quart of cream, leave the capers out of it.
  3. The sauce. There is no magic sauce that thickens in the cooking process because the meat is coated with flour. This is really cooking code for "lazy-ass sauce". Whenever you see cooking instructions like this, just break out your medium sauce pan and make a roux like you're supposed to. 
So, Monday's dinner was not exactly a success. But it wasn't a complete failure, either. I learned a little more about food and cooking. Plus we both had a pretty good laugh.