Sunday, January 29, 2012

Winter Roots: Kohlrabi

I remember as a child growing up in Green Bay going to the farmer's market and spending my allowance on any number of things. Thus typically included a kohlrabi that I ate on the walk home, skin and all. One of the neighborhood moms would peel it, slice it, and serve it to us with a little salt and pepper. Given its prominence in my formative years, I was surprised when my counterpart had never tried it.

Kohlrabi is one of those nice starchy, peppery root vegetables similar to a turnip. The name is German and loosely translates to "cabbage turnip". This is fitting as it tastes like the perfect blend of the two. It belongs to the same coniferous family as cabbage, cauliflower, and - my personal favorite - Brussel sprouts. It can be used in a similar manner in soups and sides.

It's also fairly versatile. It is more tender and less bitter than turnips, and not as forward as radishes, making it a nice choice for salads. If you want that crunchy peppery radish quality in your salad but without the pungency, kohlrabi is a good choice. The greens are also edible and provide an interesting note. A note, though, that the greens are similar to other vegetables in this family - kale, turnip, and collard greens. While not as bitter as these, there is a similar flavor and texture, so mixing with other more mild greens is recommended.

When cooked, kohlrabi has a wide range of flavors and textures, depending on how long you cook it. A quick saute slightly mutes the raw flavor, but a longer fry or oven roast brings out an unexpected sweetness. If you are using it as a side dish, having a mix of kohlrabi in various stages of the cooking process will yield a flavorful medley. It also mixes well with other roots like celeriac, turnip, and carrot.

If you're into root veggies during the cold dark winter days (and many of us seasonal eaters are), add this veg into the mix. Here are some recipe suggestions from Simply Recipes.


Wednesday, January 25, 2012

Homemade Pasta

One of the easiest things to make from scratch at home is pasta. The ingredient list is similar to pie crust - flour, fat and a little liquid - but unlike pie crust, pasta is forgiving, which gives you a lot of room to play around. And fresh pasta is infinitely superior to the dried stuff in the cardboard box, but also quite a step up from the stuff in the dairy case.

The basic recipe that my counterpart uses is the egg noddle recipe that came with the pasta attachment to our Kitchen-Aid mixer. He's committed it to memory, so he no longer bothers with the recipe. Or the Kitchen-Aid for that matter.

Start with a couple of handfuls of flour and a couple of eggs and mix vigorously by hand on a large cutting board. Incidentally, he uses the same board for pasta that I use for pie crust. Basic all-purpose flour is a good choice. You can add a little of another variety for a different texture. My counterpart has included whole wheat, buckwheat and oat at various times.


Add some oil, a little at a time, and continue kneading the dough.


You should have a little water nearby. Add the water until the dough is firm yet elastic and not sticky. At this point, you can also add some herbs and seasoning.


Roll it into a ball and let it rest for 30 minutes. Then roll and cut.


Now here's a secret. You don't really need any fancy equipment. You can roll it out on your cutting board and cut it with your chef's knife.


My counterpart was making orzo to go with my birthday venison on this occasion. The device he is using below is another quality find from Warehouse Restaurant Equipment in Green Bay.


Remove from the cutting board and boil.


Note that the fresh pasta will cook quicker that the dried stuff in the cardboard box. It will also hold a sauce better. If you have leftovers, you need to eat them within a couple of days.


Thursday, January 19, 2012

Diva Deen's Diabetic Decision

I admit, I am not a fan of Paula Deen's style of butter-laden down-home cooking. I have always watched her show from the safety of the high horse of the treadmill, getting a perverse motivation out of watching her take too-big bites of heart-stopping culinary messes to run harder, faster, longer. I am most definitely not her target audience. Yet, even from that comfortable distance, I noticed a change in her.

In December, her program featured clips from previous shows to showcase her favorite holiday recipes. And the differences over the years was remarkable. Just a few years ago, she was a pleasantly plump Southern matron with a sparkle in her eye. As each season's recipe was aired, I watched as she got progressively bigger. But I also noticed heavier makeup as the ruddiness in her cheeks diminished, and that twinkle in her eye dimming. So, I was not surprised by her announcement that she has Type 2 diabetes.

I am surprised by her decision to medicate and to not alter her trademark lifestyle. Type 2 diabetes is directly related to lifestyle and can very often be treated (and eliminated) through some basic lifestyle changes. She has built a reputation and a following on dietary excess, and there's probably a percentage of her fanbase that finds themselves in her same condition. This places her in a prime position to perform a much-needed public service.

Paula Deen is unarguably a kitchen diva. Whether you cringe at her food like I do, or swear by her recipes, she is engaging and entertaining. And trusted. I believe she has something unique to offer in the growing arena of down-home cooking with a healthy make-over. Watching her restore her health through updating her favorite recipes for our obesity-prone era would make for interesting viewing, too.

But, she has chosen to partner with Novo Nordisk and has become a spokesperson for their diabetes medication. Granted, these medications are a godsend for many who are unable to reduce their weight and reverse the damage that has already been done. And maybe Paula Deen falls into this camp. Maybe it will take a decade of lifestyle changes for her to get healthy. Even so, the two approaches are not mutually exclusive.

Diabetes can have some debilitating consequences. My thoughts and prayers are with Paula Deen, her family, and her staff as she starts down the long road of healing. I'll be tuning in to her show - probably a little more often - to see how she's doing. Hopefully she will address her lifestyle. Both her and her fans would benefit.

Monday, January 16, 2012

Some Notes on Food Photography

I dedicated considerable time this long holiday weekend to improving my photography skills. The new camera provides an opportunity to cultivate new habits. Plus the differences between the old and the new have made it necessary.

So, first some notes on the upgrade. I have a Canon 10D. It's served me well for the better part of a decade in the realm of nature photography, out in the open where there is plenty of good, bright, natural lighting. Until the New Year's Even posting, it was not used in conjunction with this blog. In its day, it was a high-end prosumer product - better than the Rebel but not as good as the low-end professional gear. It had the same ability to manually set the camera, but the menuing was arcane. The professional photographer who taught the mini-course I took at the Y last spring was even baffled. Given the lack of understanding about my camera, I relied heavily on the "training wheels" - the settings familiar to many of us:

The Canon 10D - complete with training wheels


Enter the 7D. This is a step (or maybe two) up from the 10D as Canon no longer makes an equivalent. The 60D is the closest approximation, but after doing a little research, it's actually much closer to the Rebel than it is to the 10D. So, we seriously upgraded. Gone are the training wheels, but in exchange I have a menuing system that I understand and can actually use:

The Canon 7D - a whole lot of auto settings eliminated


So that got me moving in the right direction. The first thing I found was the white balance. Then I started manually setting my aperture and f-stop. All of this improved the quality of my food shots. The red influence from our halogen track lighting was diminished, and the shots started looking a bit sharper.


Poor white balance - default setting


Better white balance - set for Tungsten lighting in my halogen-lit kitchen


The next step was the introduction of the tripod. I've always been a hand-held photographer, believing I'll get that perfect shot only if I have the freedom to capture the subject from all possible angles as quickly as possible. While this may work for shooting flowers and butterflies, it does not work for shooting food.

But not all tripods are created equal. Stability is important, even if you are on level ground inside the house and everyone else is in bed asleep. The earth has energy, and, if you're using a crap tripod or an unstable setup, subtle vibrations will throw your image right out of focus. you should be able to see into the view finder without standing on tip-toe. Once the focal point, aperture and f-stop are set to your liking, it's hands-off except to click the shutter and take the shot.

Poor tripod setup 


Stable tripod setup


With a good tripod and a better understanding of aperture priority, I was able to alter the f-stop and play around with the focal points of my shots, moving away from the pin-point focus and fuzzy background to a more evenly-focused image.

That lighting remains an issue, though. Unless you can block off all natural light, things are going to change throughout the course of a shoot. My pie crust posting is a perfect example. During the 30 minutes that my dough was resting, something happened to the ambient sunlight. And, here's another lesson - because I was multi-tasking, I was more focused on the pie crust than on the photography and did not fully appreciate the depreciated lighting until I downloaded my images.

Beginning of shoot - approximately 3:30 PM

About 45 minutes later - much of the natural light is gone but I am too busy baking to notice

End of shoot - about 5:30 PM, no natural light left but no change to white balance settings either

I still have a long way to go. Looking at the work of others, it seems that white balance, aperture, f-stop, and stability are not enough. The best food photos have diffused light. A Fervent Foodie post last week provides instruction on creating a home lighting kit. I think that's my next task.


Sunday, January 15, 2012

Easy as Pie?

There are some who would say the term "easy as pie" comes from the ease at which one can make a pie crust from scratch. The simplest recipe I know comes from the Betty Crocker Cookbook Sixth Edition (circa 1986) and contains all of three ingredients: flour, shortening and a little ice water. Simple, but deceptively so. One wrong move spells disaster. I once made this pie crust with the wrong flour and was doomed. I was on a white whole wheat kick and had been getting really nice results with breads and other baked goods. In pie crust, however, the results I got could have been used to patch the roof.

So, when making pie crust from scratch, it is important to follow the recipe, especially if you are new to this. After a little practice, you get a feel for what the tolerances are, and you can deviate all you like. My counterpart puts egg in his crust.

Also many people fear the home made pie crust due to the potential mess. With the right  equipment, the clean up is a snap.

And, it really is worth the effort. The pre-made frozen crusts are a convenience, but once you fill one of them with a nice, made from scratch filling, all those additives in the crust really stand out. A few years ago, I was a judge for a holiday bake-off at work. All entries were to be made from scratch. One woman entered a really lovely chocolate silk pie that she did indeed make from scratch. Except for the crust. Next to her superior filling, the phony crust was obvious.

For this afternoon's pie, I turned to another reliable standby, The Joy of Cooking Cookbook (1997 edition) and made the Deluxe Butter Flaky Pastry Dough.
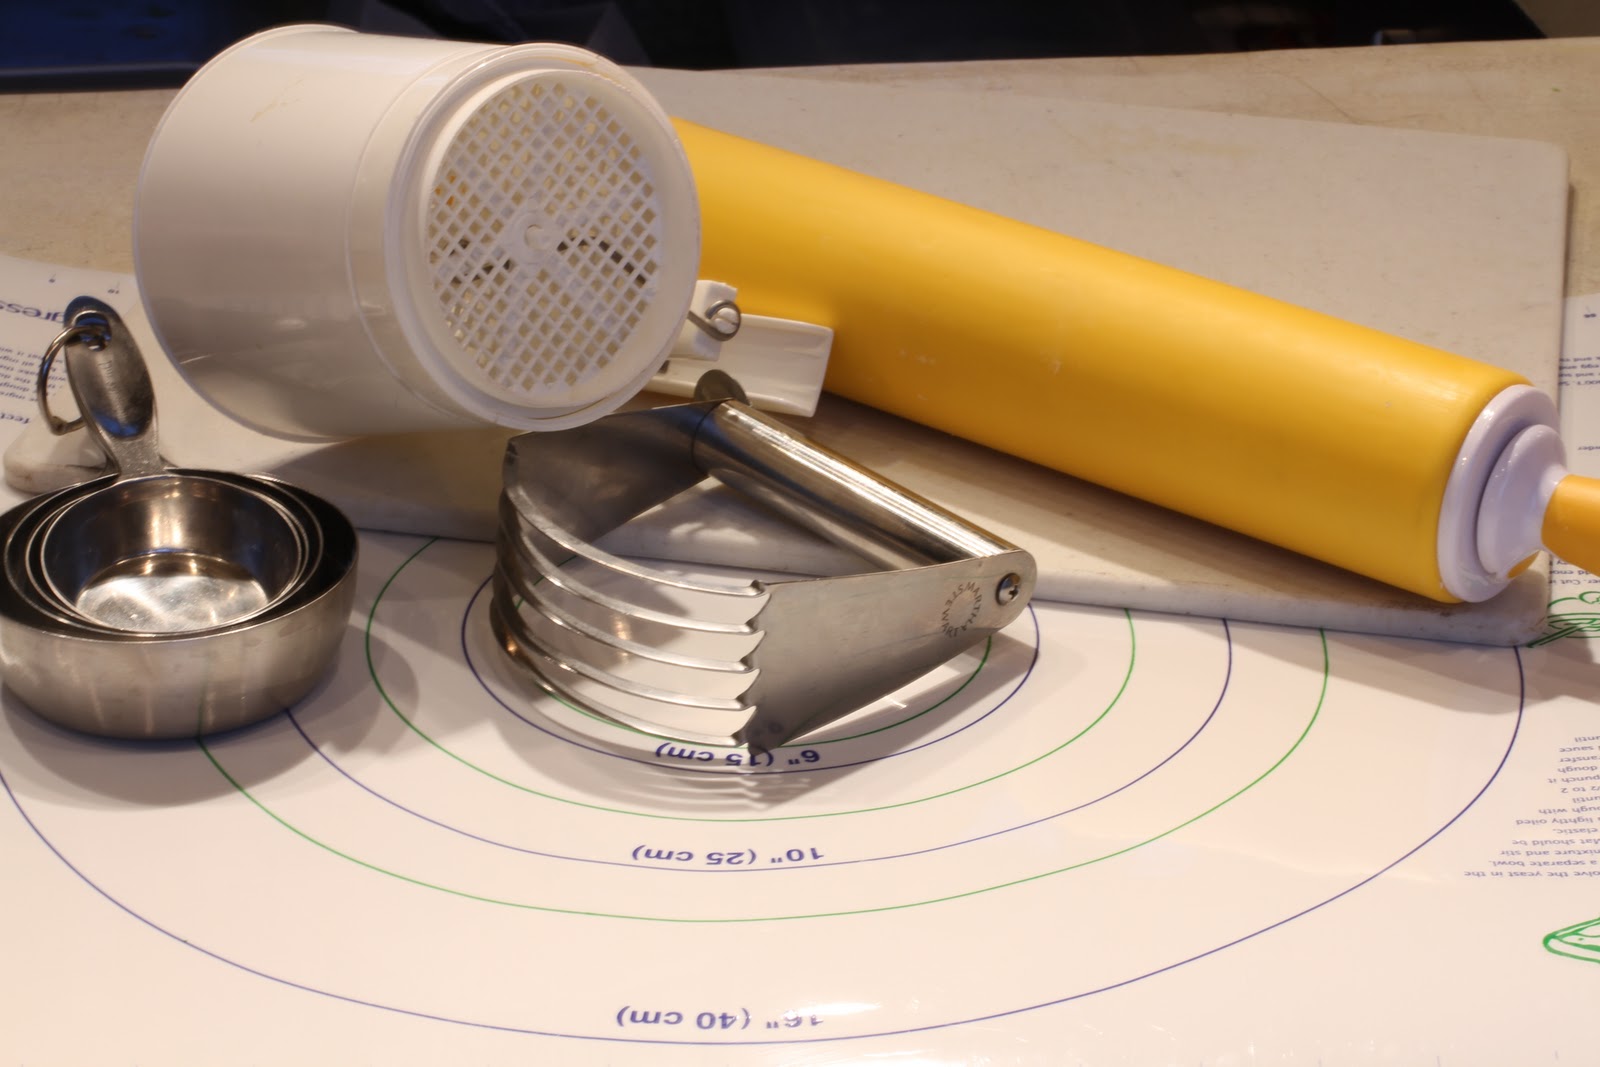
First, the tools:

In addition to my measuring cups and flour sifter, I have a pastry blender, a silicon rolling pin, a large plastic cutting board, and a pie mat. These are basics in making a pie crust without making a mess.


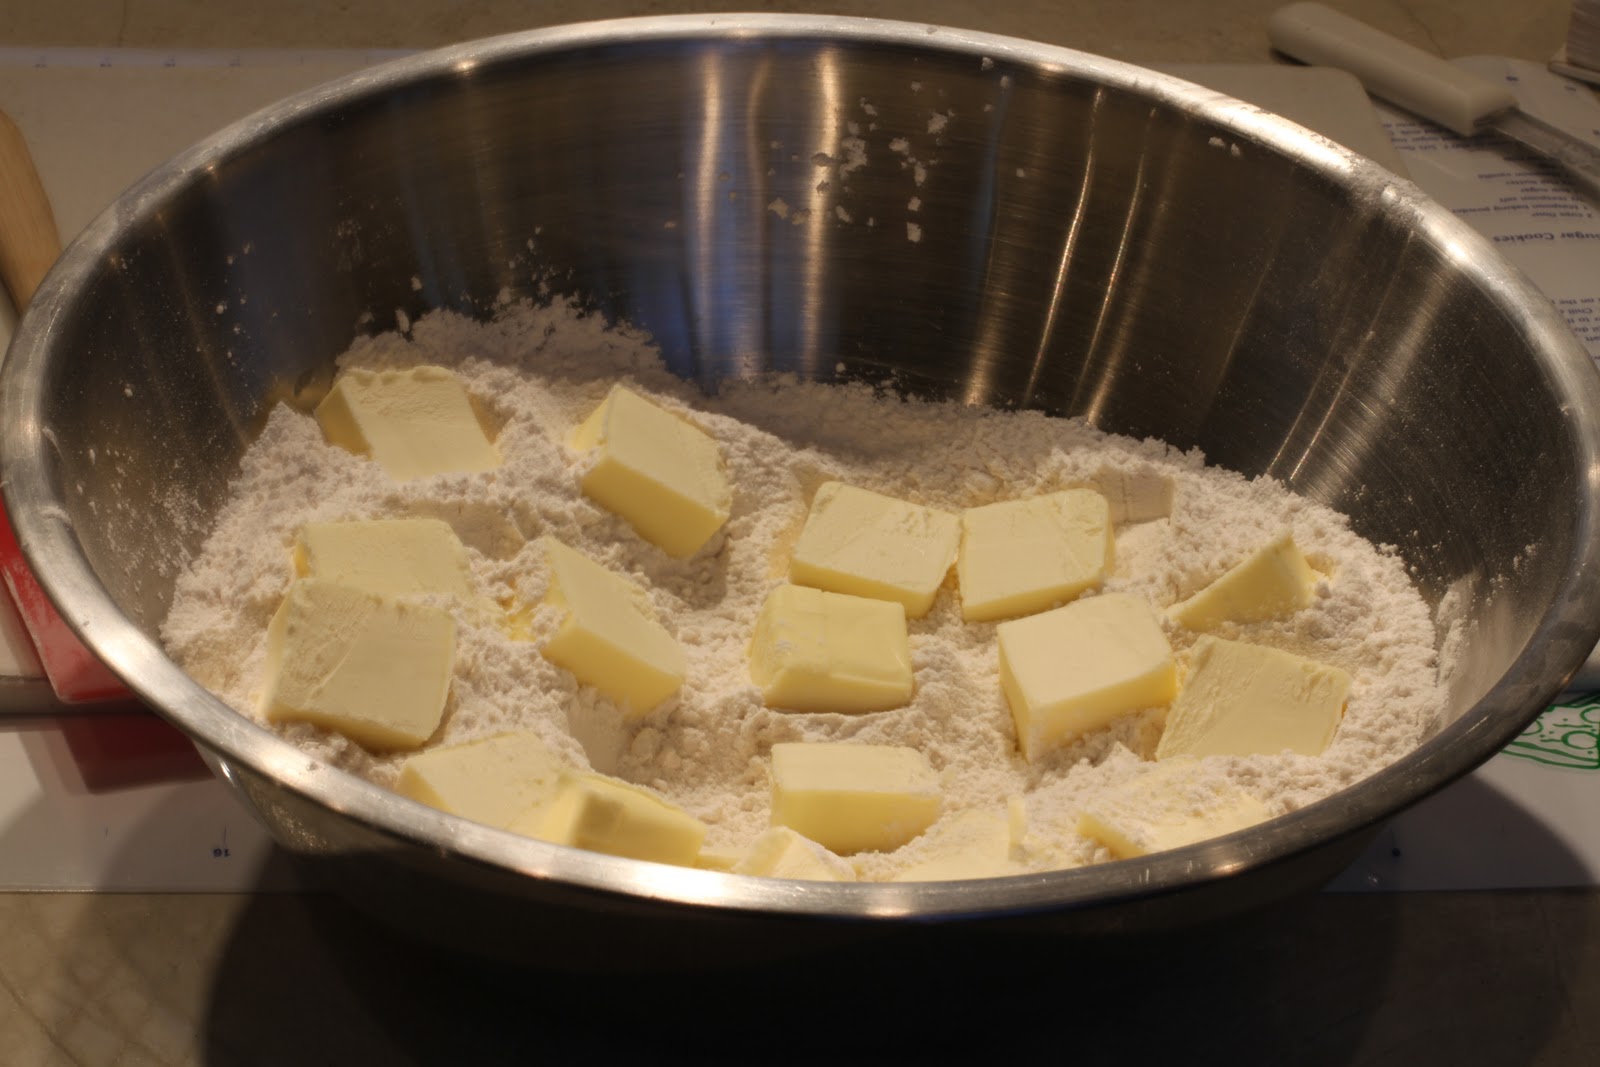
Next, lightly mix together:

2 1/2 cups all-purpose flour (unless the recipe states otherwise, this is the flour to use)
1 tsp white sugar
1 tsp salt


Then add 2 1/2 sticks cold unsalted butter. I cut mine into smaller pieces as it makes the next step easier.


There are a couple of approaches to blending the cold, hard butter into the flour mixture. You can use a butter knife, but this will take a good bit of time and is a bit of a pain in the ass. Or, you can use the pastry blender. A poor one will not make much difference. A good one will make all the difference in the world. If you're serious about baking and doing things from scratch, this is a sound investment.


The concept is to break up the butter into small pieces that are coated with flour without softening the butter too much. A chopping motion is very effective. You should end up with pieces about the size of peas.


You should have 1/3 cup plus 2 tablespoons ice-cold water nearby. Drizzle the 1/3 cup into the dough. At this point, I prefer to work it by hand, which I readily admit is a tad messy. Keep it in the bowl and the mess is contained. Also do not do a full-on knead like you're making bread. The objective is to just get things to stick together - any heavier working changes the composition of the flour, and your crust will be nothing better than subflooring material.


Once you can form a ball with the dough, you're done. Clumps of butter are desirable here.


Let the dough rest for about 30 minutes before rolling it out. You can set it right in the refrigerator, or wrap it in plastic wrap first. While it is resting, prepare your filling.

A big help in rolling out a pie crust (or any other dough) are a silicon rolling pin and a pie mat. The dough won't stick to them the way it will to other surfaces, and these items are easier to clean that a wooden rolling pin and your countertop. Plus, the pie mat has circles that correspond to common sizes of pie plates.


So, ideally, your ball of dough will roll out into a perfect fit for your pie plate.

Even if you have superior tools like these, you will still need some flour. My preferred method is to drop a small handful of flour on top, flatten the ball slightly, flip it over, and repeat. This covers the surface area of the dough and the mat. Roll the dough out from the center to the edges until you have enough to cover the surface of your pie plate.


I got my dough just about evenly rolled to the corresponding circle for my pie plate. Just to make sure, this is also a good visual technique.

There is also a trick to getting it from the pie mat into the pie plate. I do not have photos as I was working solo. Basically, you place parchment paper over the rolled out crust. Then, place the large plastic cutting board over the parchment paper. Placing one hand on top of the cutting board, gently lift the mat off the counter top and flip the whole thing over so that the map is on the top. Place everything back on the counter top and peel the mat off of the dough. Gently flip it over again onto your pie plate with the cutting board now on top. Remove the board and the parchment paper, and the hard part is over. And you will notice that most of the flour is either on the crust or on the mat, not all over the counter or the floor or you.


Use your fingers to shape the dough into the plate, filling in any gaps. Then, trim the overhang with a knife and press the edges into the rim of the plate. And, you can do what my mother always used to do with the trimmings: lay them on a metal cookie sheet, sprinkle them with cinnamon and sugar, and bake until golden. These are a nice treat and a good preview of your crust before you serve it to others.


You can either pre-bake your crust or fill it right away. If you pre-bake it, you'll need to add weight to it to prevent it from bubbling up. You can buy pie weights if you like. These are just metal balls that fill a pie plate. Or, you can take another hint from my mom and just use a cup or so of dried  beans. Note that once the beans are used for this purpose, they can't really be used for anything else. Store them in a container with your other baking supplies until needed.

I made the filling and crumb topping from the Apple Sour Cream Pie recipe in my good old Betty Crocker Cookbook and baked as instructed.


Happy Long Weekend!

Saturday, January 14, 2012

How to Bind Meat

I am admittedly a bit of a tourist in the kitchen. I wander around with my camera and take pictures of all the pretty sights but usually leave for more familiar terrain pretty quickly. My counterpart over at Very Chefy is a full-time resident and probably the Grand Marshall. He is responsible for the majority of food seen here and on my Facebook page.

With the acquisition of the mighty Canon 7D and my excitement to get familiar with it, we embarked on a joint venture this evening. We picked up a couple of Porterhouse steaks during last night's grocery shopping and decided to work on our meat binding and photography skills together.


Mis en Place


First, Gareth made a filling out of leek, shallot, blue cheese, and butter. The idea is that as the meat roasts, the filling melts and provides additional flavor to the meat. He used a rubber spatula to cream everything together in a large mixing bowl.


Then he cut the steak off the bones, taking care to ensure he had several large pieces of meat.


He layered the meat and the filling together until he had a pile of meaty-shalloty-cheesy goodness.


Then, using kitchen twine, he very carefully bound it all together for cooking. If this process looks a bit like macrame or crochet, it is similar. The trick is to create loops and to loop back on yourself, creating a large-weave, custom-knit netting around your meat.


Once bound, he seasoned it with a little salt and pepper.


With a nice pan-searing in olive oil, it was ready for a quick 10-minute roast in a hot oven. He placed the meat on a small rack inside a heavy pan for the roasting as with the rabbit and Frenched rack of lamb.


When the meat was roasted to his satisfaction, he removed it from the oven and transferred it to a ceramic plate to cool for a few minutes. Using kitchen shears and tongs, he carefully cut and removed the twine.


The meat was sliced and served with mashed potatoes seasoned with goat butter, leek, and shallot.


During this whole process, I took about a jillion photos. I'll post a gallery of my favorites in my Picasa gallery. Look for the link on my Facebook page.